専用IP(Dedicated IPs)
専用IPとは?
「専用IPv4アドレス」は、チームおよびエンタープライズプランを持つユーザーに提供される機能であり、「リンクされたIP」は全ユーザーが利用できる機能です。
If you have a Team or Enterprise subscription, you’ll receive several personal dedicated IP addresses. Requests to these addresses are treated as yours, and server-level configurations and filtering rules are applied accordingly. 専用 IP アドレスはより安全で、管理もより簡単です。 With linked IPs, you have to manually reconnect or use a special program every time the device’s IP address changes, which happens after every reboot.
専用IPが必要な理由は?
残念ながら、接続デバイスの技術仕様によっては、暗号化されたプライベートAdGuard DNSサーバーを設定できない場合があります。 この場合、標準の暗号化されていないDNSを使用する必要があります。 AdGuard DNSを設定する方法は2つあります: リンクされたIPを使用するか、専用IPを使用するという2方法です。
専用IPは一般的に、より安定したオプションです。 Linked IP has some limitations, such as only residential addresses are allowed, your provider can change the IP, and you’ll need to relink the IP address. 専用IPなら、あなた専用のIPアドレスが提供され、すべてのリクエストはあなたのデバイスのものとしてカウントされます。
デメリットは、パブリックDNSリゾルバで常に起こるように、無関係なトラフィック(スキャナやボット)を受信し始める可能性があることです。 その場合、アクセス設定を使用してボットトラフィックを制限する必要があったりします。
デバイスに専用IPを接続する方法は以下のとおりです:
専用IPを使用して AdGuard DNS に接続する方法
- AdGuard DNSの「ダッシュボード」を開きます。
- 新しいデバイスを追加するか、以前に作成してあるデバイスの設定を開きます。
- 「サーバーアドレスを使用」を選択します。
- 「プレーンDNSサーバーアドレス」を開きます。
- 使用したいサーバーを選択します。
- 専用IPv4アドレスをバインドするには、「割り当てる」をクリックします。
- 専用IPv6アドレスを使用したい場合は、「コピー」をクリックします。
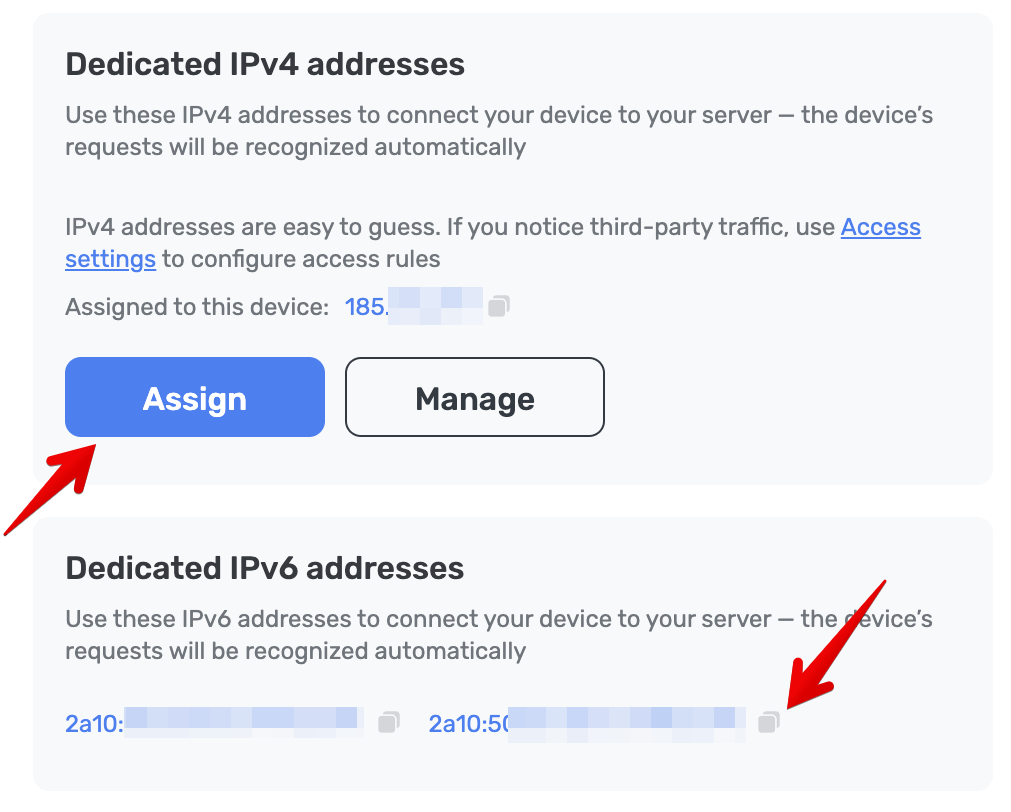
- コピーした専用アドレスをデバイス設定に貼り付けます。
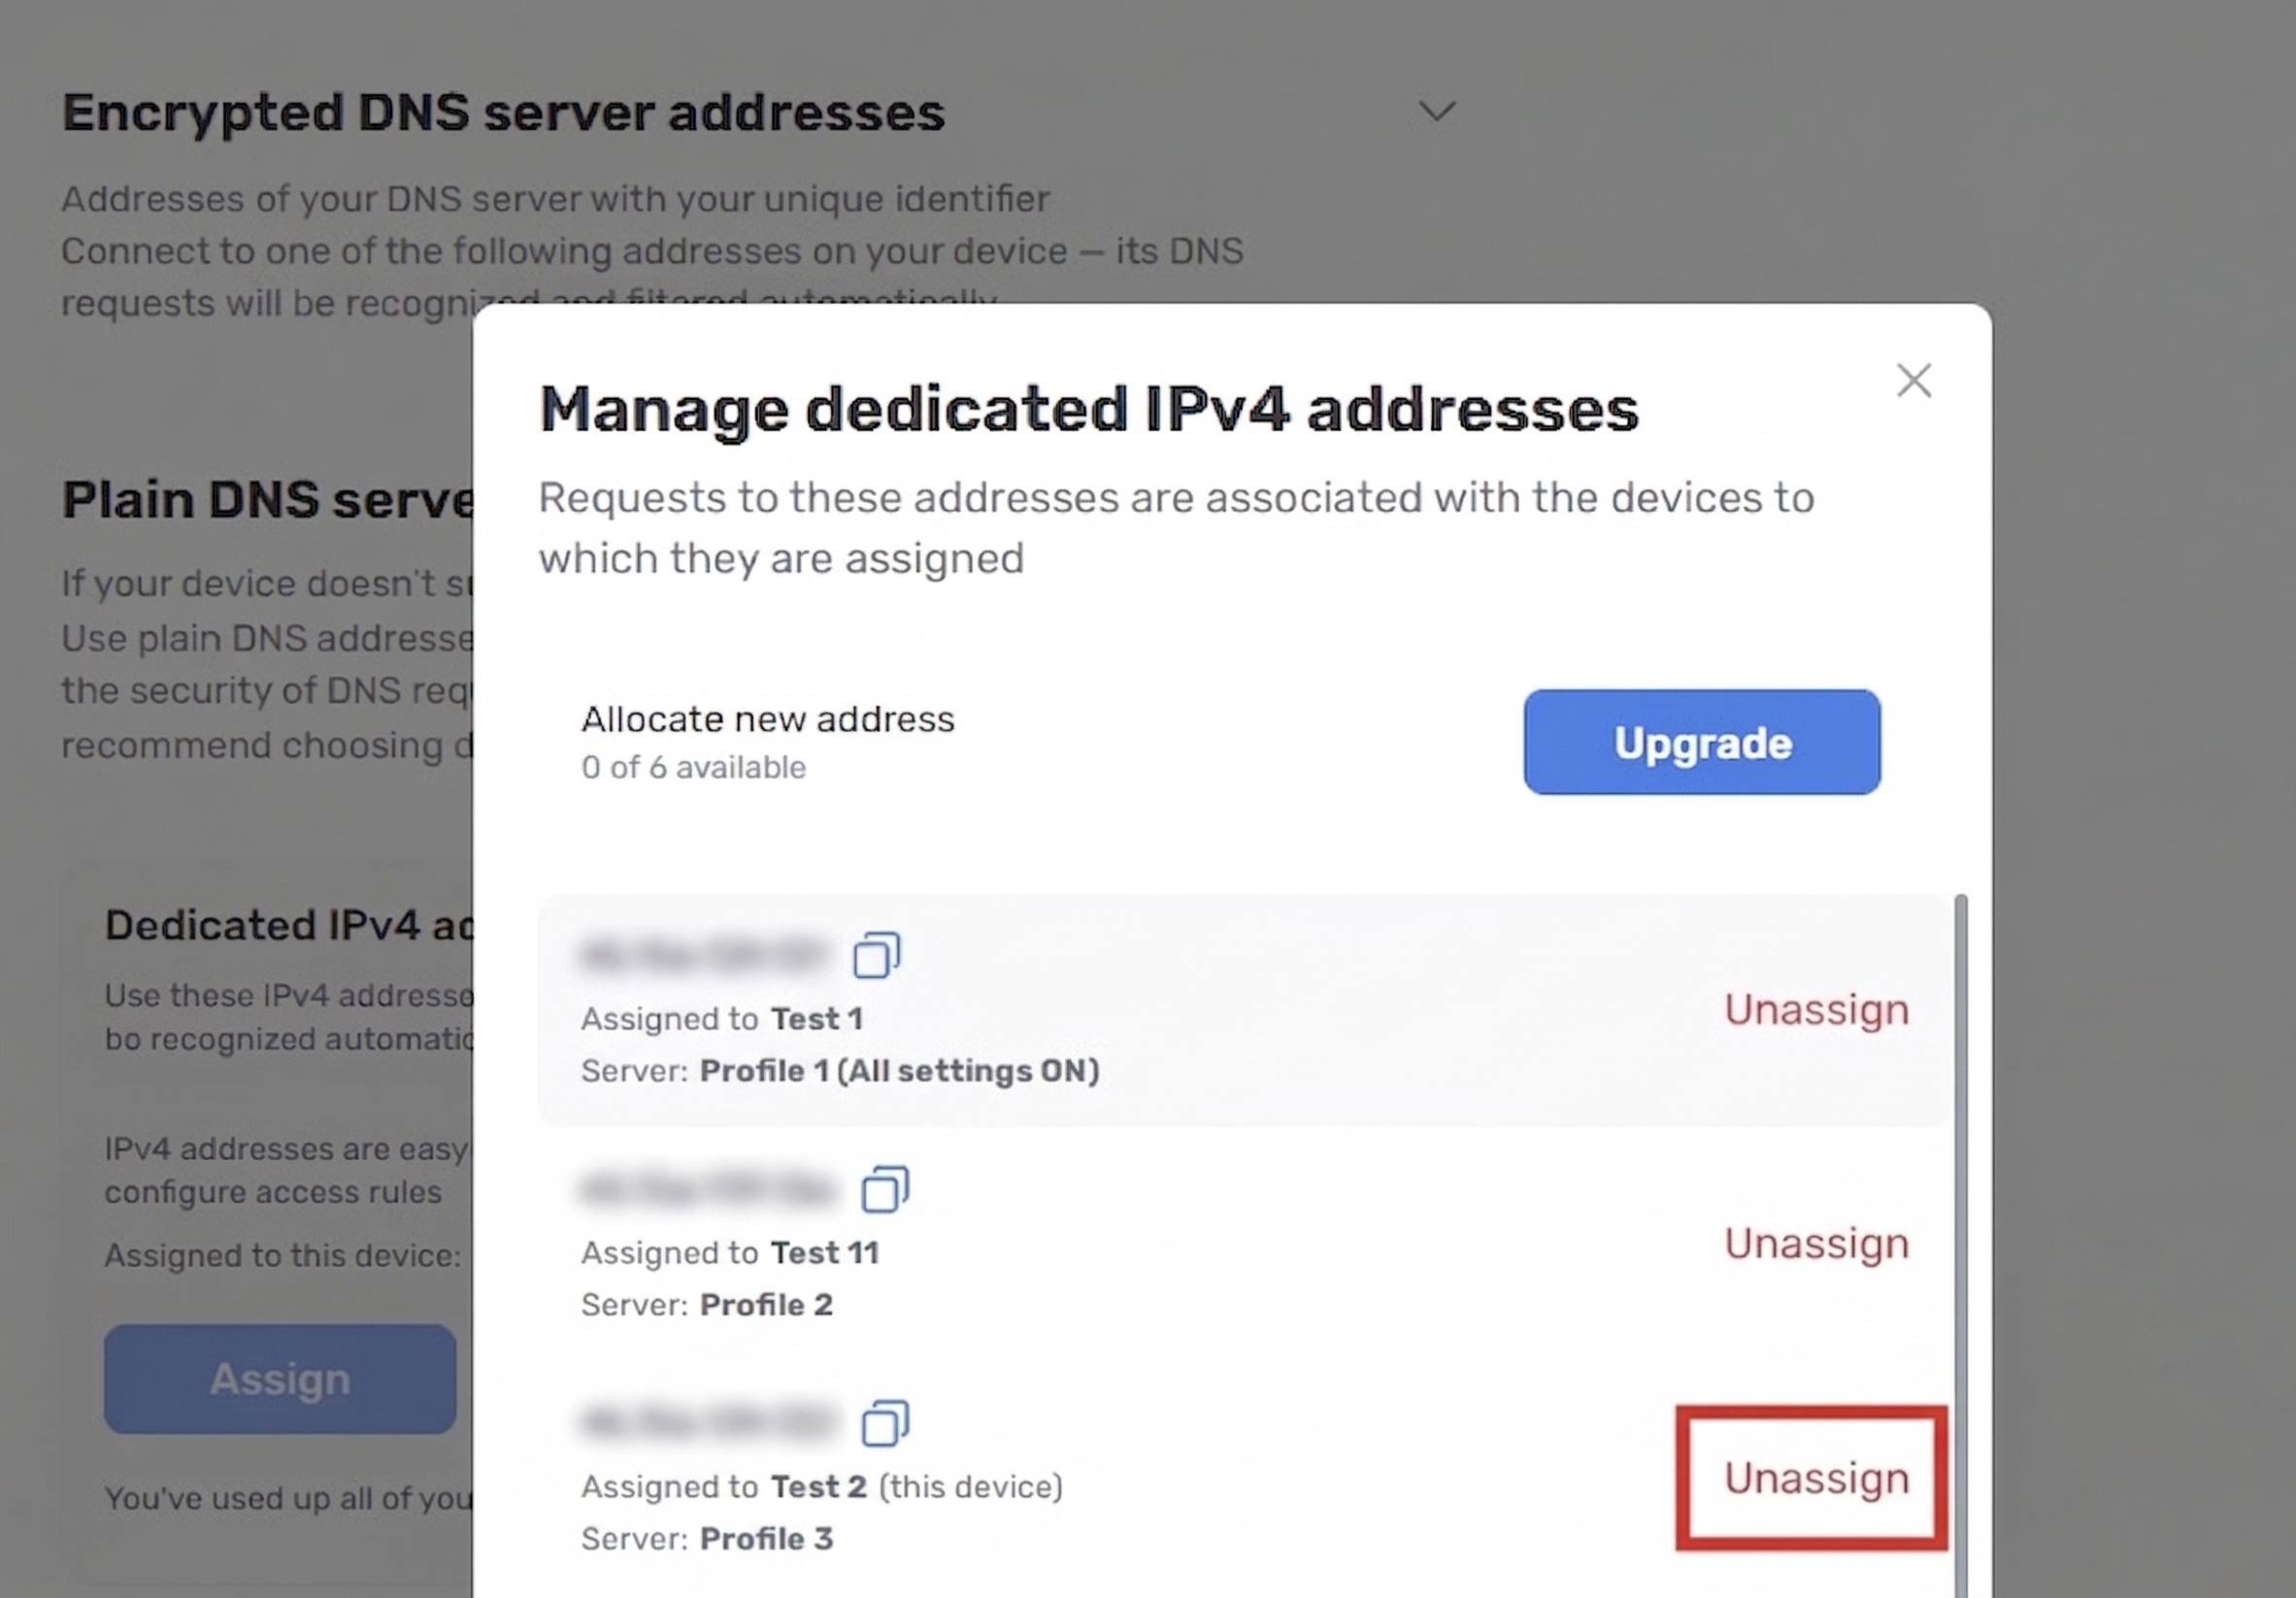
How to unassign a dedicated IP
- AdGuard DNSの「ダッシュボード」を開きます。
- Go to your device settings.
- Go to Plain DNS server addresses.
- Under Dedicated IPv4 addresses, click Manage.
- In the popup, click Unassign next to the IP you want to remove.