既知の問題
AdGuard DNS を設定した後、デバイスが AdGuard DNS に接続されていないというメッセージが表示されたり、そのデバイスからのリクエストが「クエリログ」に表示されないなど、AdGuard DNS が正しく機能しないことに気づくかもしれません。 これは、ブラウザやオペレーティングシステムの特定の隠れた設定が原因で発生することがあります。 よくある問題とその解決策を見てみましょう。
AdGuard DNS のステータス・稼働状況はこちらの専用テストページで確認できます。
ChromeのセキュアDNS設定
Chromeを使用していて、AdGuard DNSダッシュボードにリクエストが表示されない場合は、Chromeが独自のDNSサーバーを使用している可能性があります。 そのサーバーを無効にする方法は以下のとおりです:
- Chromeの設定を開きます。
- 「プライバシーとセキュリティ」に移動します。
- 「セキュリティ」を選択します。
- 「セキュア DNS を使用する」までスクロールします。
- この機能をオフにします。

If you disable Chrome’s own DNS settings, the browser will use the DNS specified in your operating system, which should be AdGuard DNS if you’ve set it up correctly.
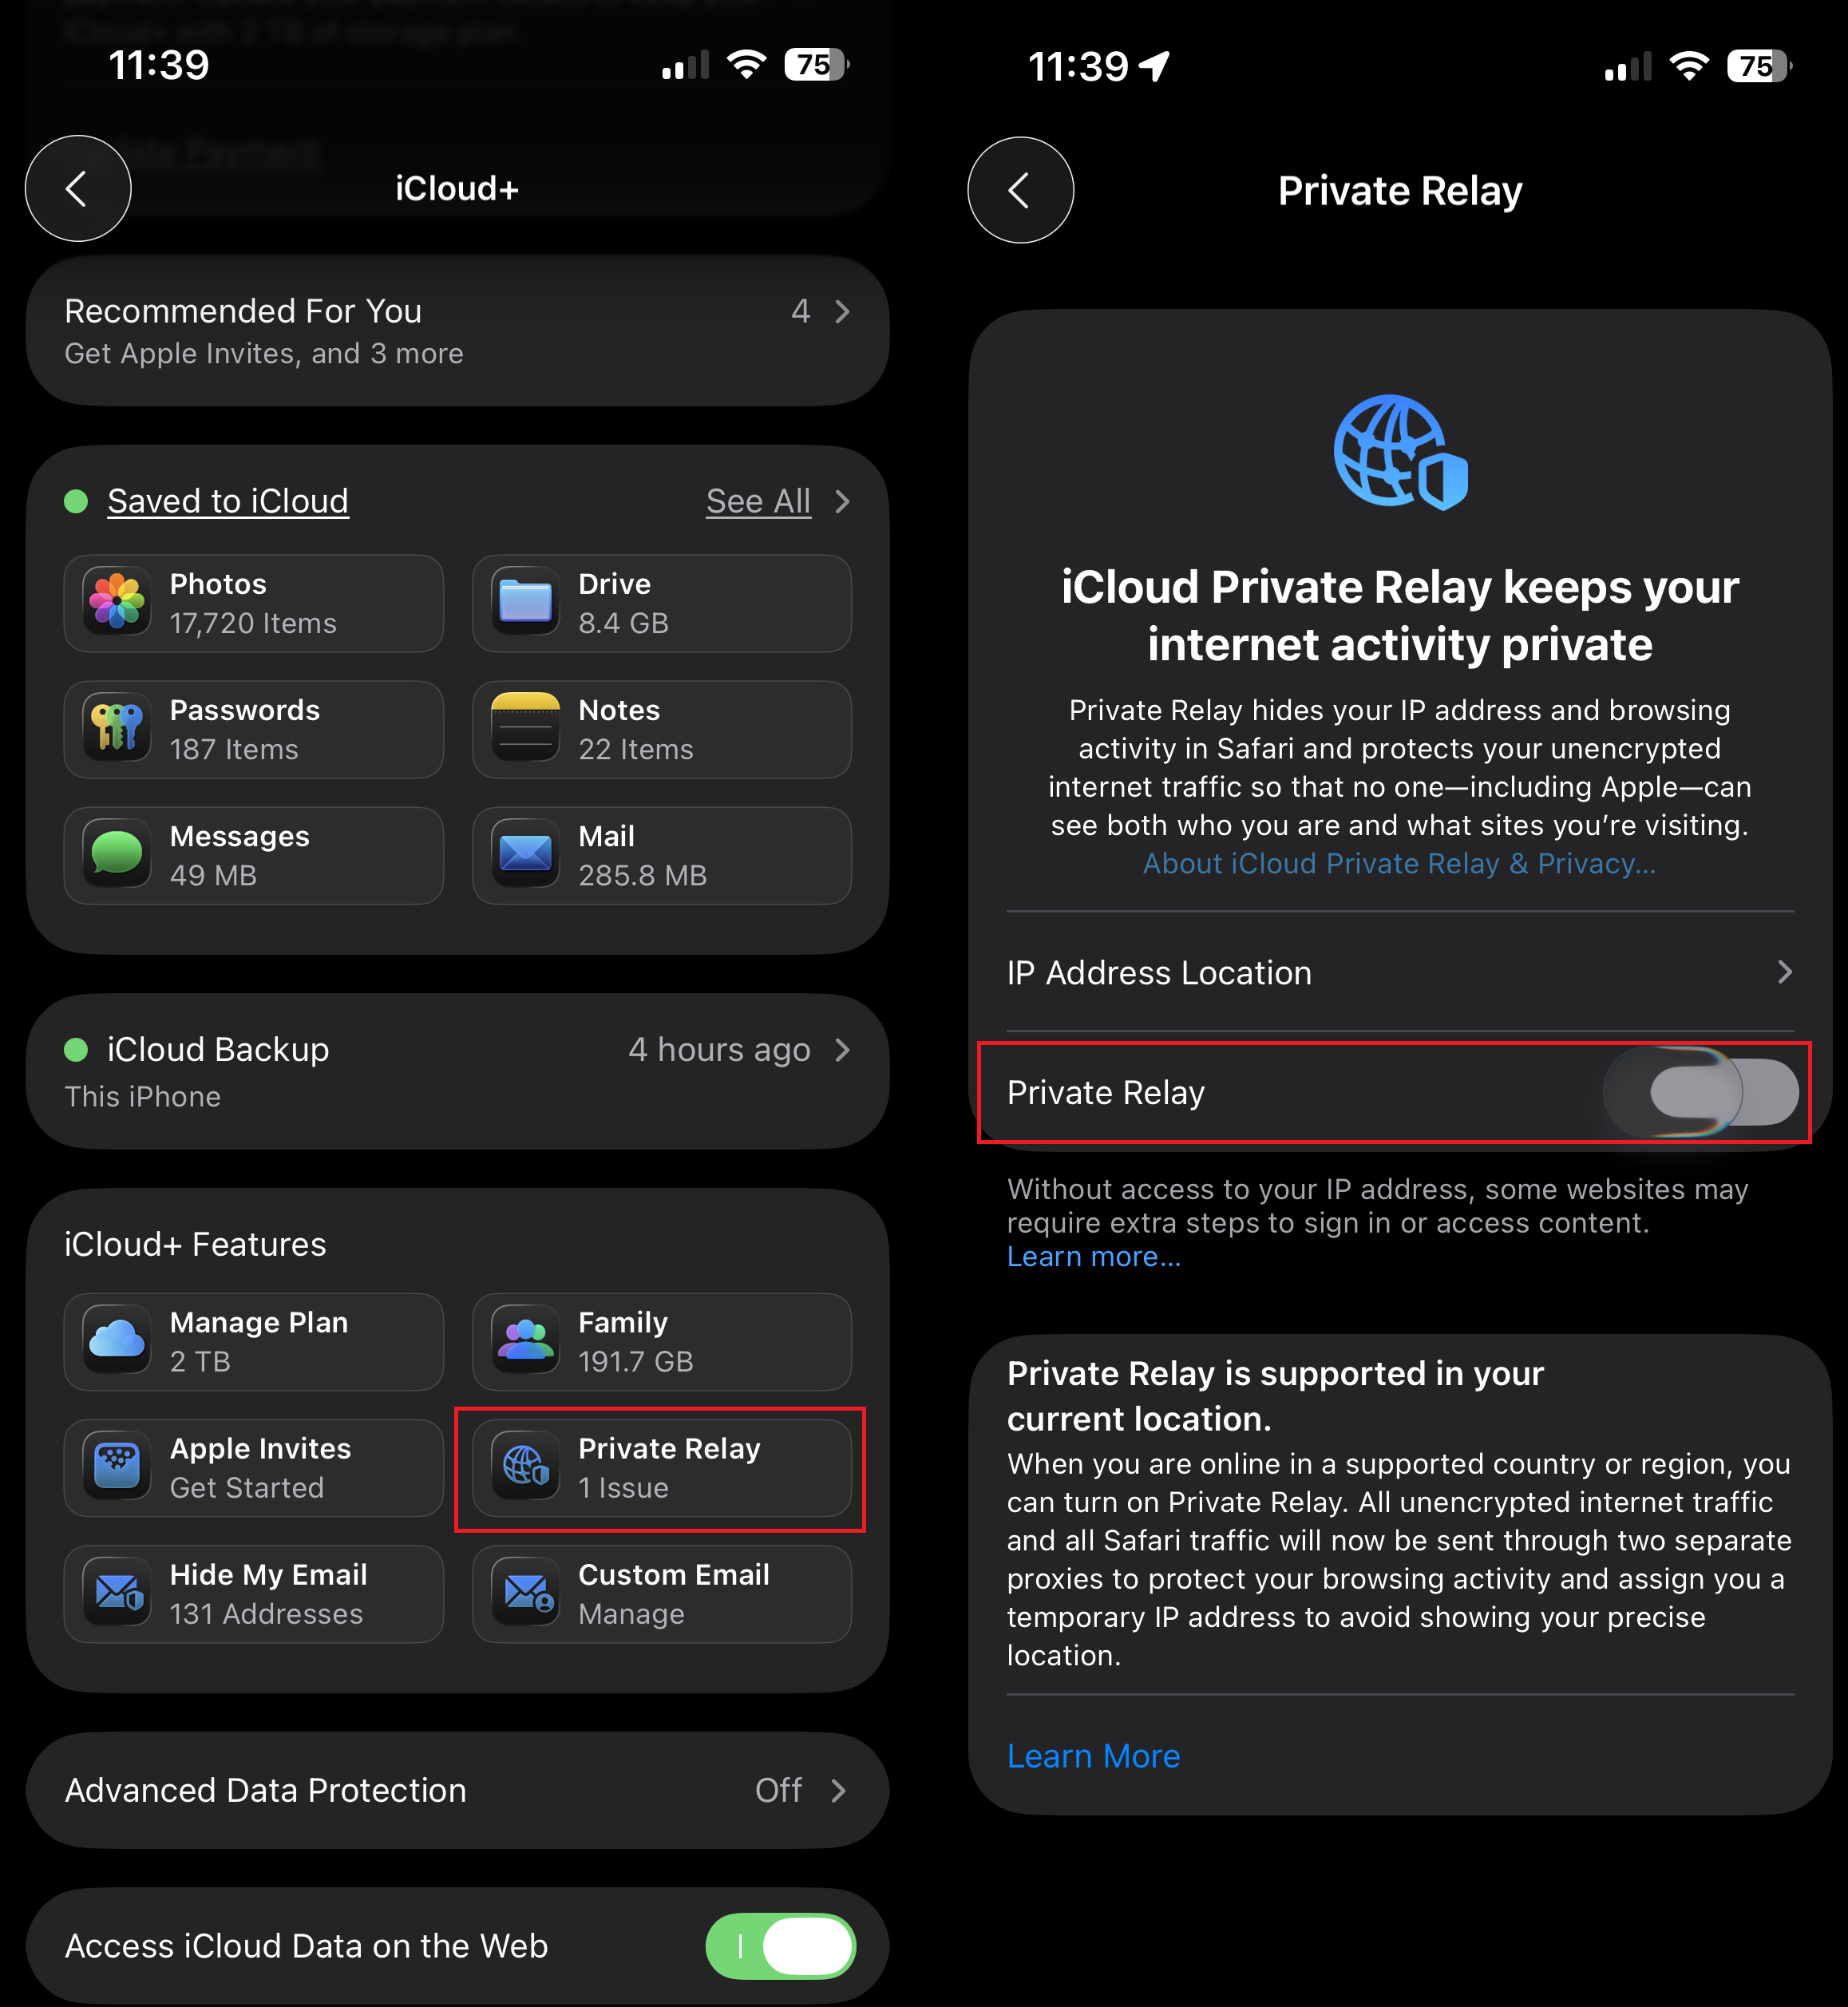
iCloudプライベートリレー (Safari、macOS、iOS)
デバイス設定で「iCloud プライベートリレー」を有効にすると、Safari は Apple の DNS アドレスを使用するため、AdGuard DNS 設定が上書きされます。
iPhoneでiCloudプライベートリレーを無効にする方法は以下のとおりです:
- 「設定」アプリを開き、上部の自分の名前をタップします。
- 「iCloud」→「プライベートリレー」を選択します。
- 「プライベートリレー」をオフにします。
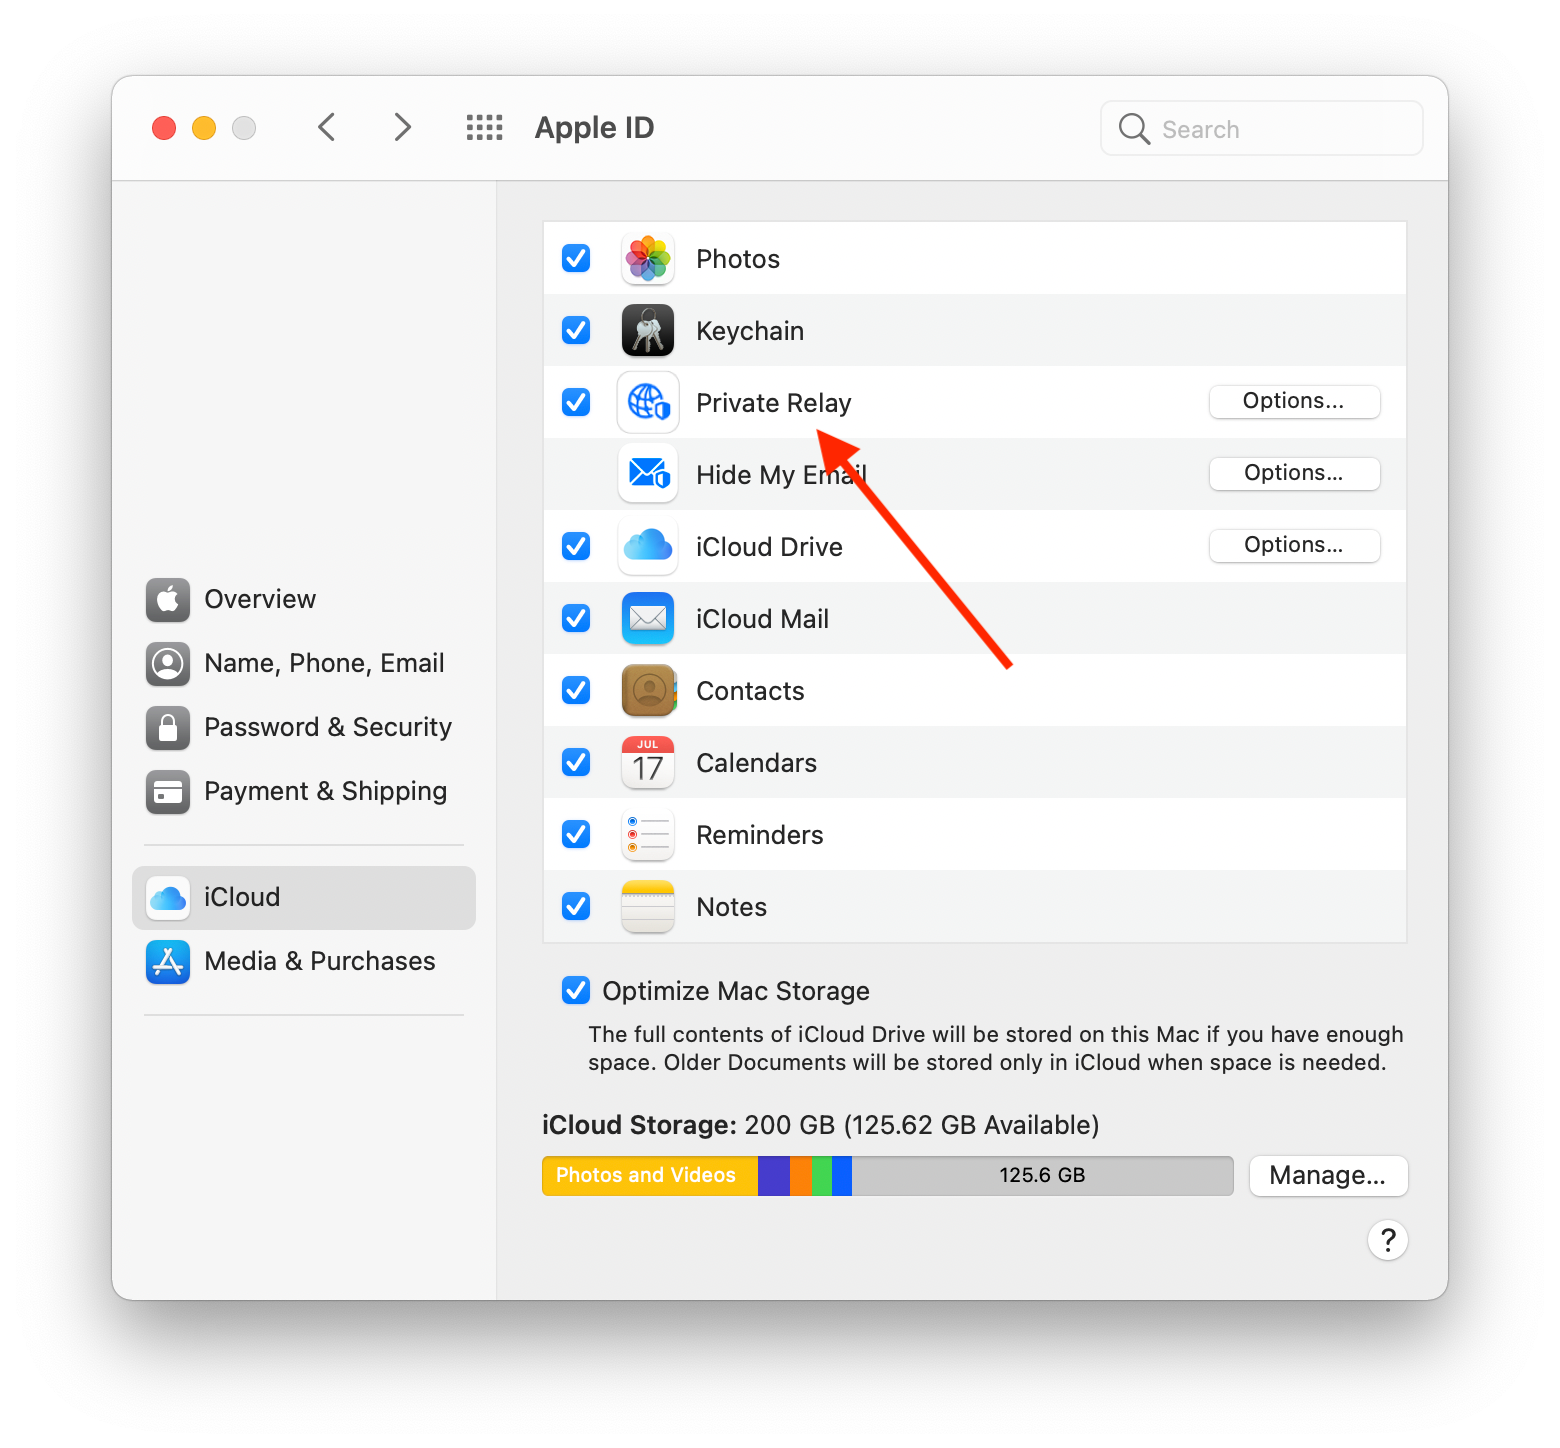
Macの場合:
- 「システム設定」を開き、自分の名前またはApple IDをクリックします。
- 「iCloud」→「プライベートリレー」を選択します。
- 「プライベートリレー」をオフにします。
- 「完了」をクリックします。
「高度なトラッキングとフィンガープリント保護」 (iOS 17以降のSafari)
iOS 17へのアップデート後、Safariの設定で「高度なトラッキングとフィンガープリント保護」で有効になっている可能性があり、iCloud プライベートリレーがAdGuard DNS設定をバイパスするのと同様の効果が出てしまうことがあります。
「高度なトラッキングとフィンガープリント保護」を無効にする方法は以下のとおりです:
For iOS 26.1 and later versions:
- Go to Settings.
- Scroll down and select Apps.
- Go to Safari → Advanced.
- Tap Advanced Tracking and Fingerprinting Protection and then Off.
![]()
For iOS versions prior to 26.1:
- Open Settings and scroll down to Safari.
- Tap Advanced.
- Disable Advanced Tracking and Fingerprinting Protection.
![]()
Limit IP Address Tracking on iPhone
When the Limit IP Address Tracking feature is enabled on your iPhone, it can interfere with AdGuard DNS’s ability to filter traffic.
This happens because the feature routes DNS queries from Safari (and other apps that support it) through Apple’s own private relay servers. This prevents AdGuard DNS from receiving your device’s actual IP address and processing DNS requests, resulting in disabled filtering for ads and trackers.
To restore full DNS-based filtering, you will need to disable this feature for the Wi-Fi network you are currently using.
Please follow the steps below:
- Open Settings on your iPhone.
- Tap Wi-Fi.
- Find and tap the name of the Wi-Fi network you are currently connected to.
- On the network’s settings page, toggle off the switch for Limit IP Address Tracking.
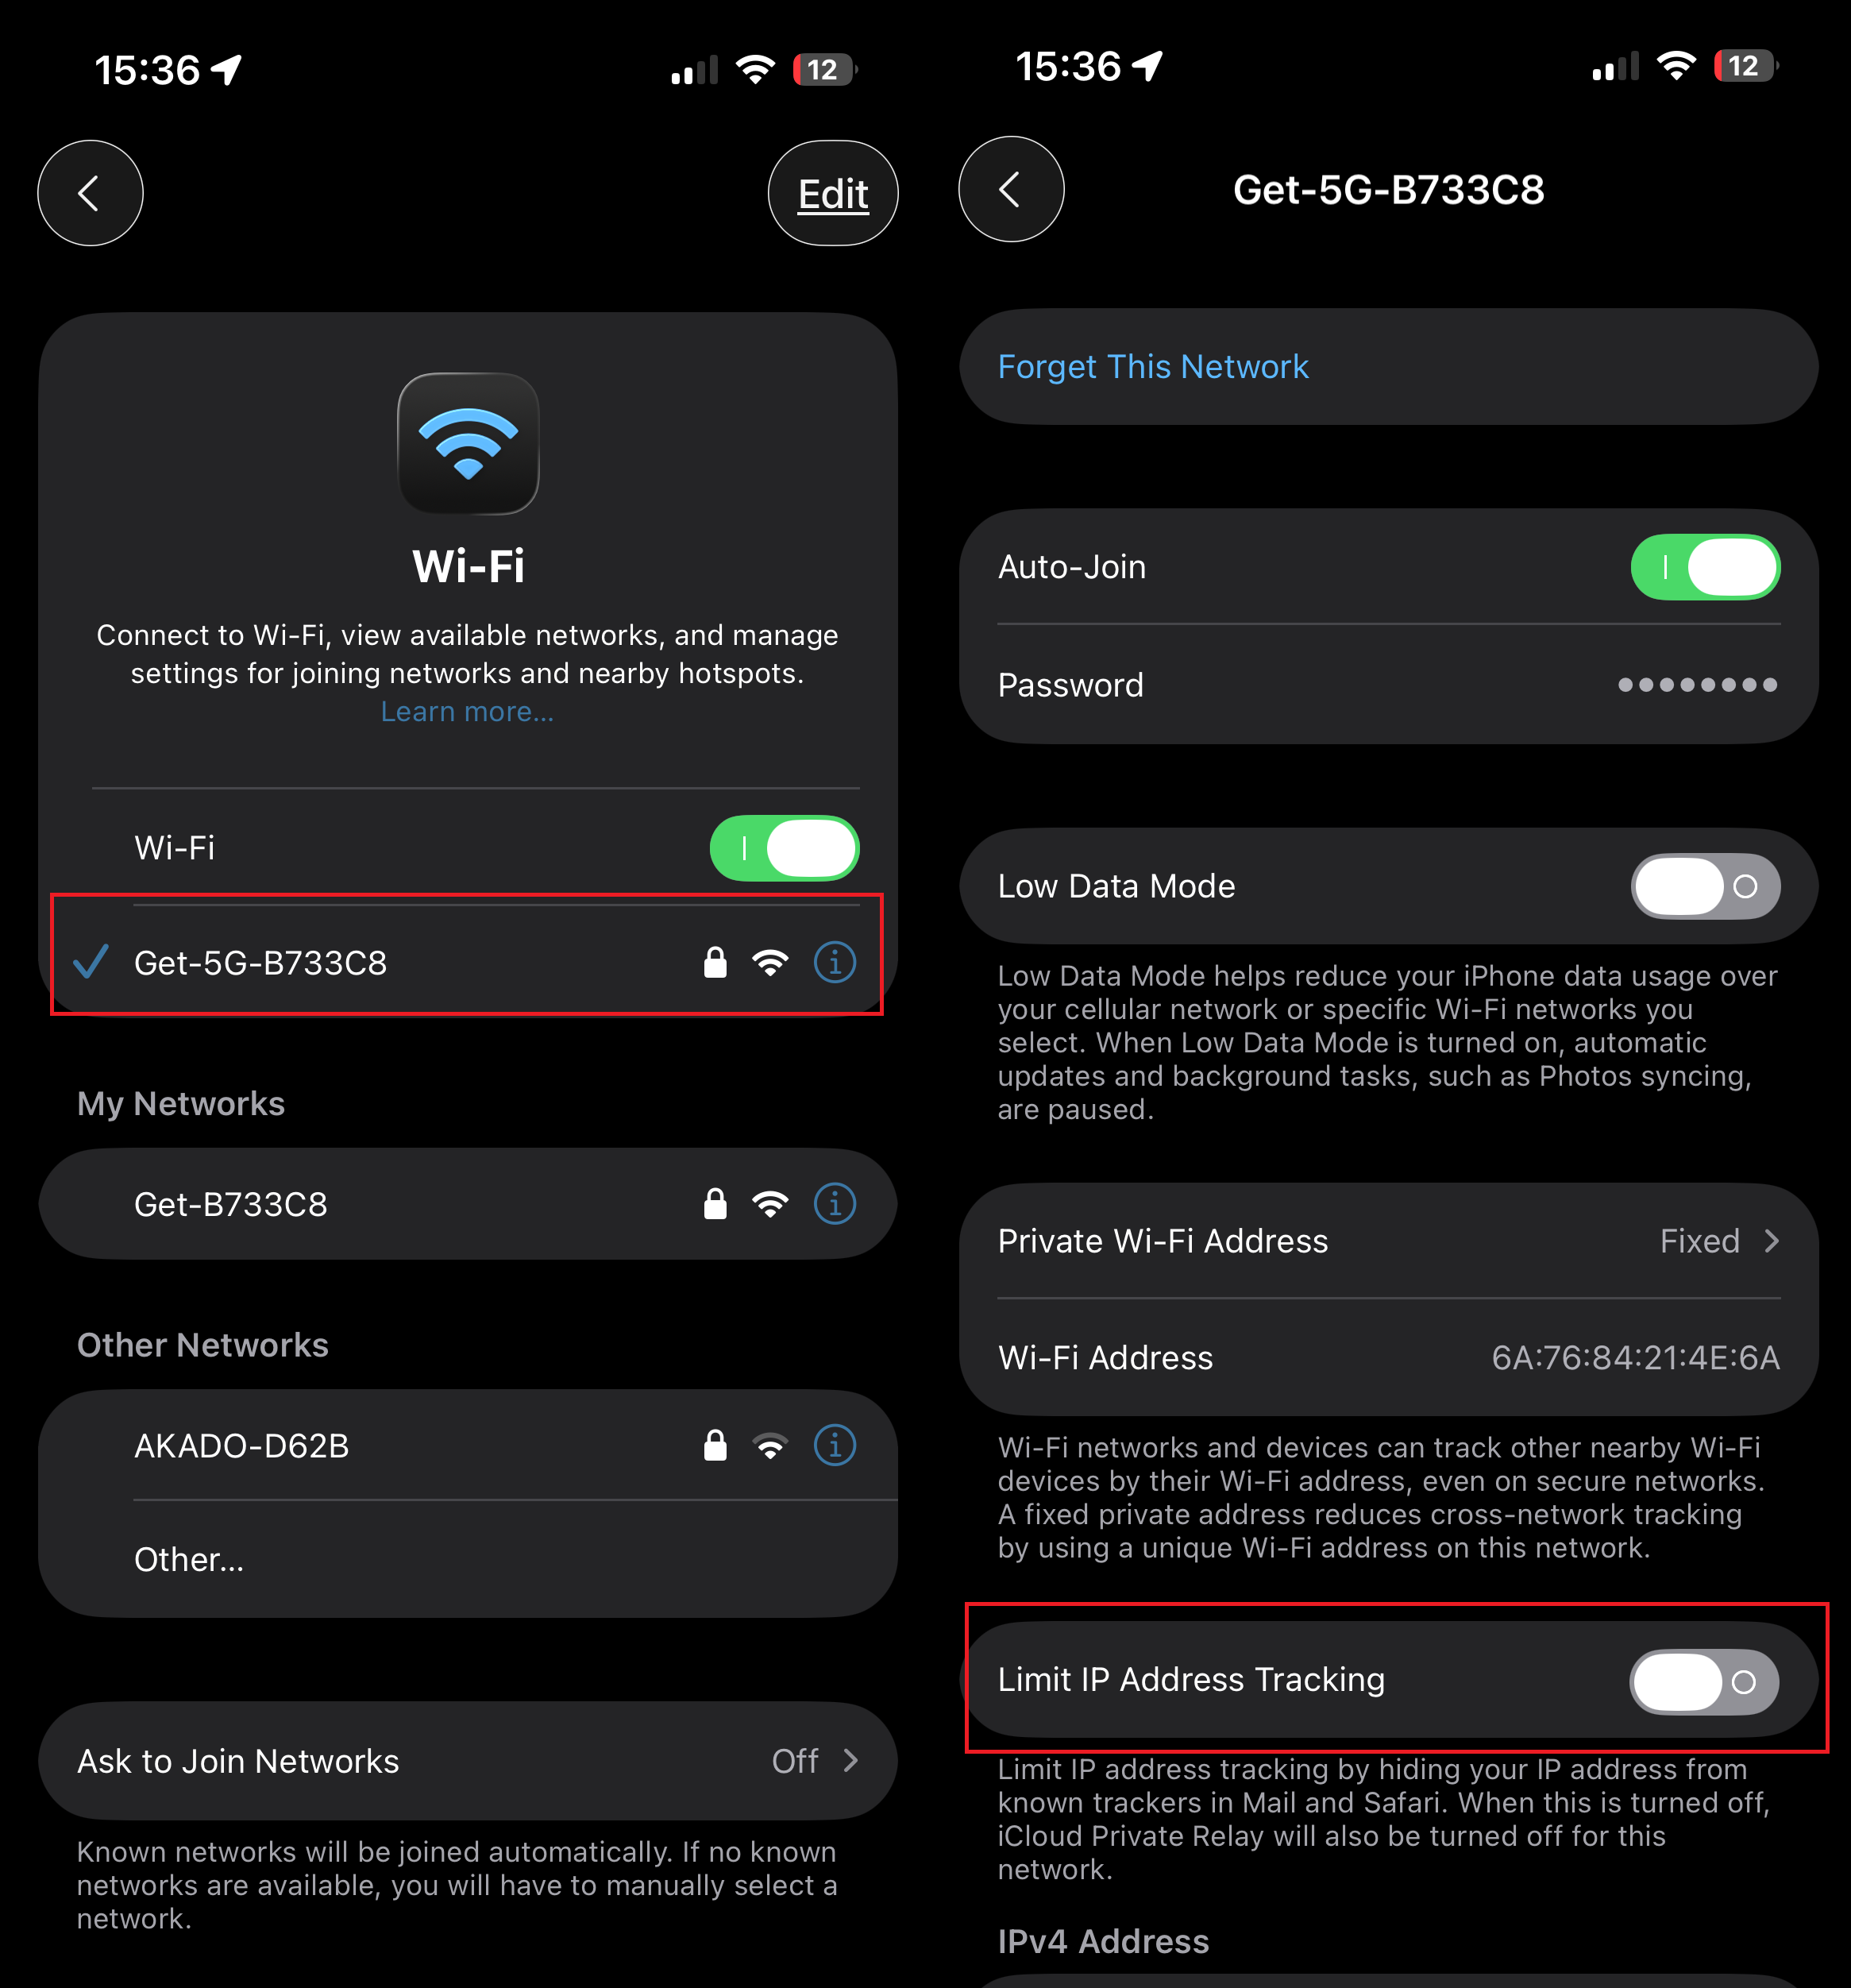
DNS filtering will resume immediately after disabling this setting. Please note that you may need to repeat this process for other Wi-Fi networks you connect to in the future.