알려진 문제
AdGuard DNS를 설정한 후 일부 사용자에게는 제대로 작동하지 않을 수 있습니다. 이런 경우 기기가 AdGuard DNS에 연결되지 않았고 해당 기기의 요청이 쿼리 로그에 표시되지 않는다는 메시지가 표시됩니다. 이는 브라우저 또는 운영 체제의 특정한 숨겨진 설정으로 인해 발생할 수 있습니다. 몇 가지 일반적인 문제와 해결 방법을 살펴보겠습니다.
테스트 페이지에서 AdGuard DNS 상태를 확인할 수 있습니다.
Chrome의 보안 DNS 설정
Chrome을 사용 중이고 AdGuard DNS 대시보드에 요청이 표시되지 않으면 Chrome이 자체 DNS 서버를 사용하기 때문일 수 있습니다. 다음은 이것을 비활성화하는 방법입니다.
- Chrome 설정을 엽니다.
- 개인 정보 보호 및 보안로 이동합니다.
- 보안을 선택하세요.
- 보안 DNS 사용으로 스크롤을 내리세요.
- 기능을 비활성화합니다.

If you disable Chrome’s own DNS settings, the browser will use the DNS specified in your operating system, which should be AdGuard DNS if you’ve set it up correctly.
iCloud 비공개 릴레이(Safari, macOS 및 iOS)
기기 설정에서 iCloud 비공개 릴레이를 활성화하면 Safari는 AdGuard DNS 설정을 무시하는 Apple의 DNS 주소를 사용하게 됩니다.
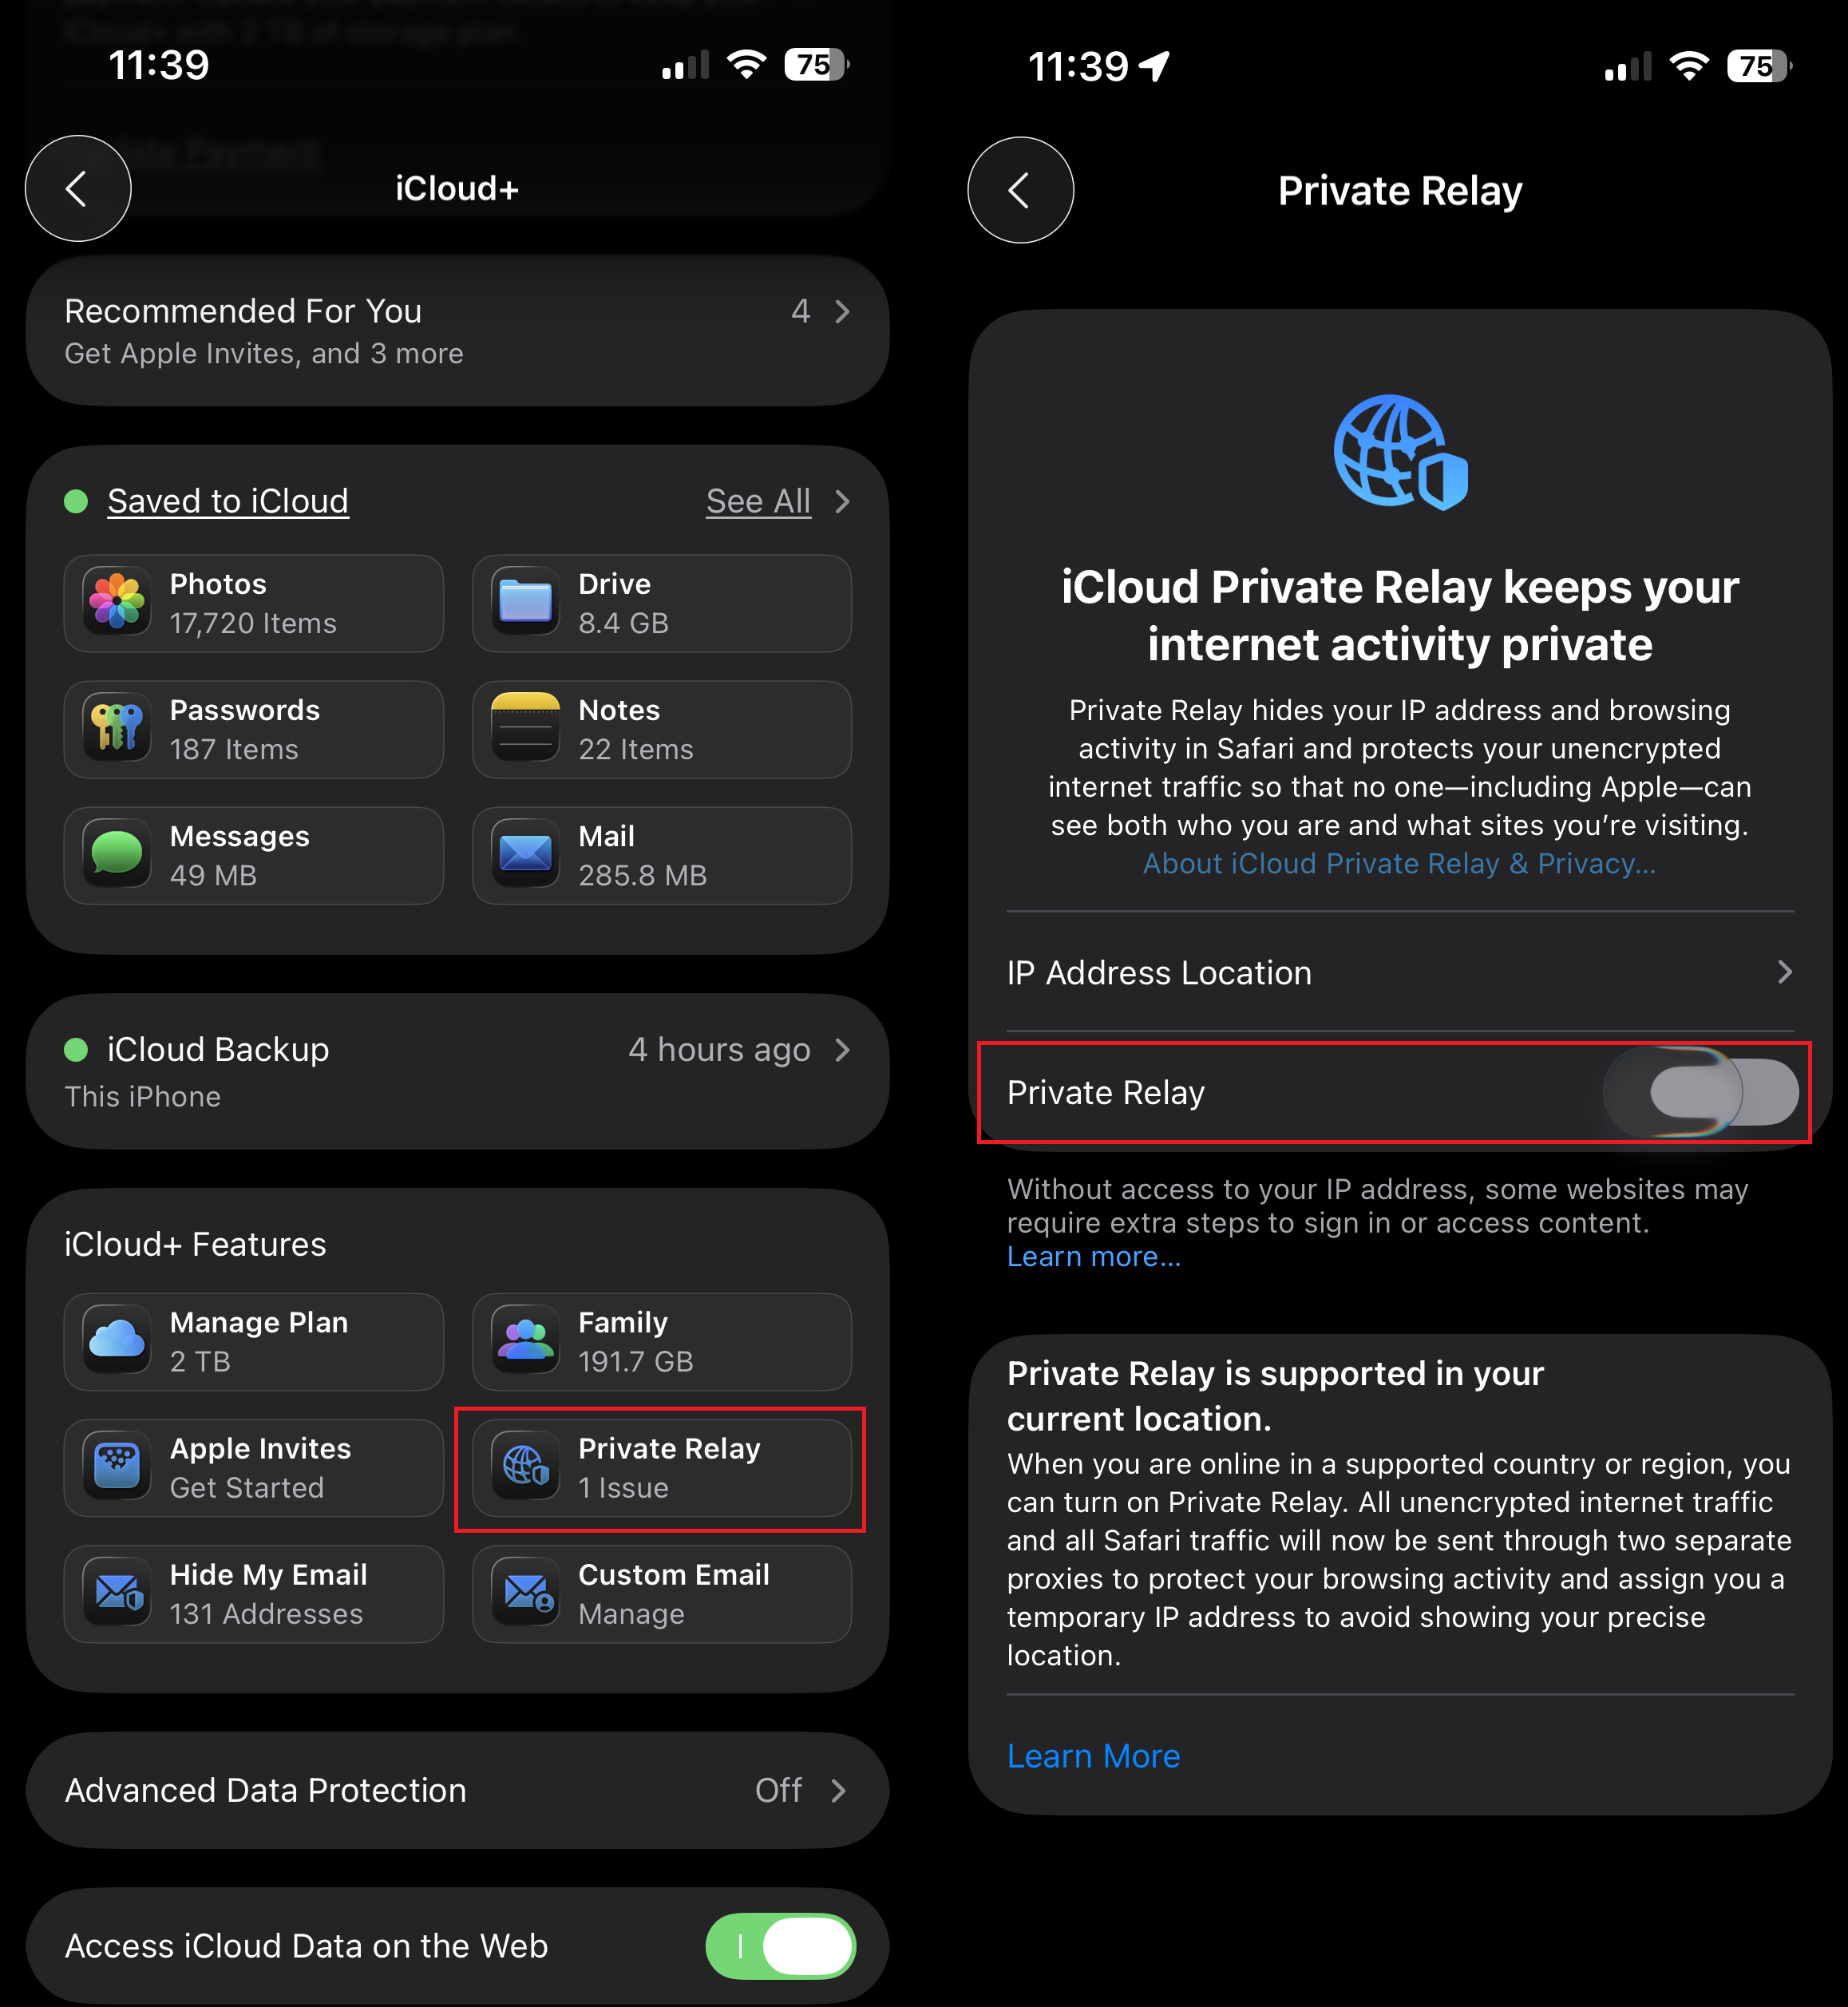
iPhone에서 iCloud 비공개 릴레이를 비활성화하는 방법은 다음과 같습니다.
- 설정을 열고 당신의 이름을 누르세요.
- iCloud → 비공개 릴레이를 선택합니다.
- 비공개 릴레이를 끕니다.
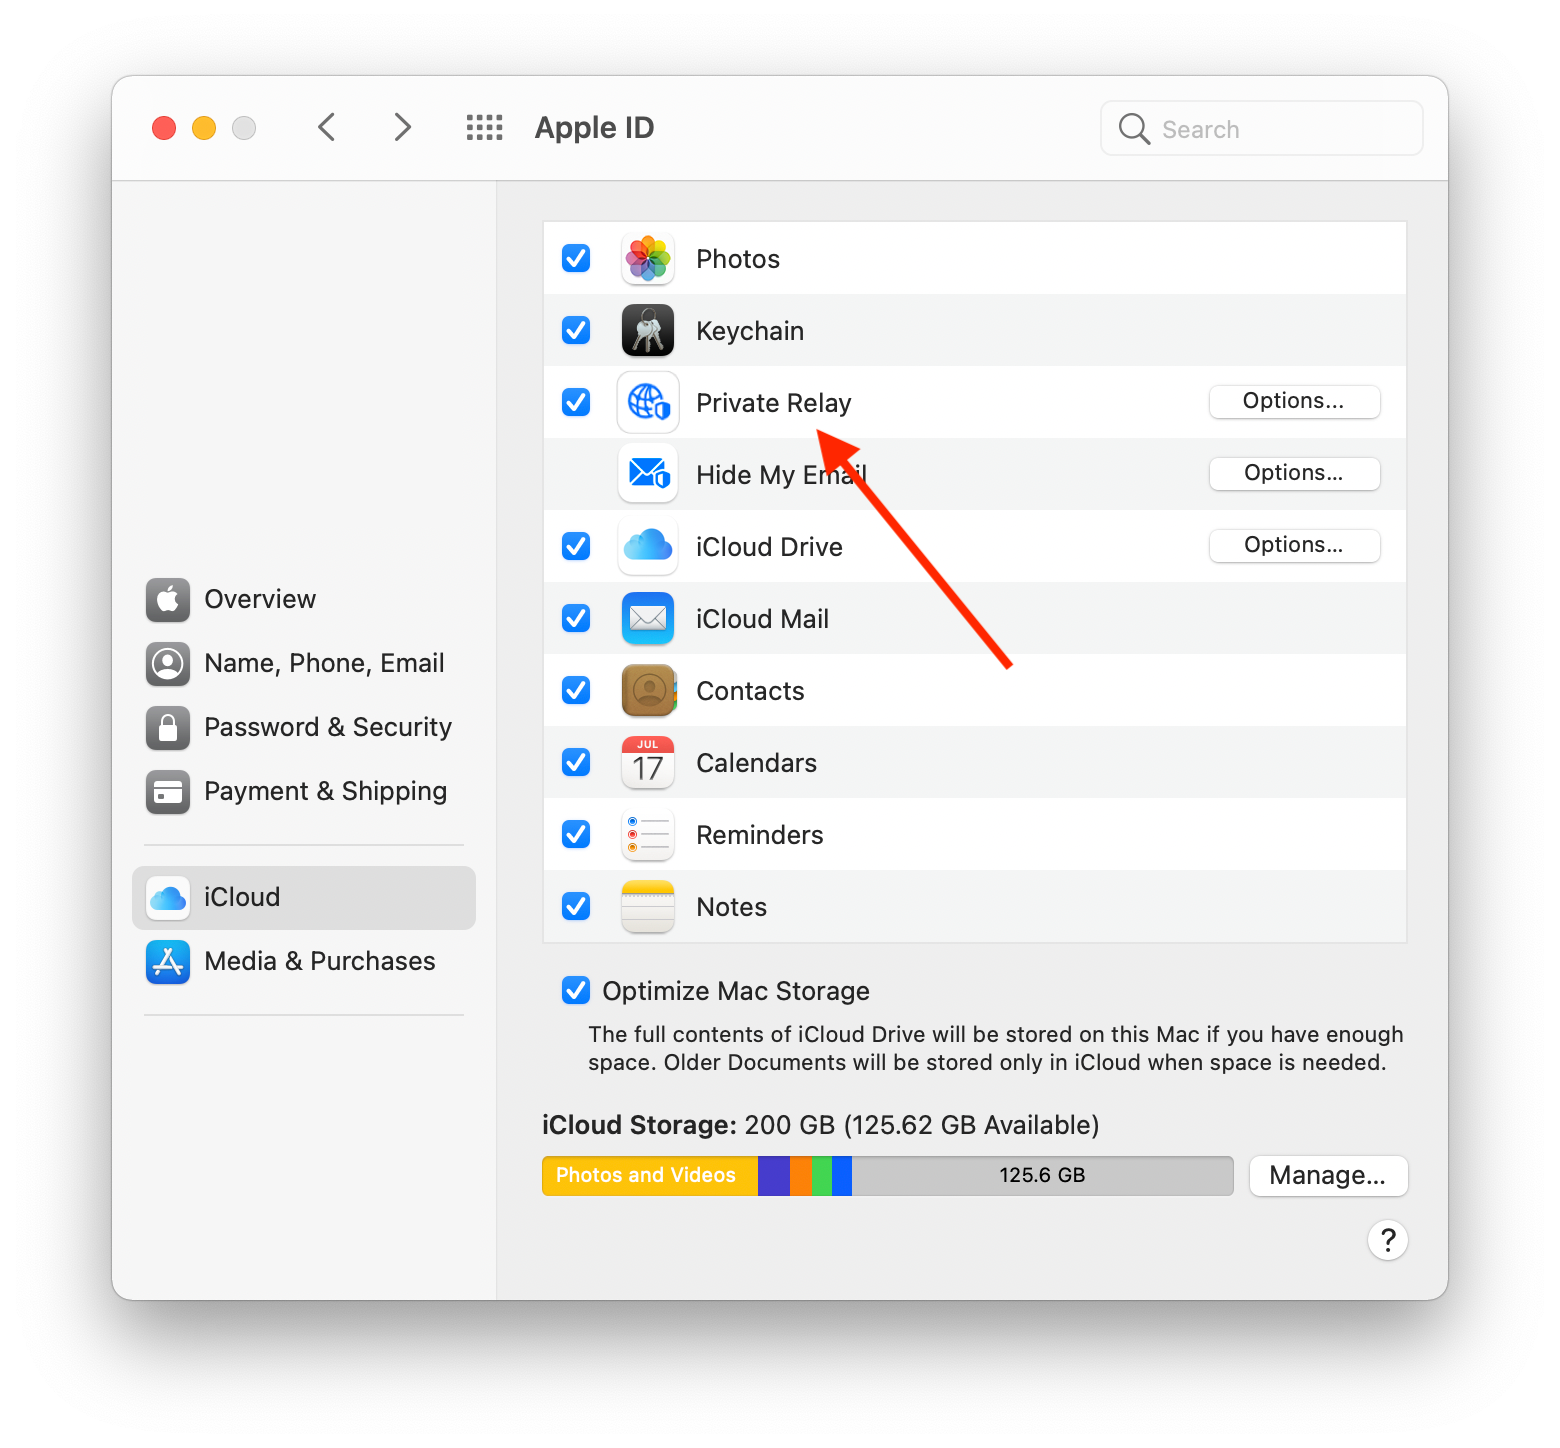
Mac의 경우
- 시스템 설정 열고 이름 또는 Apple ID를 클릭합니다.
- iCloud → 비공개 릴레이를 선택합니다.
- 비공개 릴레이를 끕니다.
- 완료를 누릅니다.
고급 추적 및 핑거프린팅 방지(Safari, iOS 17부터)
iOS 17 업데이트 후 Safari 설정에서 고급 추적 및 핑거프린팅 방지가 활성화될 수 있으며, 이는 AdGuard DNS 설정을 우회하는 iCloud 비공개 릴레이와 유사한 효과를 가질 수 있습니다.
고급 추적 및 핑거프린팅 방지를 비활성화하는 방법은 다음과 같습니다.
For iOS 26.1 and later versions:
- Go to Settings.
- Scroll down and select Apps.
- Go to Safari → Advanced.
- Tap Advanced Tracking and Fingerprinting Protection and then Off.
![]()
For iOS versions prior to 26.1:
- Open Settings and scroll down to Safari.
- Tap Advanced.
- Disable Advanced Tracking and Fingerprinting Protection.
![]()
Limit IP Address Tracking on iPhone
When the Limit IP Address Tracking feature is enabled on your iPhone, it can interfere with AdGuard DNS’s ability to filter traffic.
This happens because the feature routes DNS queries from Safari (and other apps that support it) through Apple’s own private relay servers. This prevents AdGuard DNS from receiving your device’s actual IP address and processing DNS requests, resulting in disabled filtering for ads and trackers.
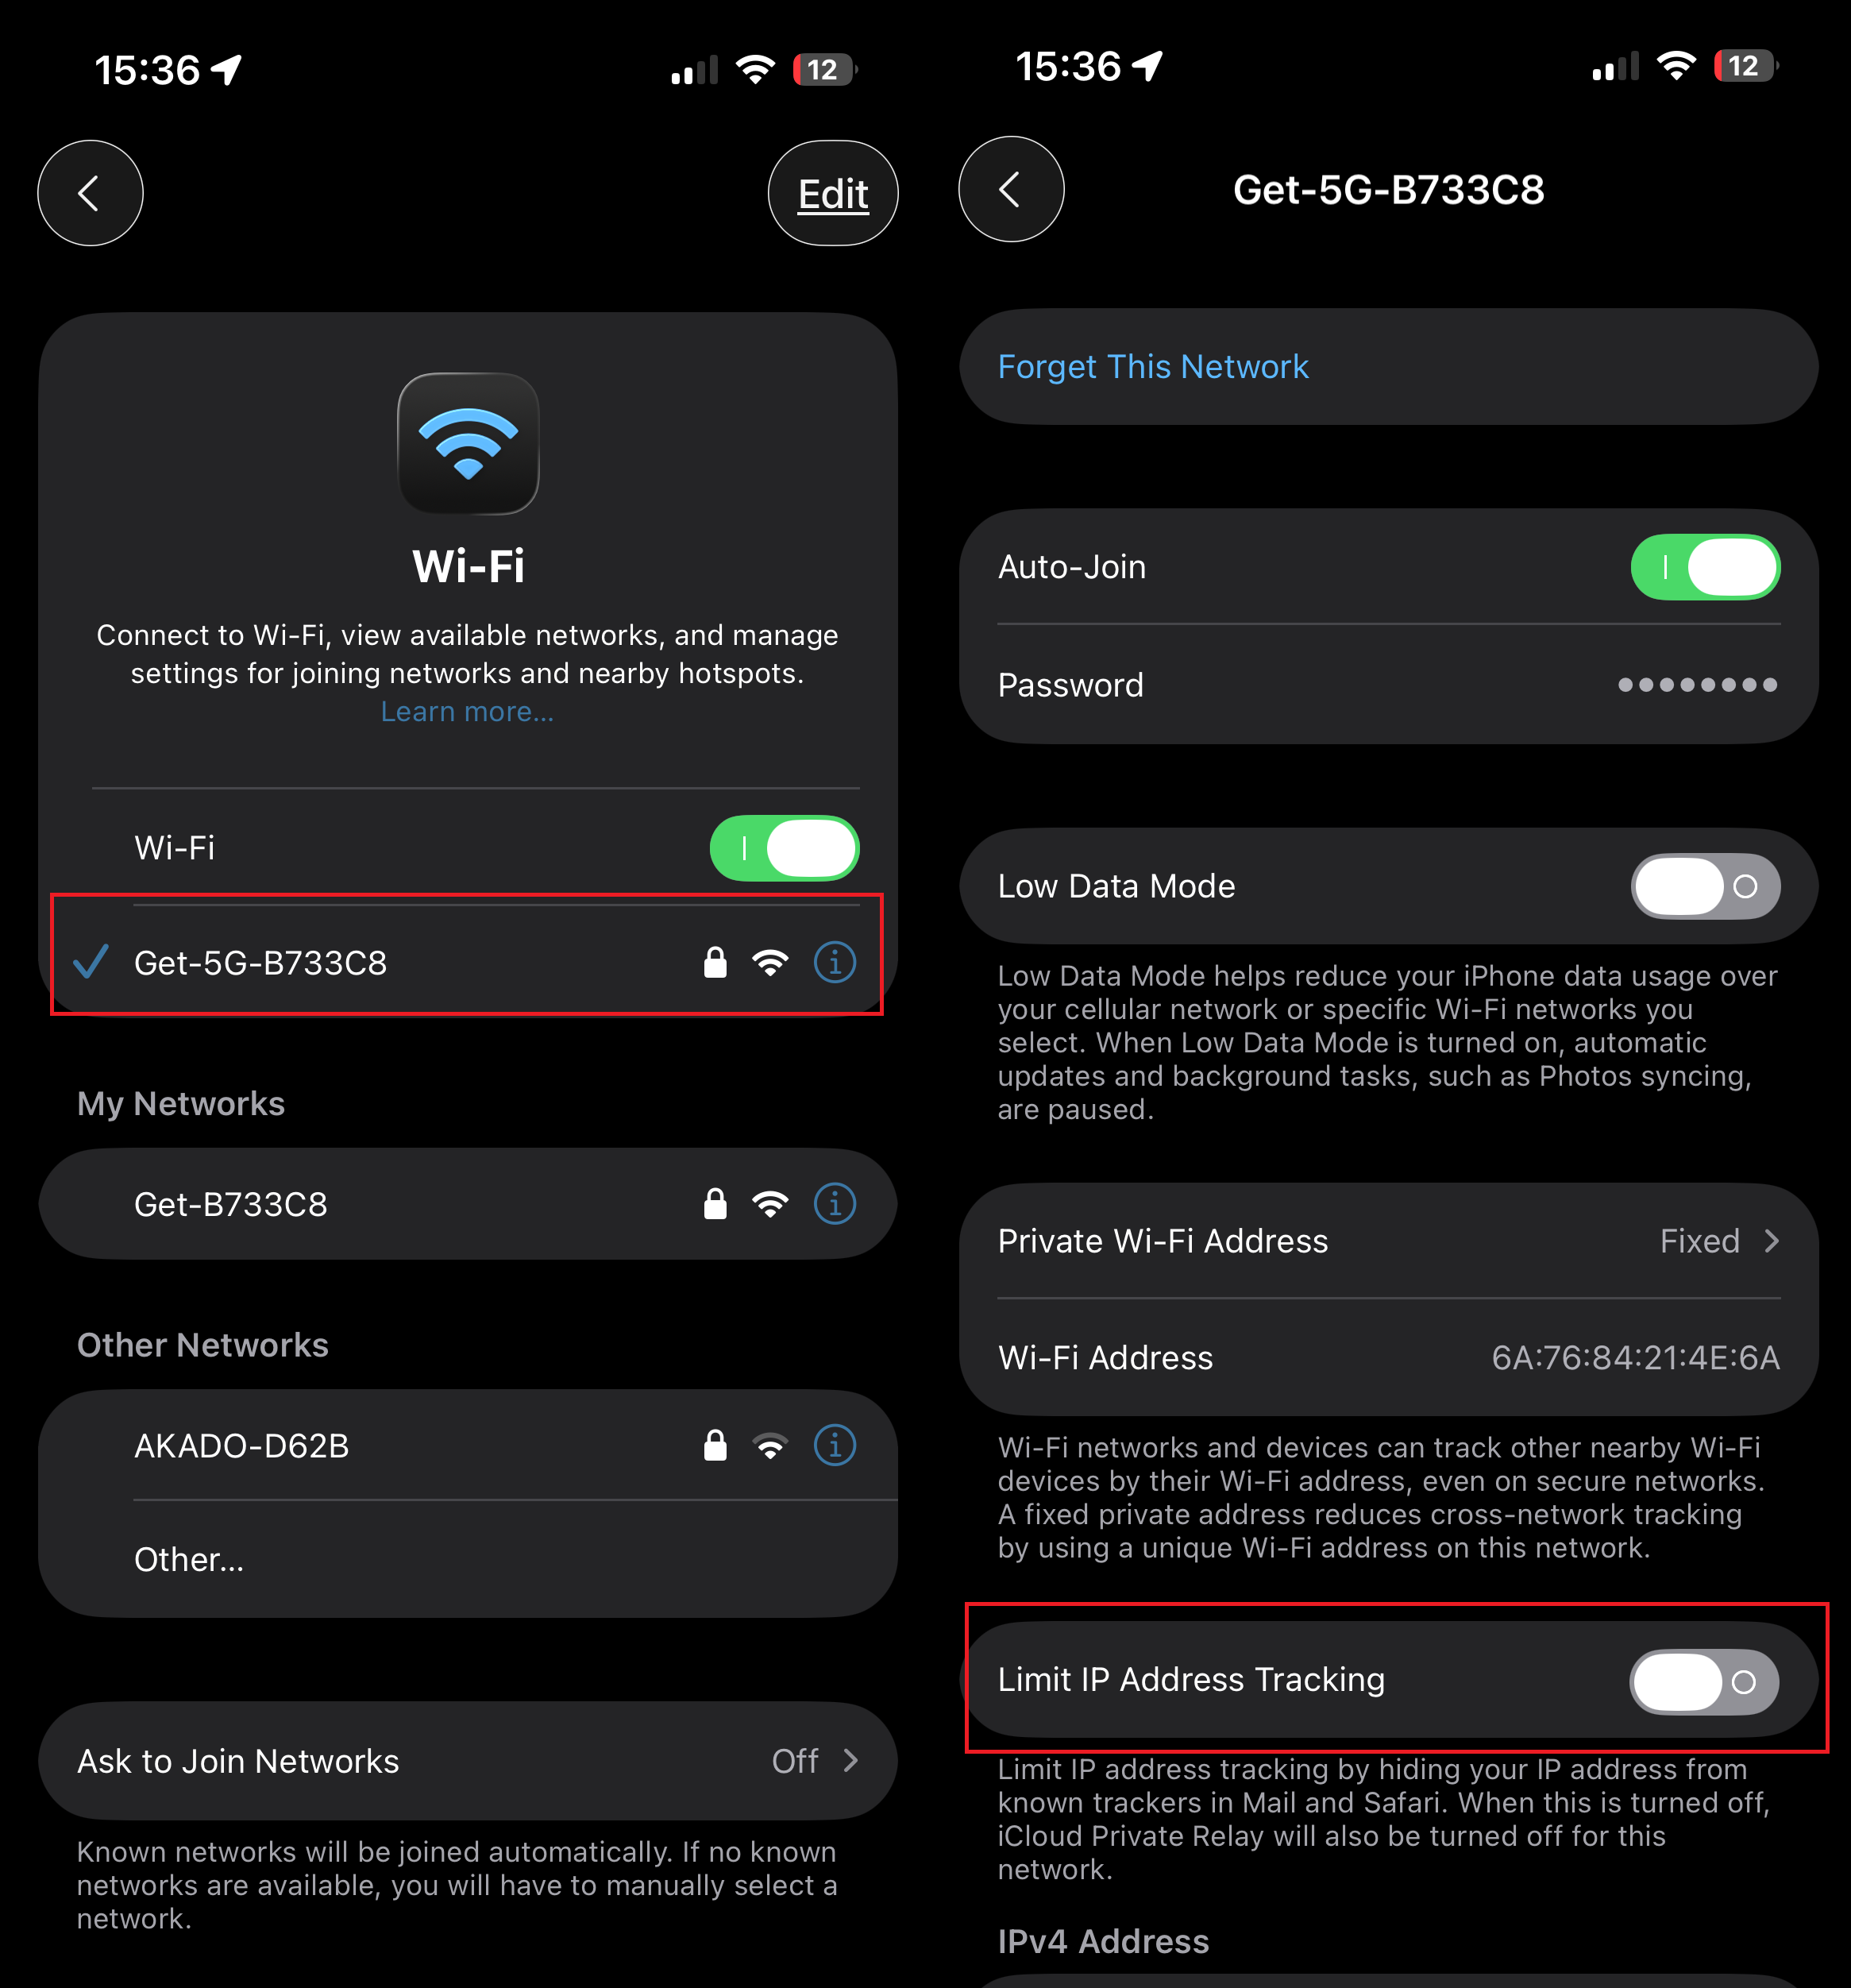
To restore full DNS-based filtering, you will need to disable this feature for the Wi-Fi network you are currently using.
Please follow the steps below:
- Open Settings on your iPhone.
- Tap Wi-Fi.
- Find and tap the name of the Wi-Fi network you are currently connected to.
- On the network’s settings page, toggle off the switch for Limit IP Address Tracking.
DNS filtering will resume immediately after disabling this setting. Please note that you may need to repeat this process for other Wi-Fi networks you connect to in the future.