已知问题
部分用户在设置 AdGuard DNS 后可能会发现它无法正常工作:用户收到信息显示其设备未连接到 AdGuard DNS,并且查询日志中不会显示来自该设备的请求。 这可能是由于浏览器或操作系统中某些隐藏的设置。 让我们来看看几个常见问题及其对应的解决方案。
您可以在测试页面中检查 AdGuard DNS 的状态。
Chrome 浏览器的安全 DNS 设置
如果用户使用的是 Chrome 浏览器,并且在 AdGuard DNS 面板中看不到任何请求,这可能是因为 Chrome 浏览器使用了自己的 DNS 服务器。 以下是禁用它的方法:
- 打开 Chrome 浏览器的设置。
- 转至「隐私和安全」。
- 选择「安全」。
- 向下滚动到「使用安全 DNS」。
- 禁用该功能。

If you disable Chrome’s own DNS settings, the browser will use the DNS specified in your operating system, which should be AdGuard DNS if you’ve set it up correctly.
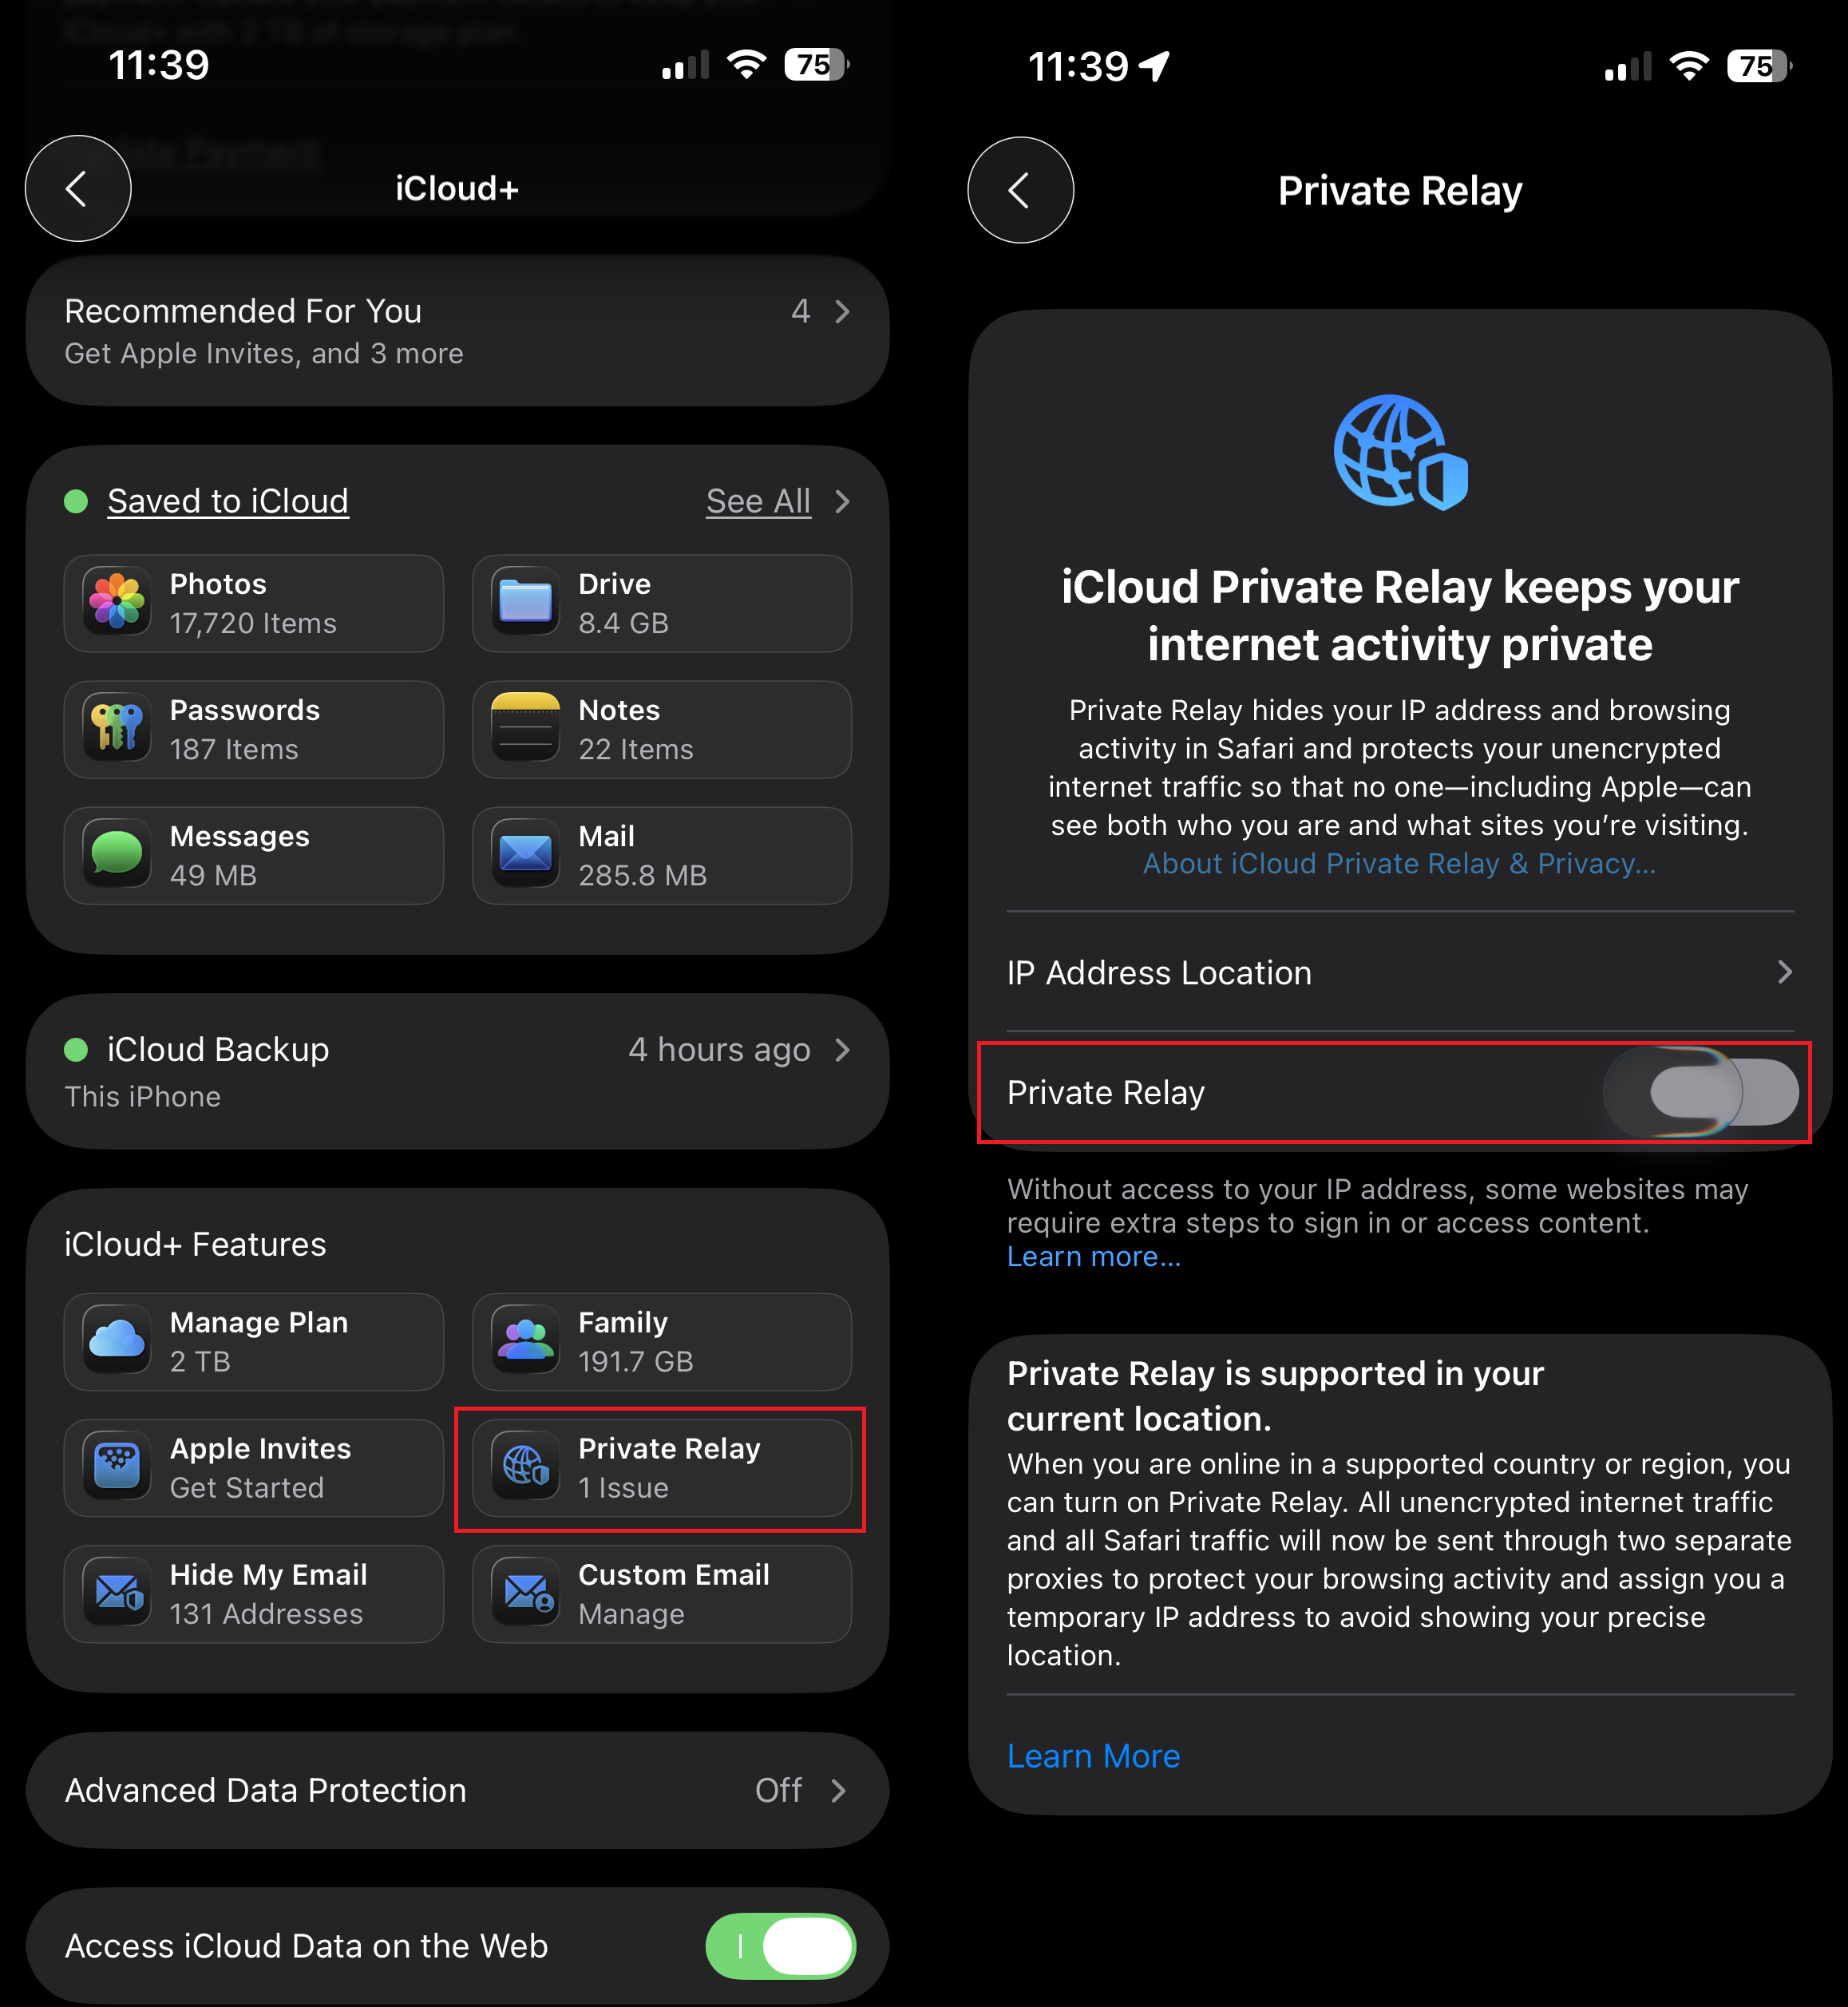
iCloud 私有代理(Safari、macOS 和 iOS)
如果您在设备设置中启用 iCloud 私有代理,那么 Safari 将会使用 Apple 的 DNS 地址,这将会覆盖 AdGuard DNS 设置。
以下是在 iPhone 上禁用 iCloud 私有代理的方法:
- 打开「设置」并点击您的姓名。
- 选择「iCloud」→「私有代理」。
- 关闭私有代理。
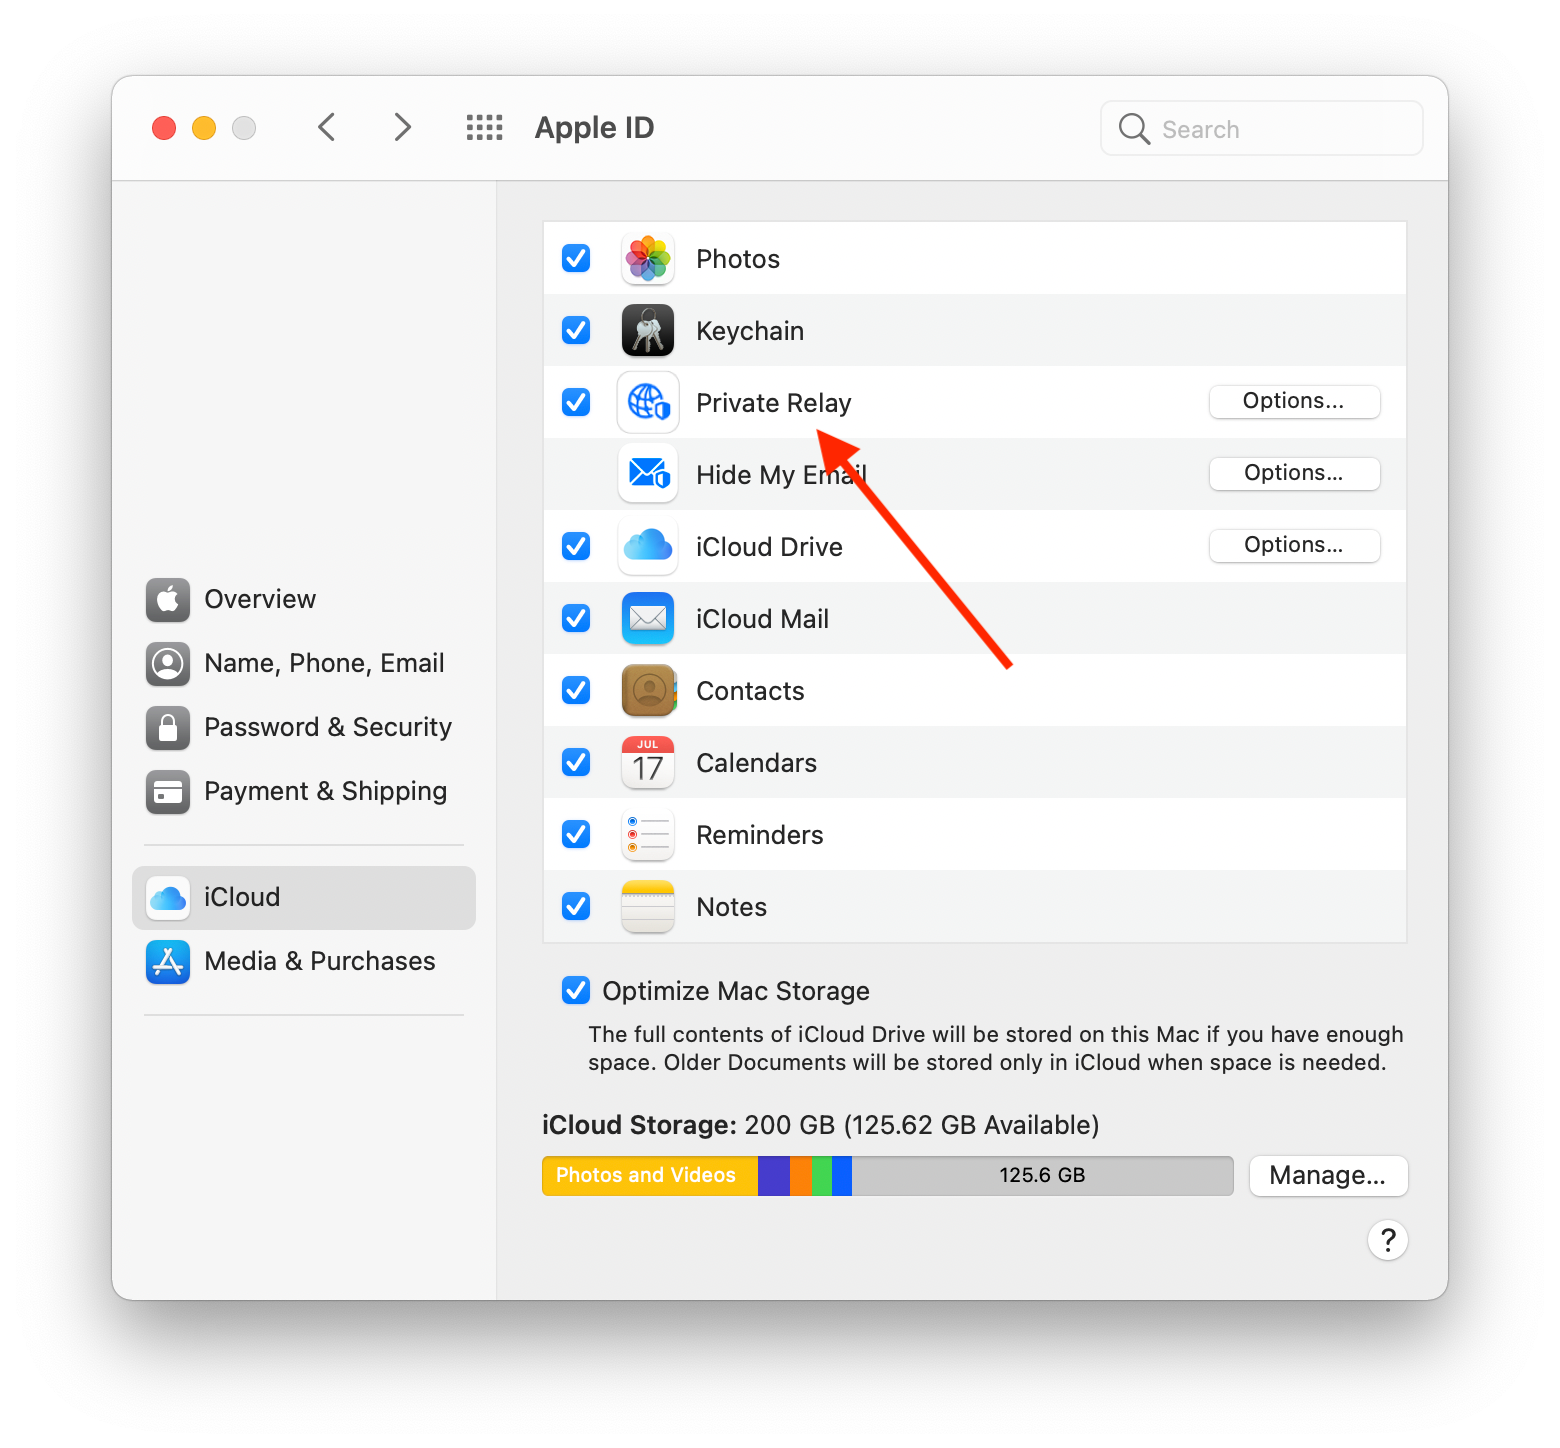
在您的 Mac 上:
- 打开「系统设置」并单击您的姓名或「Apple ID」。
- 选择「iCloud」→「私有代理」。
- 关闭私有代理。
- 单击「完成」。
高级跟踪和指纹保护(Safari,从 iOS 17 开始)
iOS 17 更新后,Safari 设置中的高级跟踪和指纹保护可能会被启用,这可能会产生类似于 iCloud 私有代理绕过 AdGuard DNS 设置的效果。
以下是禁用高级跟踪和指纹保护的方法:
For iOS 26.1 and later versions:
- Go to Settings.
- Scroll down and select Apps.
- Go to Safari → Advanced.
- Tap Advanced Tracking and Fingerprinting Protection and then Off.
![]()
For iOS versions prior to 26.1:
- Open Settings and scroll down to Safari.
- Tap Advanced.
- Disable Advanced Tracking and Fingerprinting Protection.
![]()
Limit IP Address Tracking on iPhone
When the Limit IP Address Tracking feature is enabled on your iPhone, it can interfere with AdGuard DNS’s ability to filter traffic.
This happens because the feature routes DNS queries from Safari (and other apps that support it) through Apple’s own private relay servers. This prevents AdGuard DNS from receiving your device’s actual IP address and processing DNS requests, resulting in disabled filtering for ads and trackers.
To restore full DNS-based filtering, you will need to disable this feature for the Wi-Fi network you are currently using.
Please follow the steps below:
- Open Settings on your iPhone.
- Tap Wi-Fi.
- Find and tap the name of the Wi-Fi network you are currently connected to.
- On the network’s settings page, toggle off the switch for Limit IP Address Tracking.
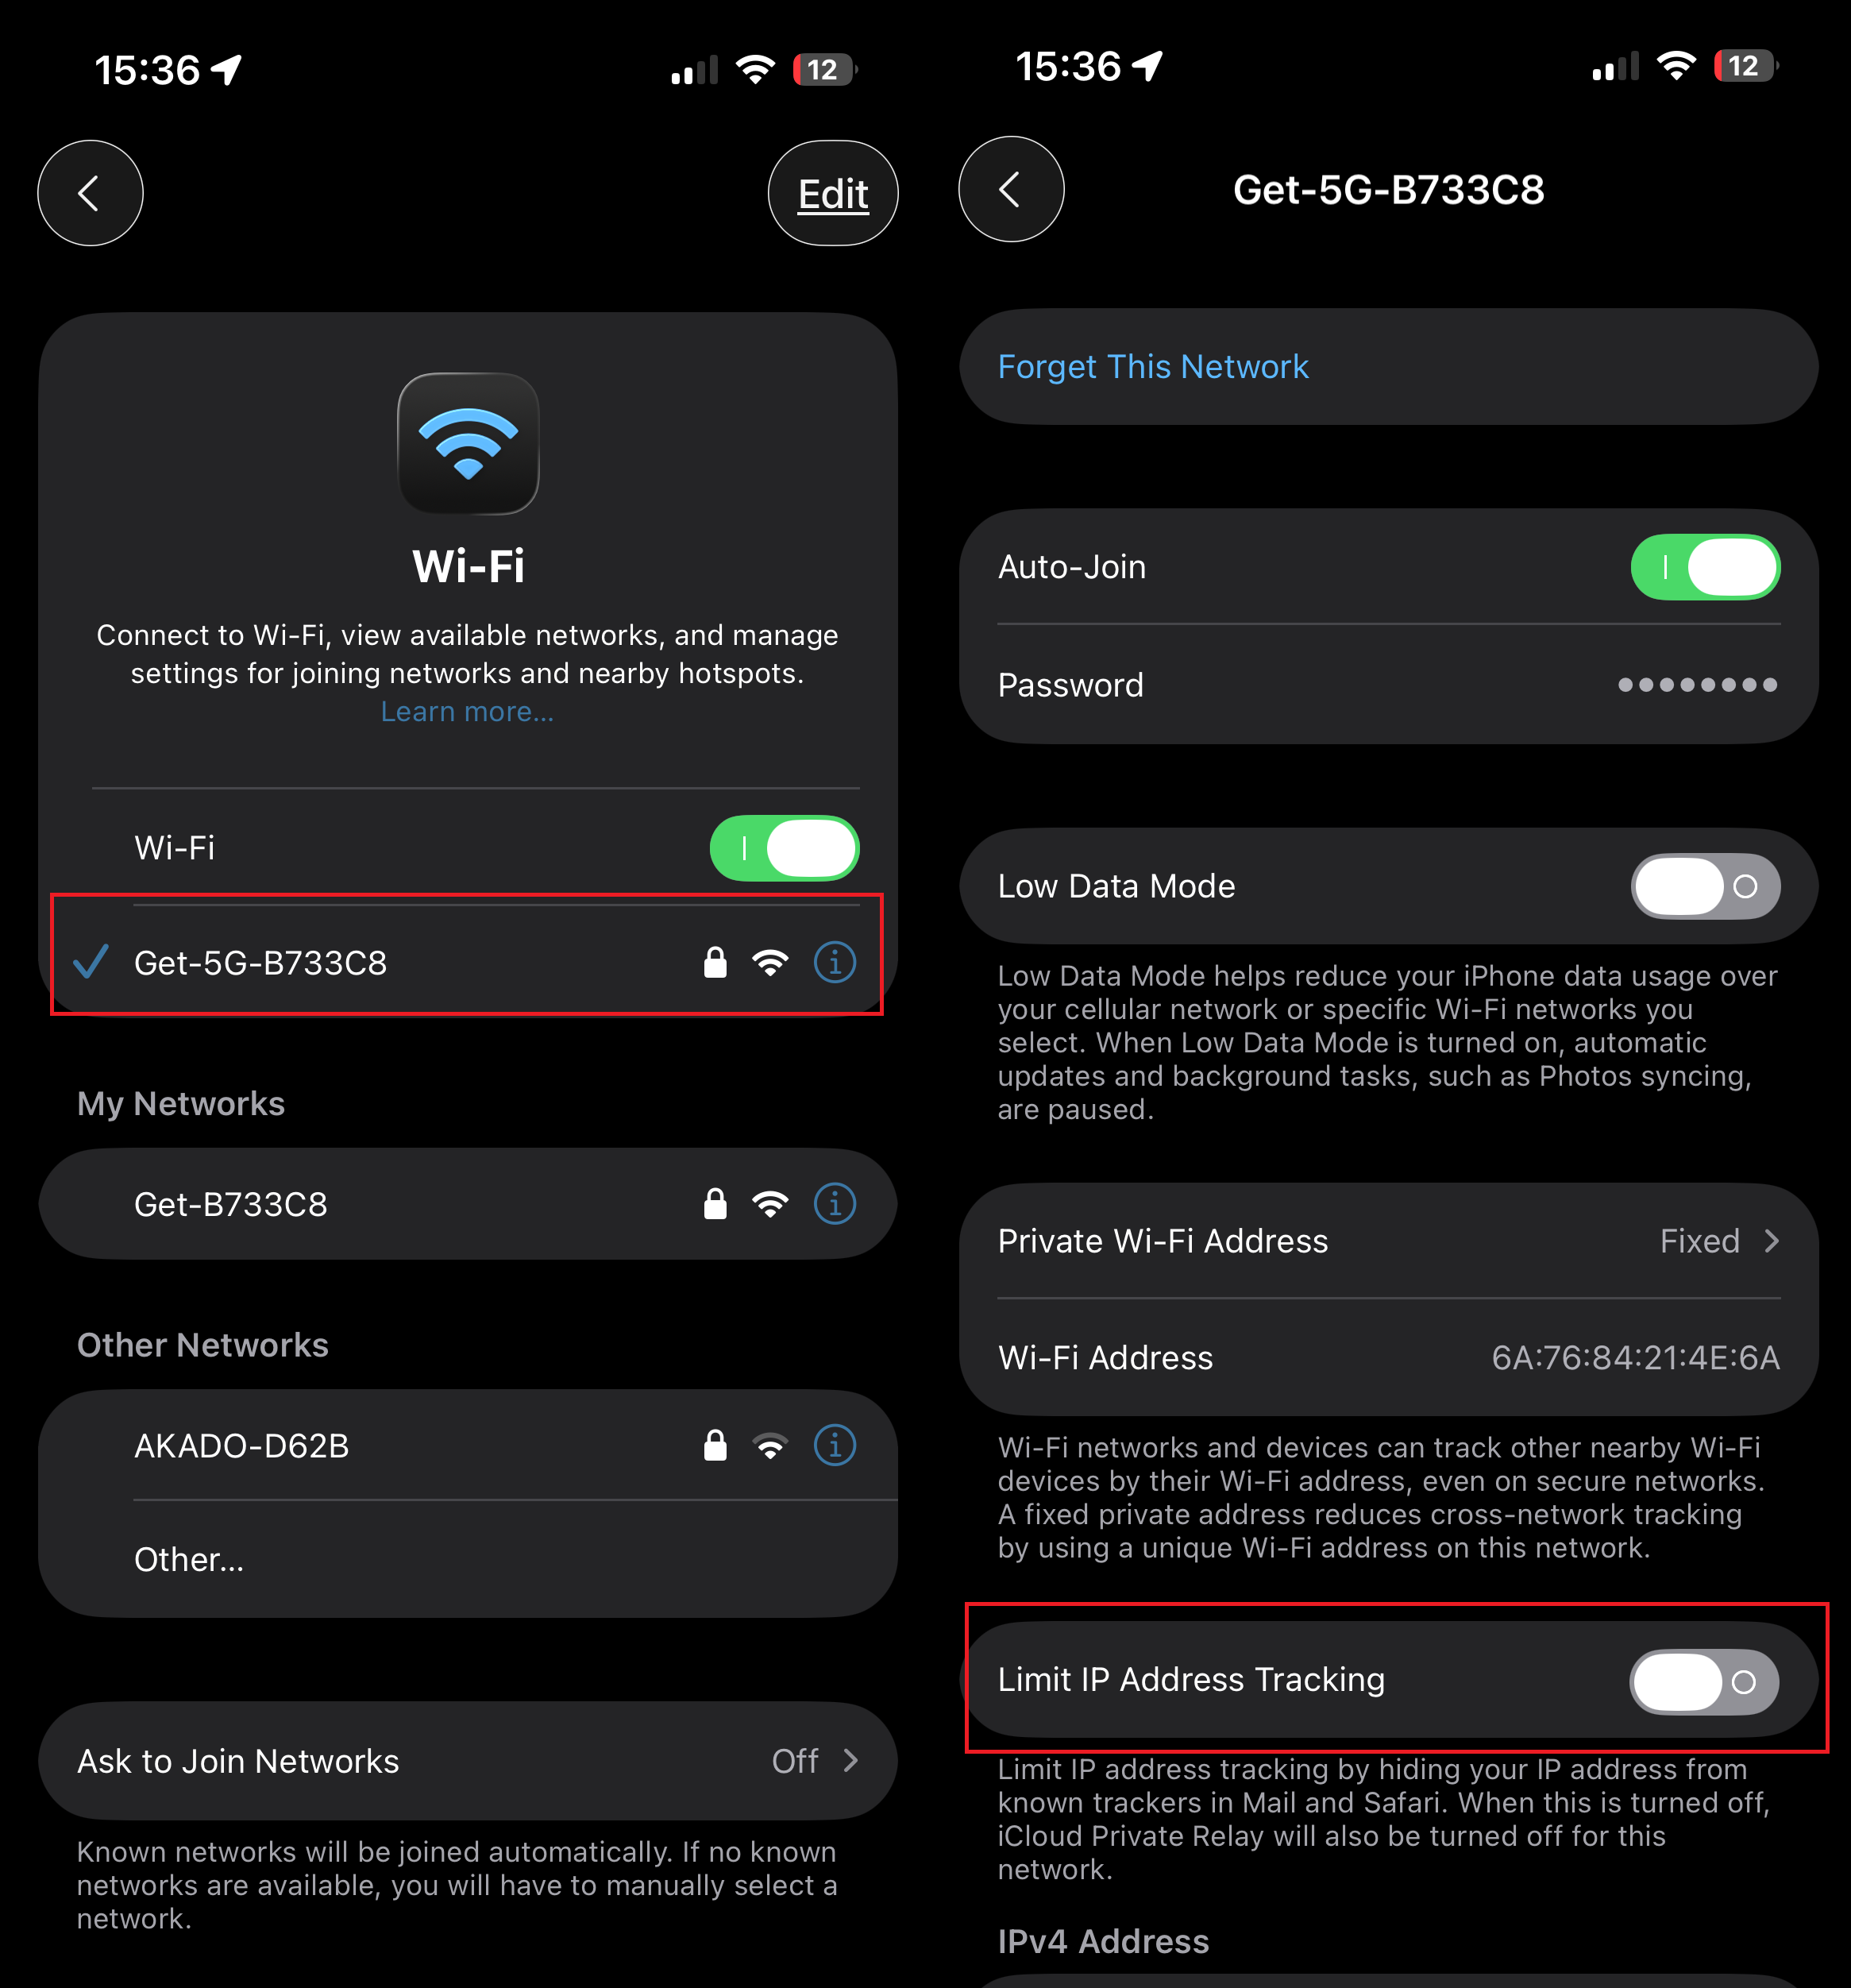
DNS filtering will resume immediately after disabling this setting. Please note that you may need to repeat this process for other Wi-Fi networks you connect to in the future.