Known issues
After setting up AdGuard DNS, some users may find that it doesn’t work properly: they see a message that their device is not connected to AdGuard DNS and the requests from that device are not displayed in the Query log. This can happen because of certain hidden settings in your browser or operating system. Let’s look at several common issues and their solutions.
You can check the status of AdGuard DNS on the test page.
Chrome’s secure DNS settings
If you’re using Chrome and you don’t see any requests in your AdGuard DNS dashboard, this may be because Chrome uses its own DNS server. Here’s how you can disable it:
- Open Chrome’s settings.
- Navigate to Privacy and security.
- Select Security.
- Scroll down to Use secure DNS.
- Disable the feature.

If you disable Chrome’s own DNS settings, the browser will use the DNS specified in your operating system, which should be AdGuard DNS if you’ve set it up correctly.
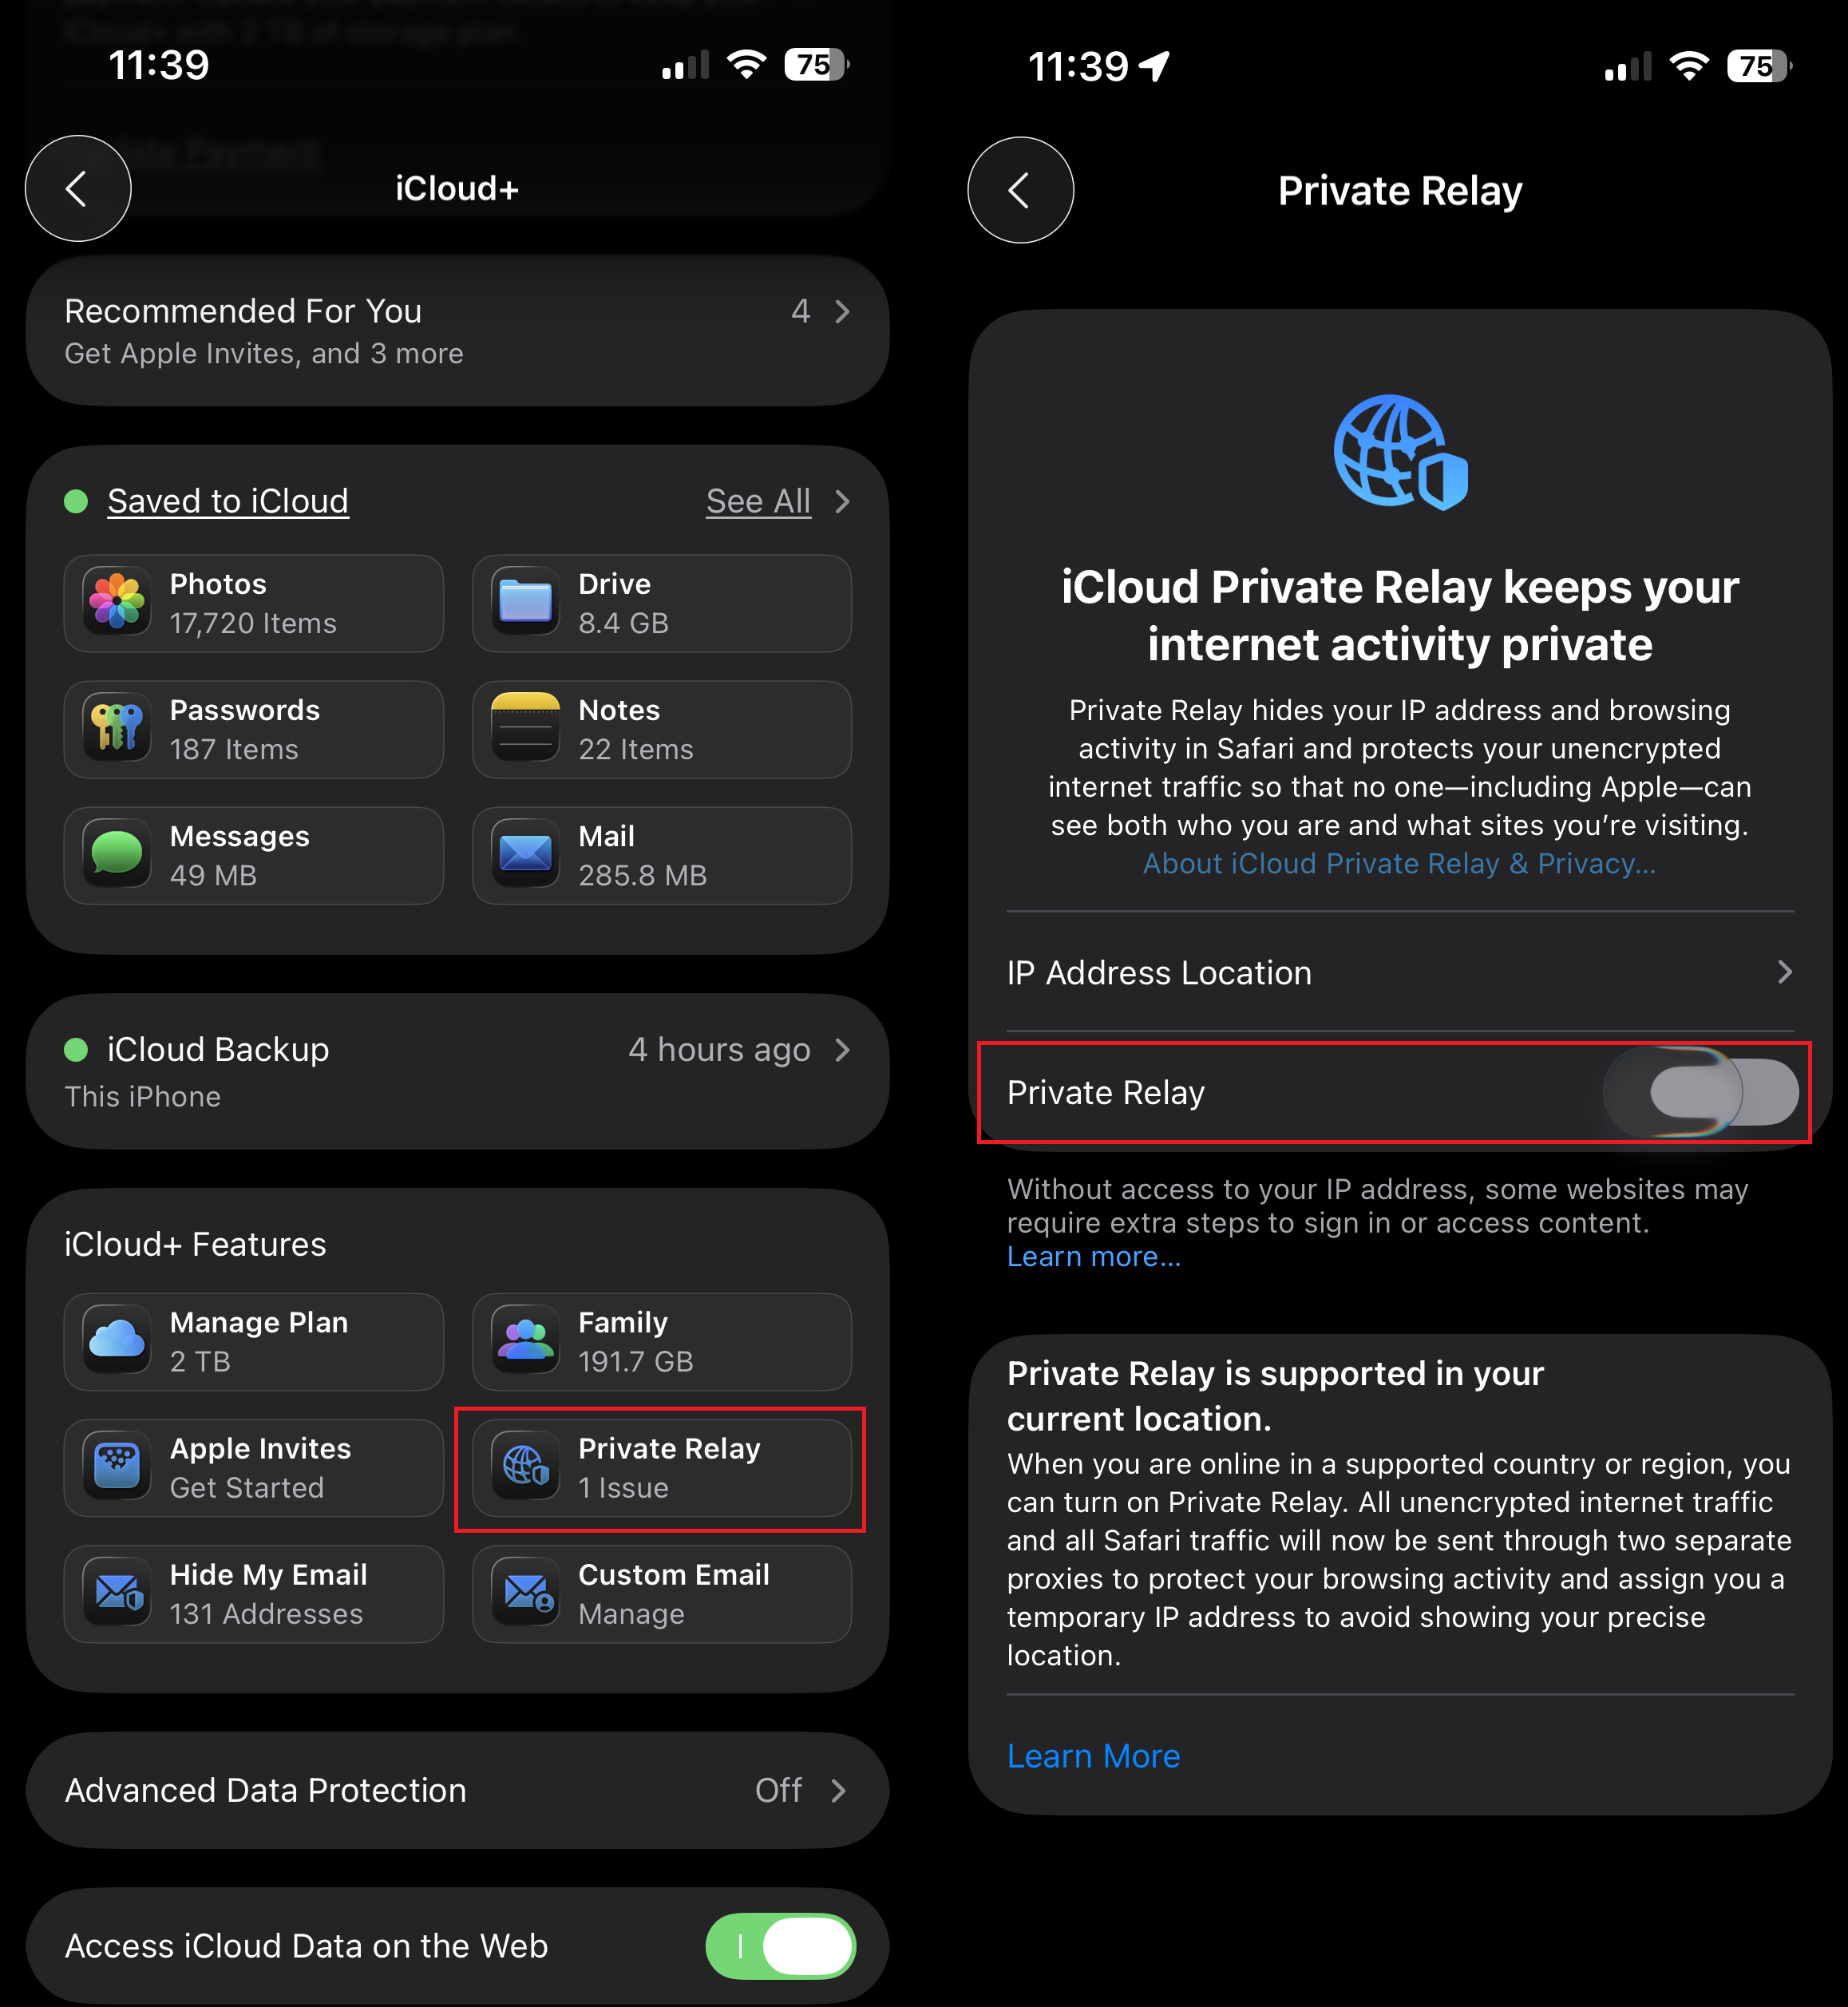
iCloud Private Relay (Safari, macOS, and iOS)
If you enable iCloud Private Relay in your device settings, Safari will use Apple’s DNS addresses, which will override the AdGuard DNS settings.
Here’s how you can disable iCloud Private Relay on your iPhone:
- Open Settings and tap your name.
- Select iCloud → Private Relay.
- Turn off Private Relay.
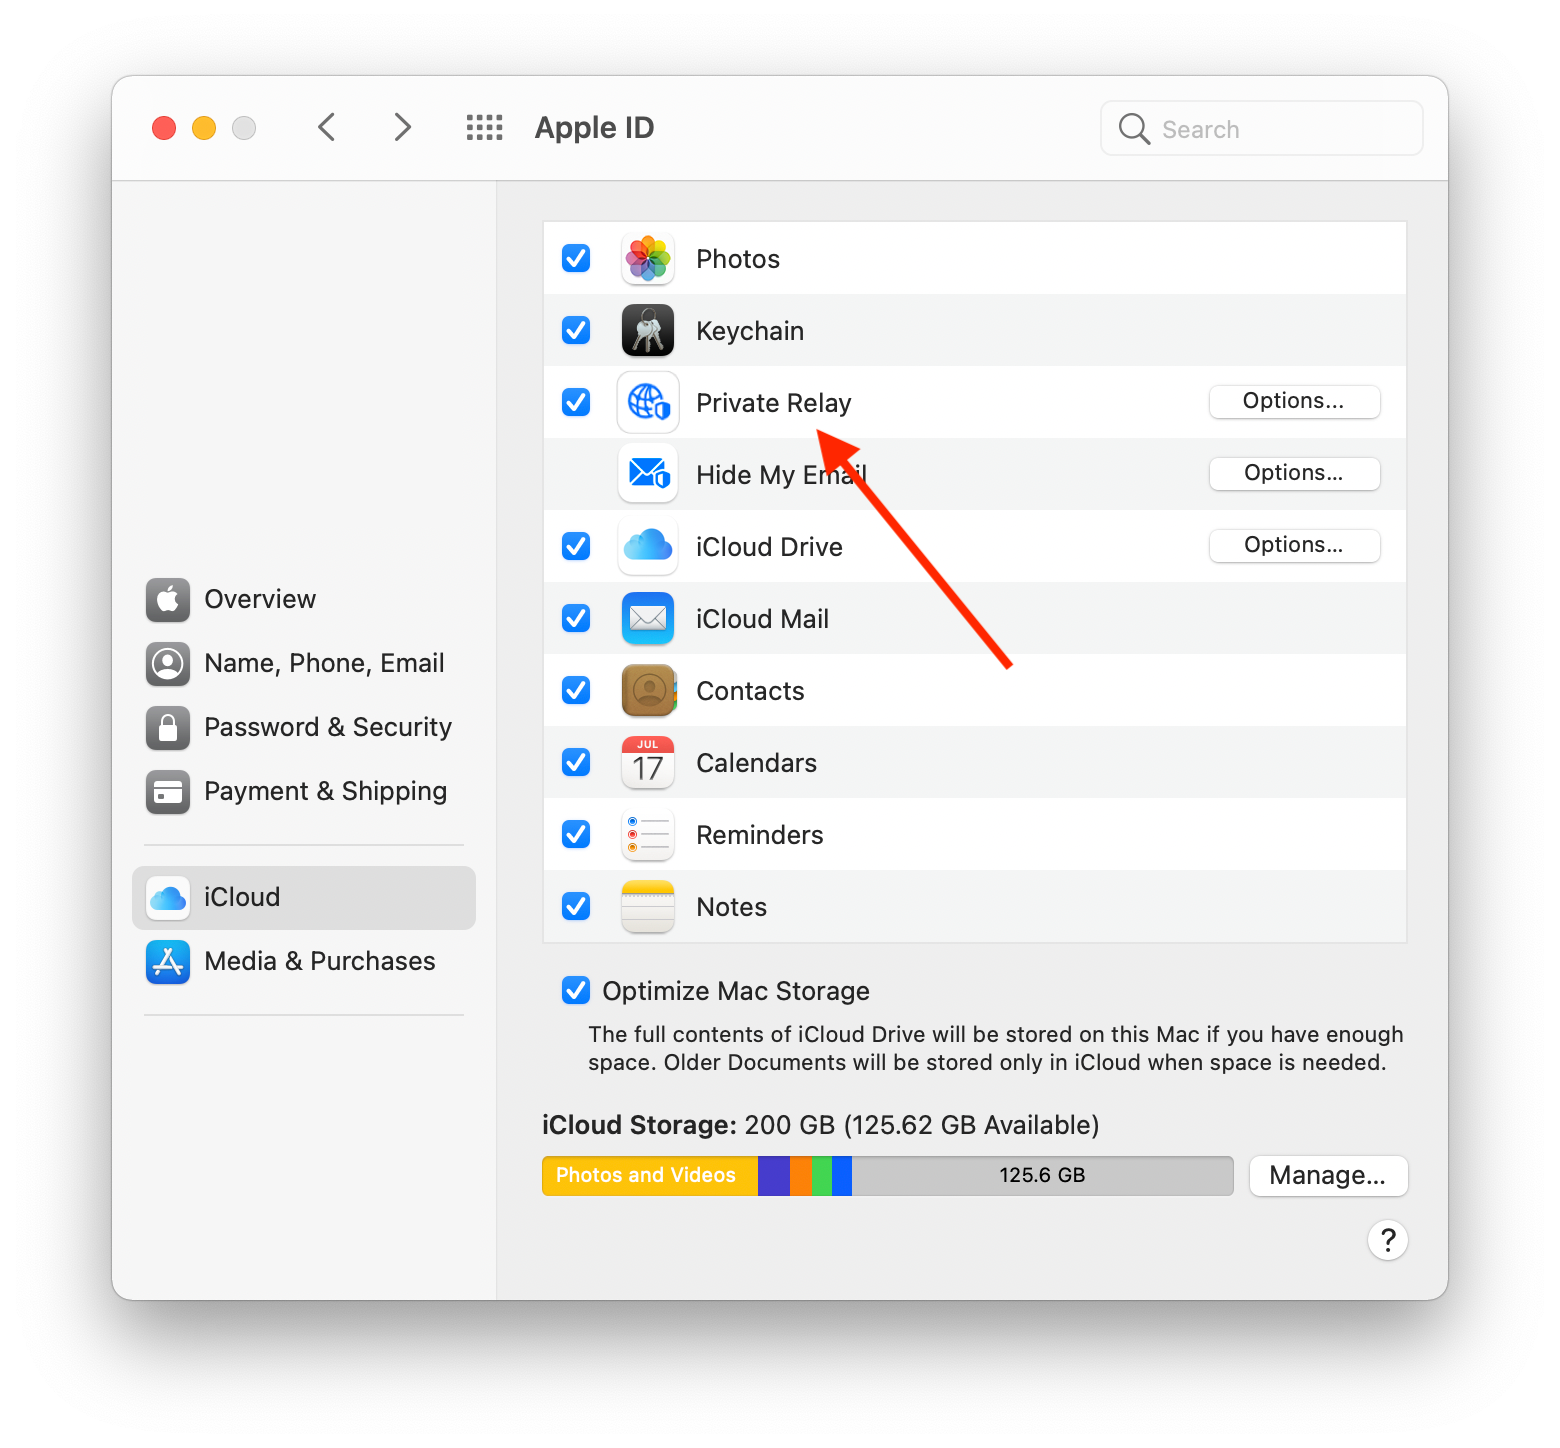
On your Mac:
- Open System Settings and click your name or Apple ID.
- Select iCloud → Private Relay.
- Turn off Private Relay.
- Click Done.
Advanced Tracking and Fingerprinting Protection (Safari, starting from iOS 17)
After the iOS 17 update, Advanced Tracking and Fingerprinting Protection may be enabled in Safari settings, which could potentially have a similar effect to iCloud Private Relay bypassing AdGuard DNS settings.
Here’s how you can disable Advanced Tracking and Fingerprinting Protection:
For iOS 26.1 and later versions:
- Go to Settings.
- Scroll down and select Apps.
- Go to Safari → Advanced.
- Tap Advanced Tracking and Fingerprinting Protection and then Off.
![]()
For iOS versions prior to 26.1:
- Open Settings and scroll down to Safari.
- Tap Advanced.
- Disable Advanced Tracking and Fingerprinting Protection.
![]()
Limit IP Address Tracking on iPhone
When the Limit IP Address Tracking feature is enabled on your iPhone, it can interfere with AdGuard DNS’s ability to filter traffic.
This happens because the feature routes DNS queries from Safari (and other apps that support it) through Apple’s own private relay servers. This prevents AdGuard DNS from receiving your device’s actual IP address and processing DNS requests, resulting in disabled filtering for ads and trackers.
To restore full DNS-based filtering, you will need to disable this feature for the Wi-Fi network you are currently using.
Please follow the steps below:
- Open Settings on your iPhone.
- Tap Wi-Fi.
- Find and tap the name of the Wi-Fi network you are currently connected to.
- On the network’s settings page, toggle off the switch for Limit IP Address Tracking.
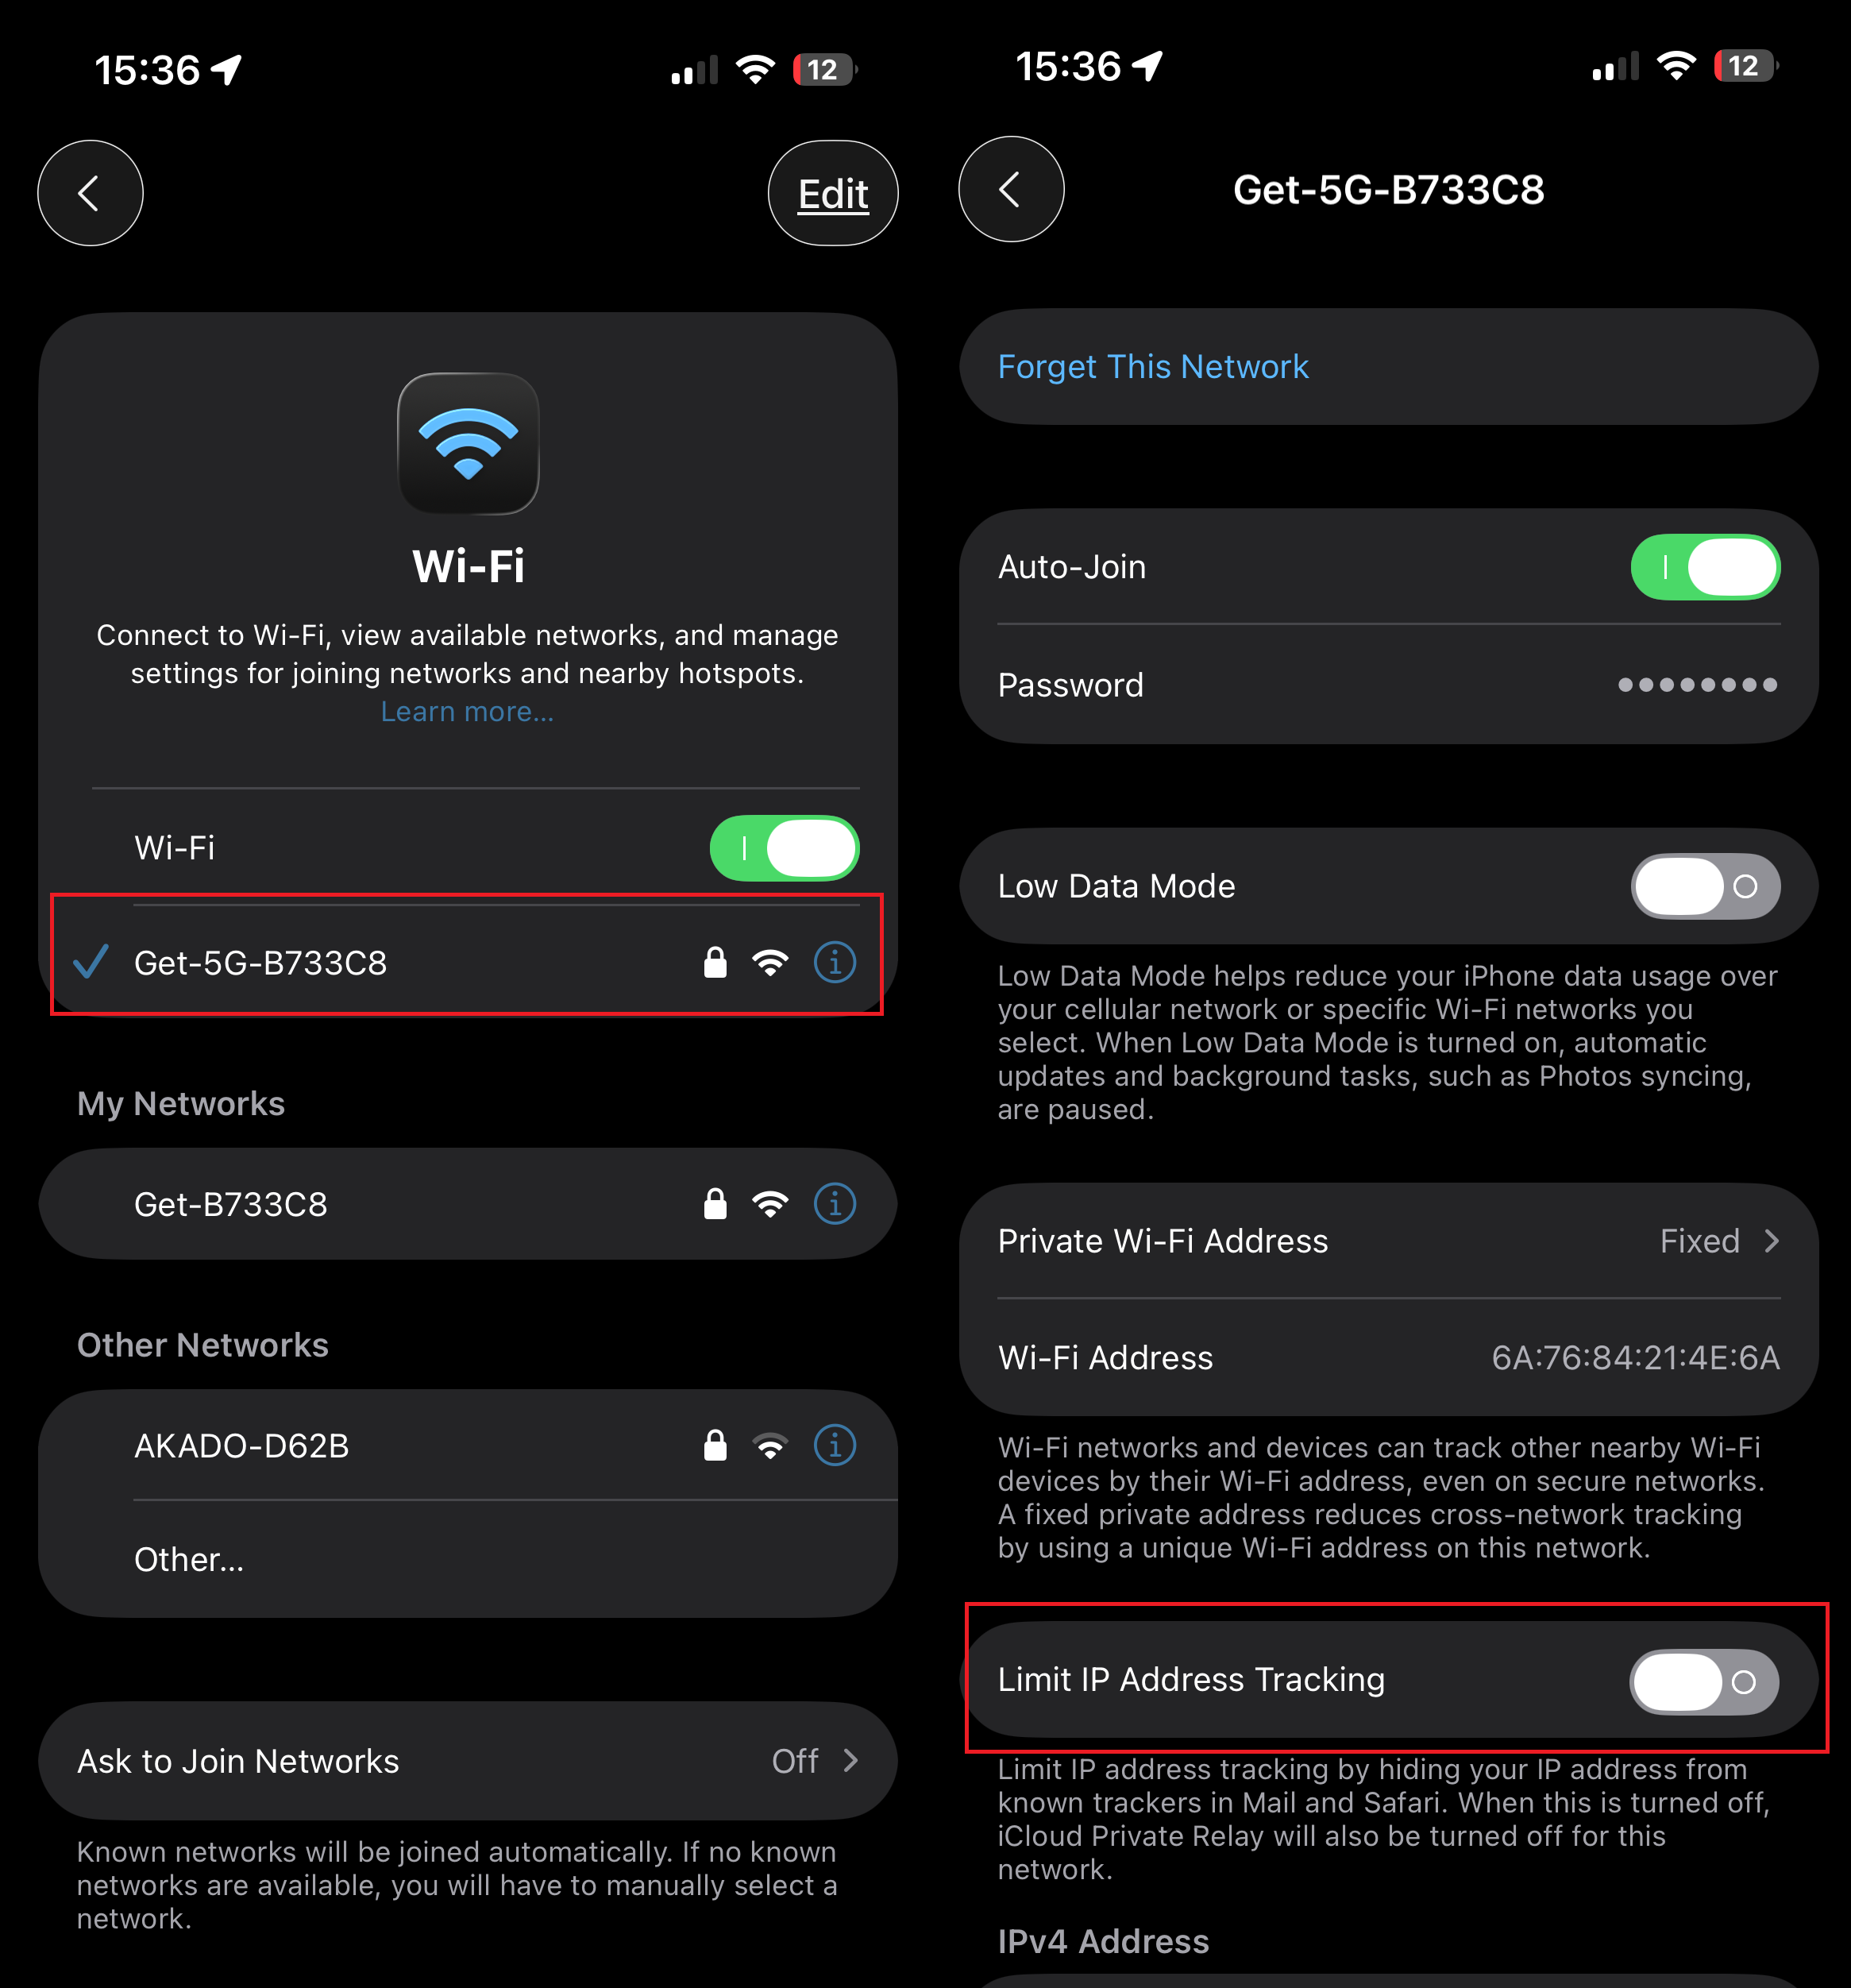
DNS filtering will resume immediately after disabling this setting. Please note that you may need to repeat this process for other Wi-Fi networks you connect to in the future.