Привязанные IP-адреса
Что такое привязанные IP-адреса и почему они полезны
Не все устройства поддерживают зашифрованные DNS-протоколы. В этом случае стоит рассмотреть возможность настройки незашифрованного DNS. Например, вы можете использовать привязанный IP-адрес. Единственным требованием к привязанному IP-адресу является то, что это должен быть резидентный IP.
Резидентный IP-адрес — это IP-адрес, назначенный устройству, подключённому к резидентному интернет-провайдеру. Как правило, он связан с физическим местоположением и выделяется для отдельных домов или квартир. Люди используют резидентные IP-адреса для повседневной онлайн-деятельности, такой как просмотр веб-страниц, отправка почты, использование социальных сетей или стриминг контента.
Иногда резидентный IP-адрес уже может быть задействован, и при попытке подключения к нему, AdGuard DNS предотвратит соединение.
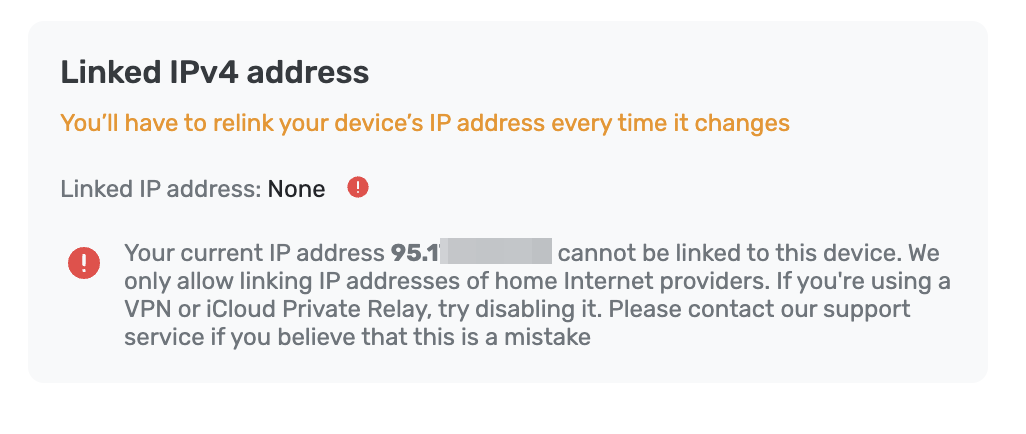
Если это произошло, обратитесь в поддержку по адресу support@adguard-dns.io, и вам помогут с правильными настройками конфигурации.
Как настроить привязанный IP
Следующая инструкция объясняет, как подключиться к устройству через привязанный IP-адрес:
Откройте Панель управления.
Добавьте новое устройство или откройте настройки ранее подключённого устройства.
Перейдите в раздел Использовать адреса DNS-серверов.
Откройте Адреса незашифрованных DNS-серверов и подключите привязанный IP.

Динамический DNS: зачем это нужно
Каждый раз, когда устройство подключается к сети, оно получает новый динамический IP-адрес. Когда устройство отсоединяется, DHCP-сервер может назначить освободившийся IP-адрес другому устройству в сети. Это означает, что динамические IP-адреса меняются часто и непредсказуемо. Следовательно, вам нужно будет обновлять настройки всякий раз, когда перезагружается устройство или меняется сеть.
Чтобы автоматически обновлять привязанный IP-адрес, вы можете использовать DNS. AdGuard DNS будет регулярно проверять IP-адрес вашего домена DDNS и связывать его с вашим сервером.
Динамический DNS (DDNS) — это служба, которая автоматически обновляет записи DNS при каждом изменении вашего IP-адреса. Она преобразует сетевые IP-адреса в легко читаемые доменные имена для удобства. Информация, связывающая имя с IP-адресом, хранится в таблице на DNS-сервере. DDNS обновляет эти записи при любых изменениях IP-адресов.
Таким образом, вам не придётся вручную обновлять привязанный IP-адрес каждый раз, когда он изменяется.
Динамический DNS: как настроить
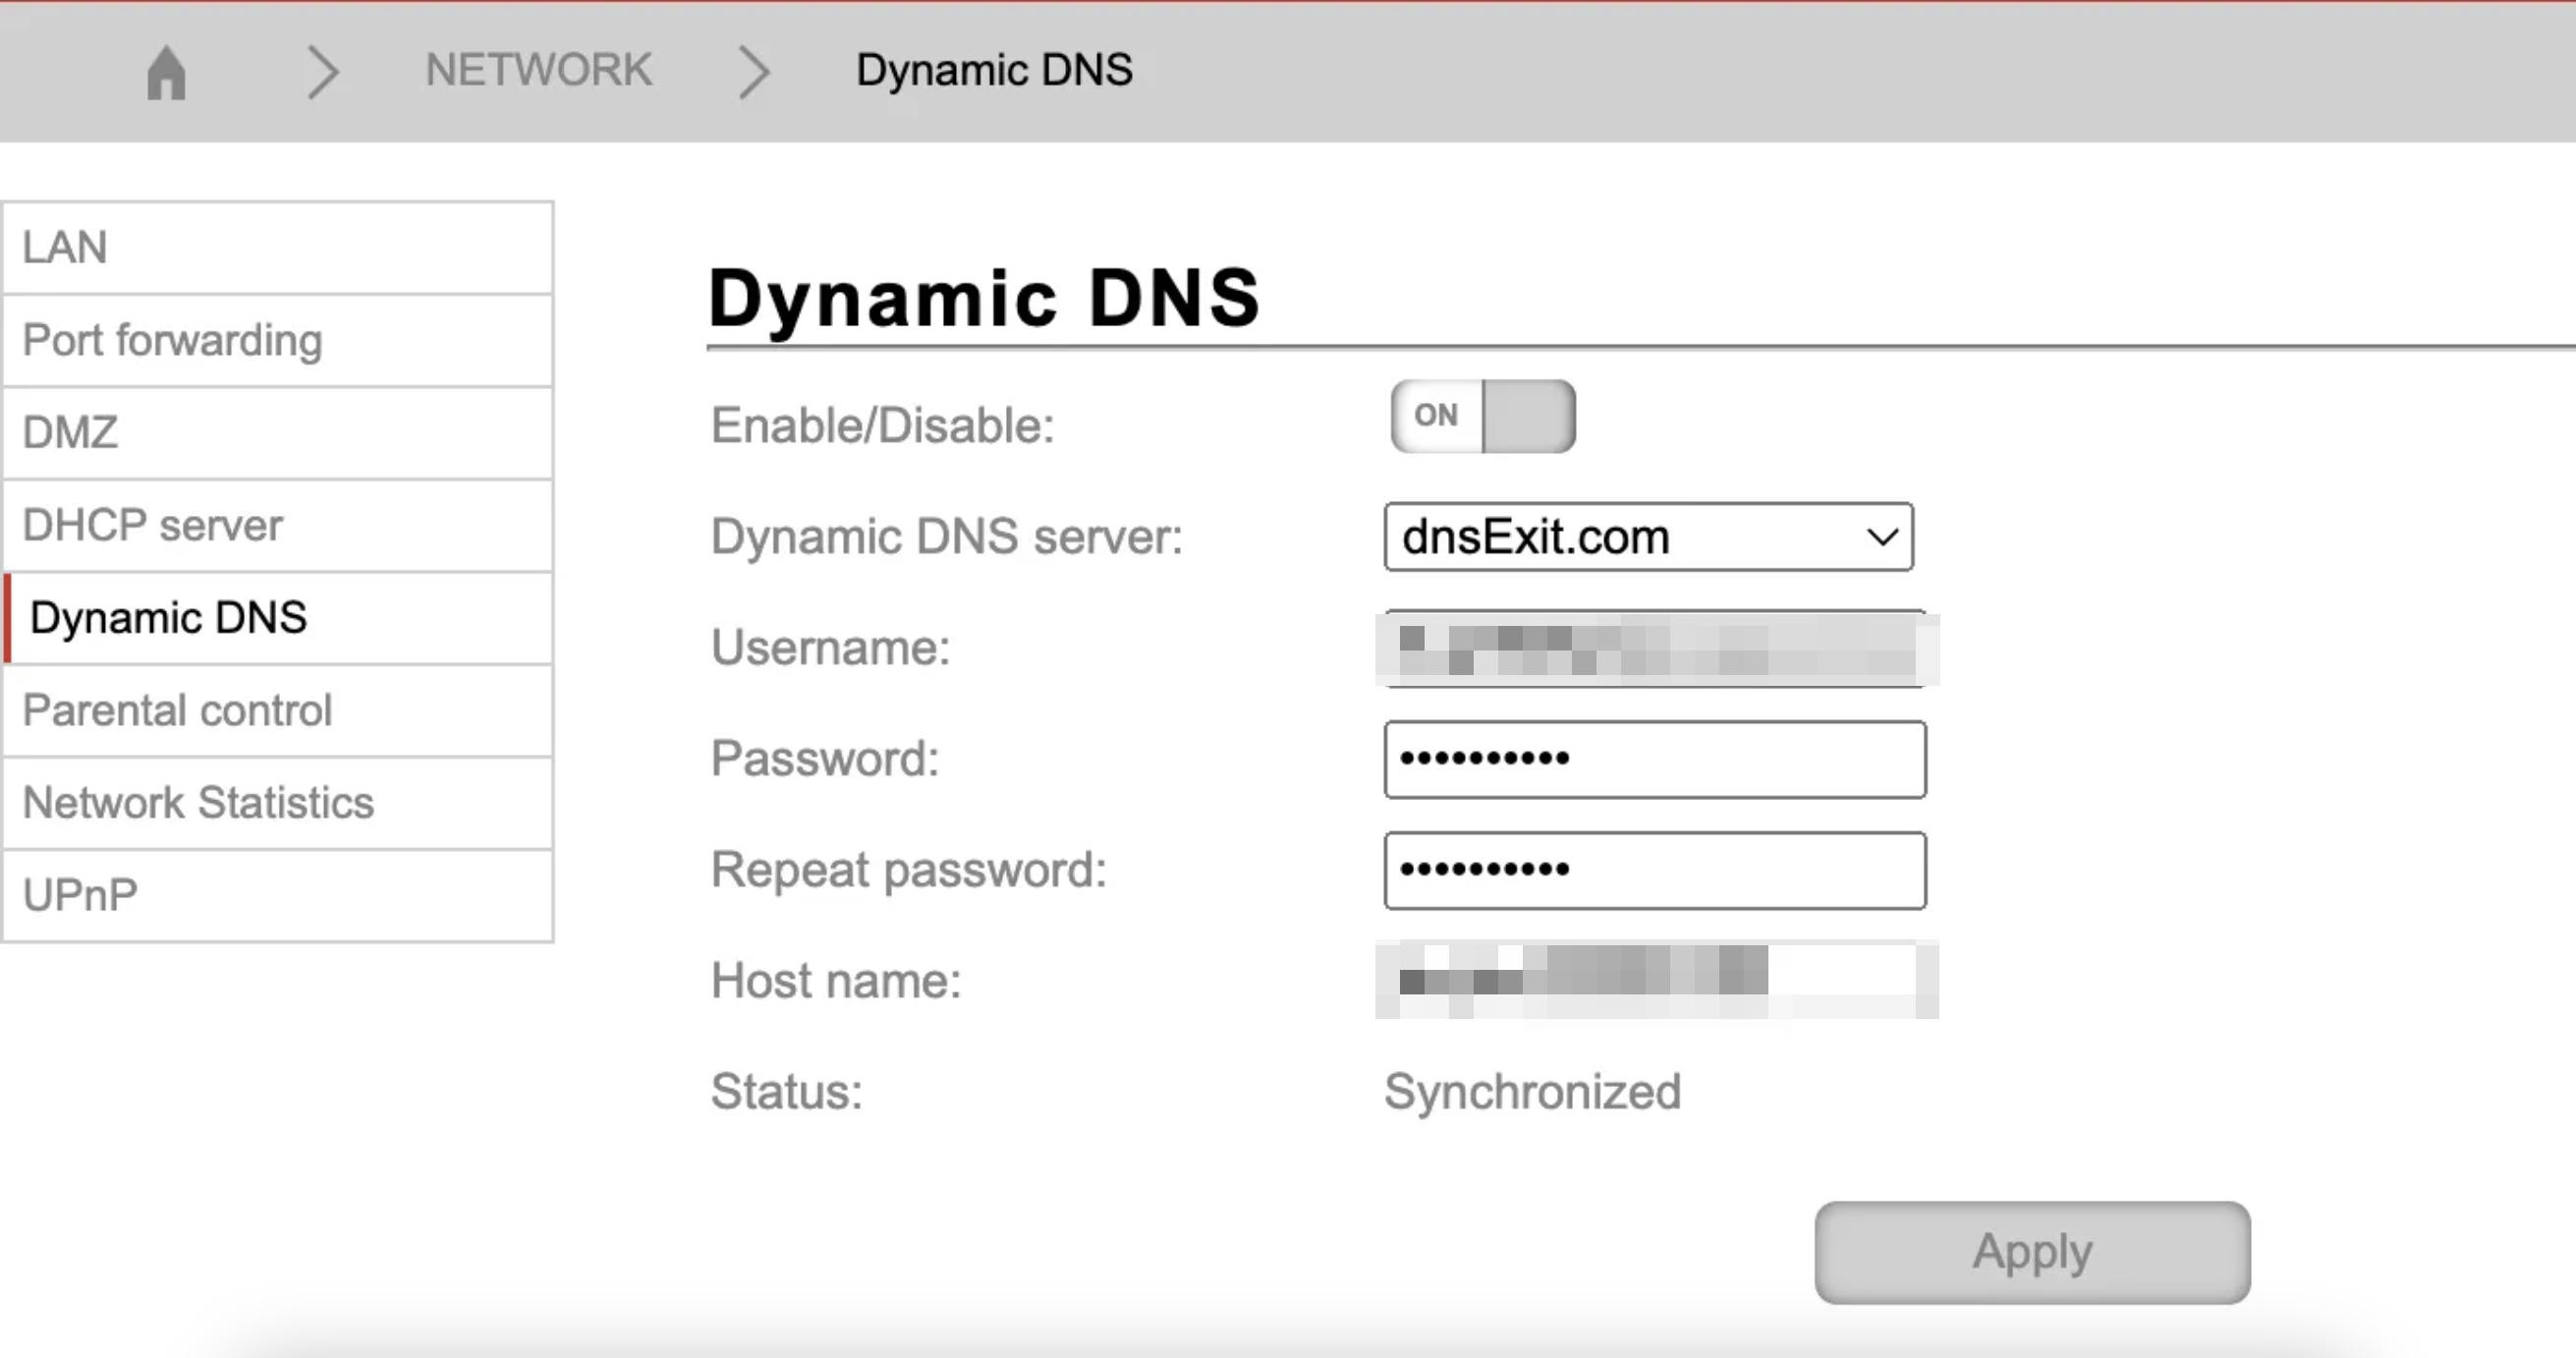
Сначала вам нужно проверить, поддерживает ли ваш роутер DDNS:
- Перейдите в Настройки роутера → Сеть
- Найдите раздел DDNS или Dynamic DNS
- Перейдите в него и убедитесь, что настройки действительно поддерживаются. Это только пример того, как это может выглядеть, настройки могут различаться в зависимости от вашего роутера
Зарегистрируйте домен через популярный сервис, такой как Dyn, NO-IP или любой другой предпочитаемый вами поставщик DDNS.
Введите домен в настройках роутера и синхронизируйте конфигурации.
Откройте настройки Привязанного IP-адреса, затем перейдите в Расширенные настройки и нажмите Настроить Dyn.
Введите домен, который вы зарегистрировали ранее, и нажмите Настроить Dyn.
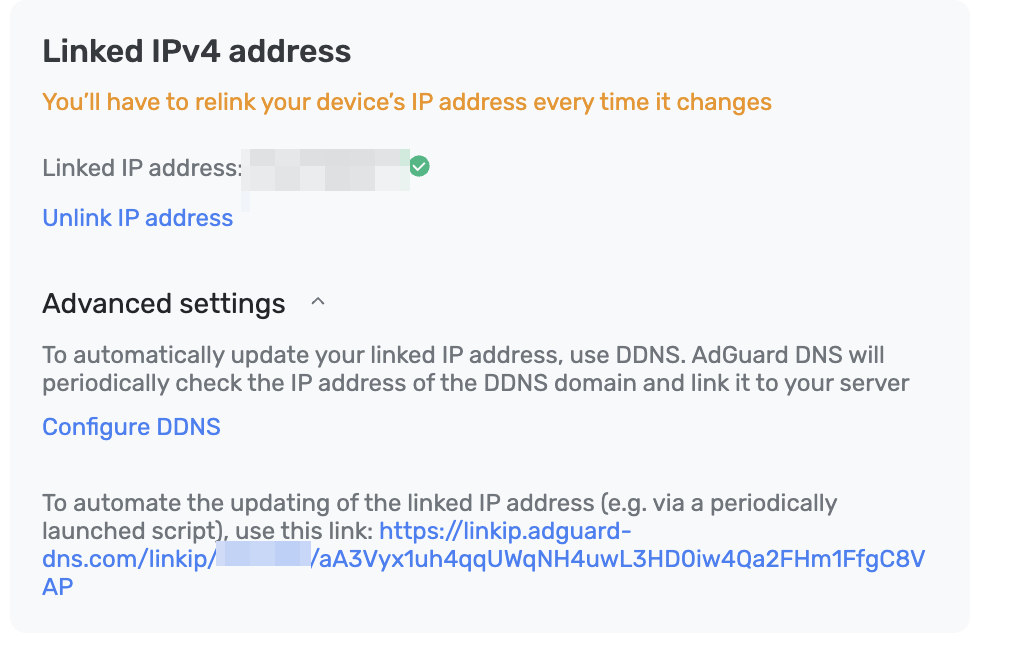
Готово, вы успешно настроили DDNS!
Автоматизация обновления привязанного IP-адреса через скрипт
На Windows
Самый простой способ — использовать Планировщик задач:
- Создайте задачу:
- Откройте Планировщик задач.
- Создайте новую задачу.
- Установите триггер на запуск каждые 5 минут.
- Выберите Запуск программы в качестве действия.
- Выберите программу:
- В поле Программа или скрипт введите
powershell - В поле Добавить аргументы введите:
Command "Invoke-WebRequest -Uri 'https://linkip.adguard-dns.com/linkip/{ServerID}/{UniqueKey}'"
- В поле Программа или скрипт введите
- Сохраните задачу.
На macOS и Linux
На macOS и Linux самый простой способ — использовать cron:
- Откройте crontab:
- В терминале выполните
crontab -e.
- В терминале выполните
- Добавьте задачу:
- Добавьте следующую строку:
/5 * * * * curl https://linkip.adguard-dns.com/linkip/{ServerID}/{UniqueKey} - Эта задача будет выполняться каждые 5 минут
- Добавьте следующую строку:
- Сохраните crontab.
- Убедитесь, что на macOS и Linux установлен
curl. - Не забудьте скопировать адрес из настроек и заменить значения
ServerIDиUniqueKey. - Если требуется более сложная логика или обработка результатов запросов, рассмотрите возможность использования скриптов (например, Bash, Python) в сочетании с планировщиком задач или cron.