Android
Android デバイスを AdGuard DNS に接続するには、まずはデバイスを「ダッシュボード」に追加します:
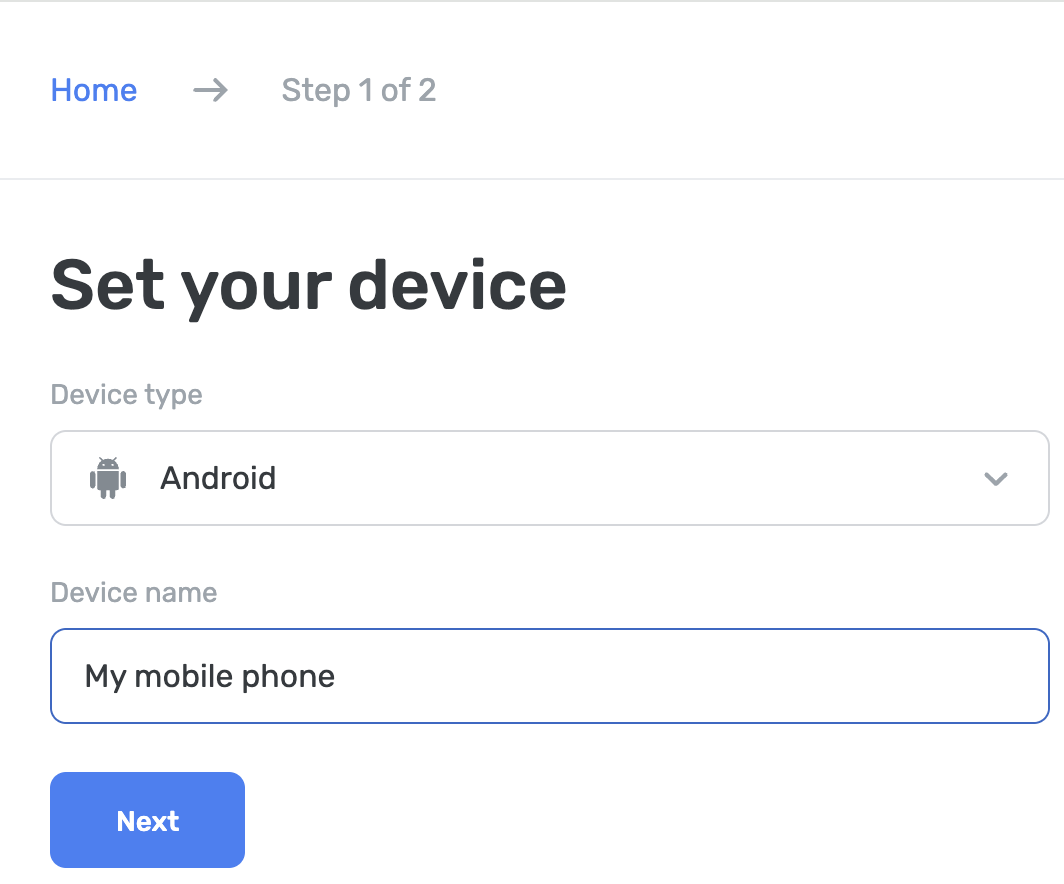
- ダッシュボードに移動し、「新しいデバイスを接続」をクリックします。
- 「デバイスタイプ」というドロップダウンメニューで「Android」を選択します。
- デバイスに名前を付けます。
AdGuard DNS アプリを使う
AdGuard DNSアプリは基本的なDNSレベル保護を目的としており、広告、トラッカー、そして悪意あるウェブサイトをブロックします。 AdGuard 広告ブロッカーまたは AdGuard VPN が提供するすべての機能が必要でない方には、このアプリが最適な選択肢かもしれません。
デバイスの設定方法:
AdGuard DNS アプリを Google Play からダウンロードします。
AdGuard DNS ダッシュボード(adguard-dns.io/dashboard)にアクセスします。
「ダッシュボード」タブの「ホーム」画面で「デバイスを接続する」をクリックします。
デバイスタイプを選択し名前を付けて、「次へ」をクリックします。
「AdGuardアプリを使って接続」セクションを開きます。
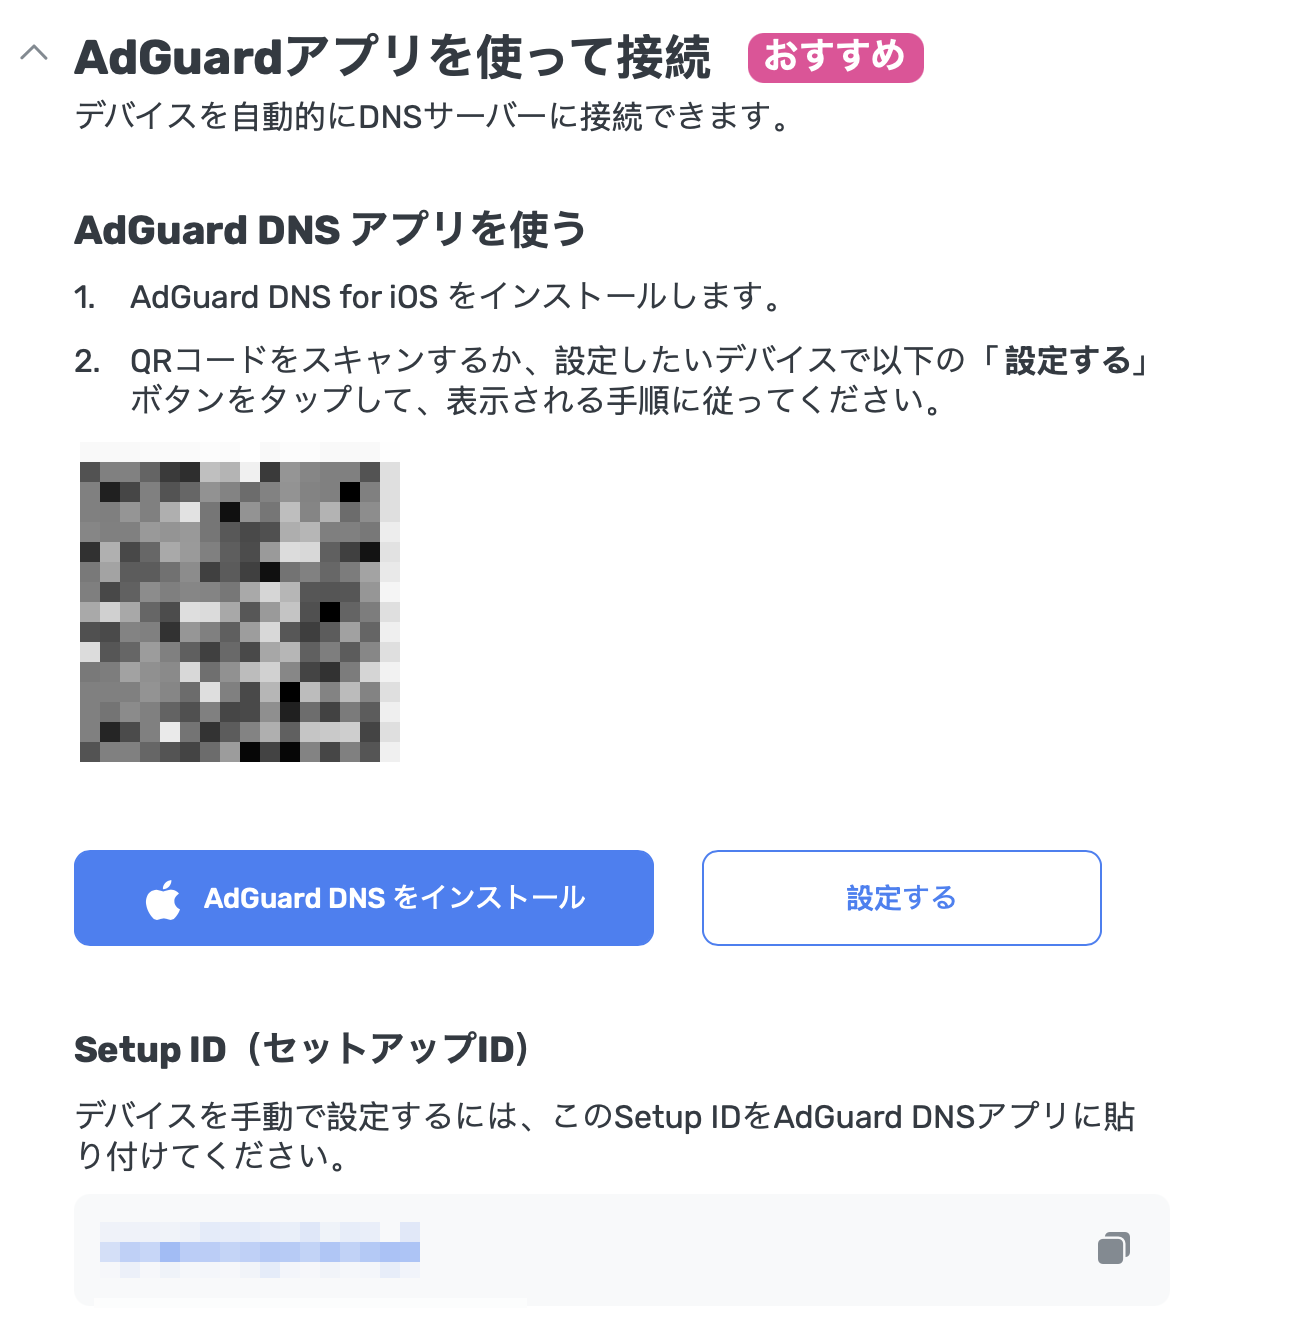
「AdGuard DNS アプリを使う」セクションで、以下の設定方法のいずれかを選択します:
DNSに接続したいデバイス上で操作する場合は「設定する」をクリック
DNSに接続したいデバイスでQRコードをスキャン
「Setup ID」をコピーし、保護したいデバイス上のアプリに直接貼り付ける:

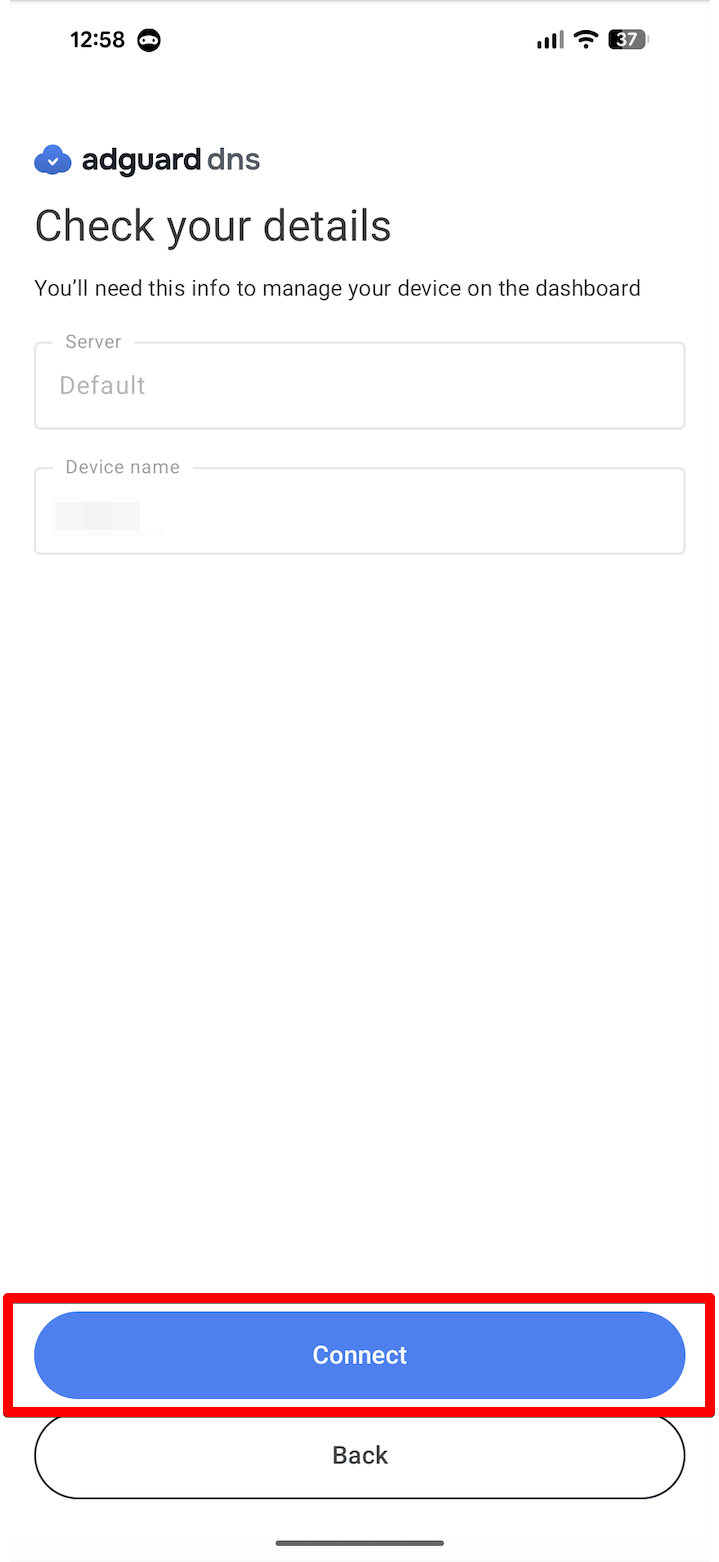
「続行する」 → 「接続する」をタップします。
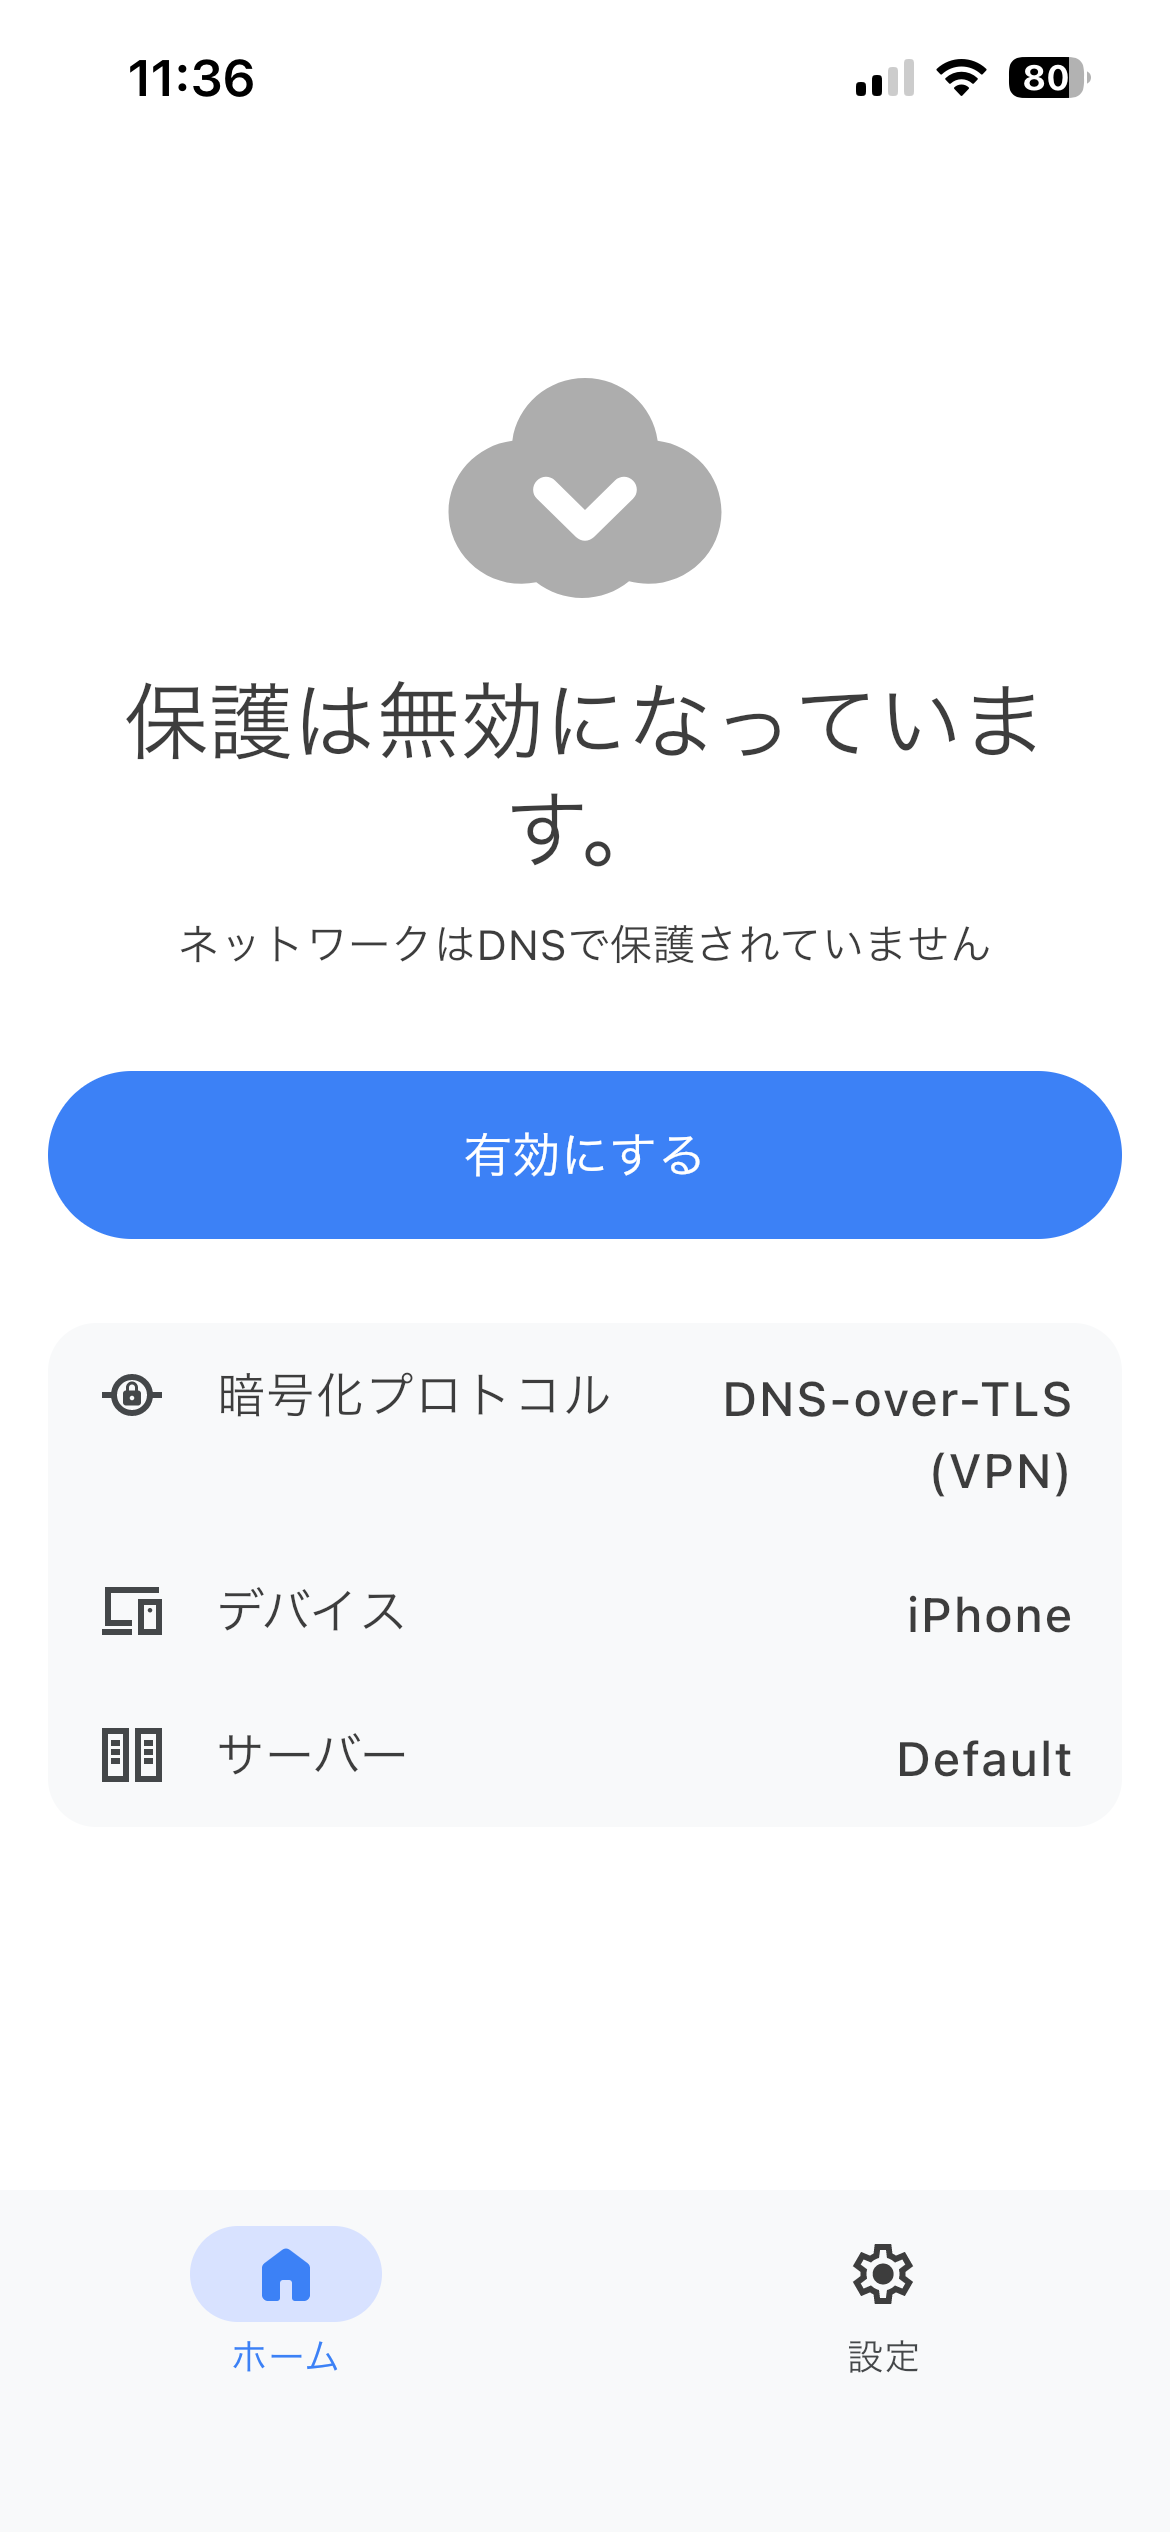
VPNベースのプロトコルを使用する場合、保護を有効にする前にVPNプロファイルの作成を許可する必要があります。 これを行うには、アプリのホームページで「有効にする」をクリックし、アプリ内の指示に従ってください。
完了です! これで、お使いのデバイスは正常に AdGuard DNS に接続されました。 保護機能を開始したいときは、毎回「有効にする」をタップしてください。
AdGuard 広告ブロッカーアプリを使用する(有料オプション)
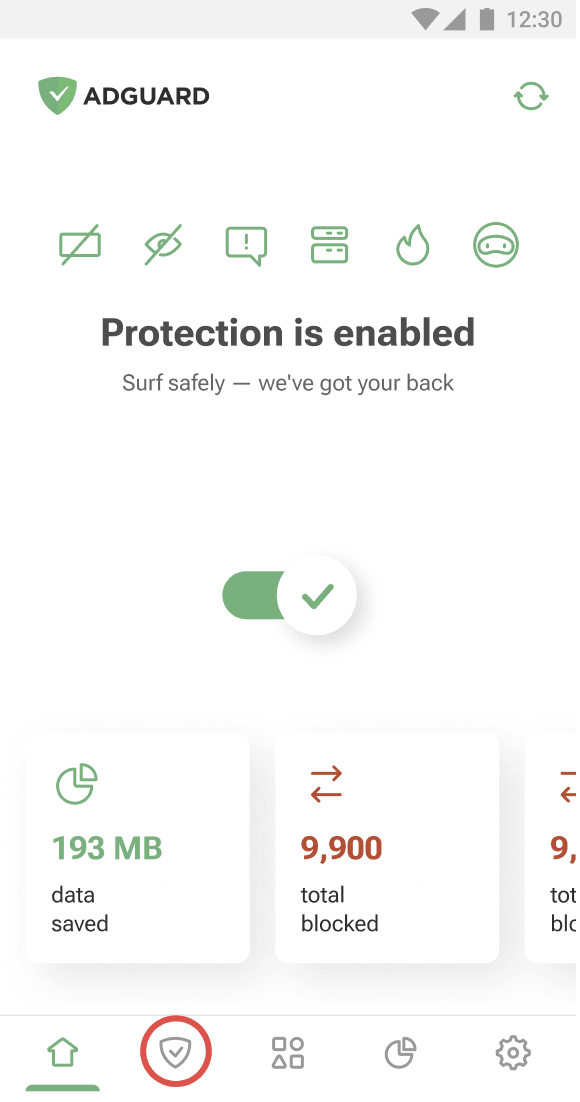
AdGuardアプリでは、暗号化されたDNSを使用できるため、Androidデバイスで AdGuard DNS を設定するのに最適です。 様々な暗号化プロトコルから選択することができます。 DNSフィルタリングに加えて、システム全体で機能する優れた広告ブロッカーも手に入っちゃいます。
- AdGuard DNS に接続したいデバイスにAdGuardアプリをインストールします。
- アプリを開きます。
- 画面下部メニューバーの左から2番目にある盾のアイコンをタップします。
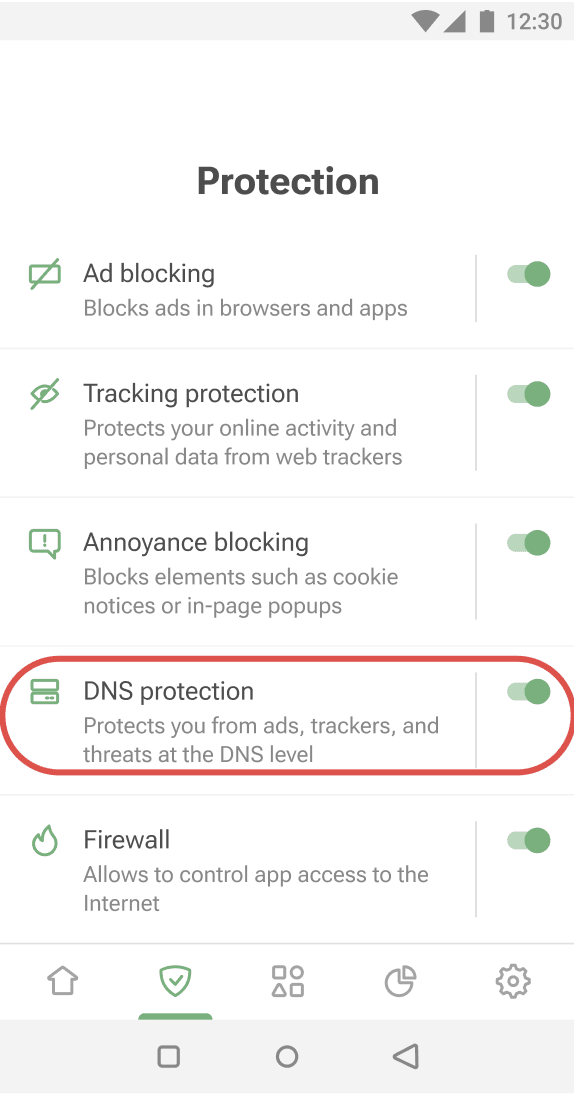
- 「DNS通信を保護」をタップします。
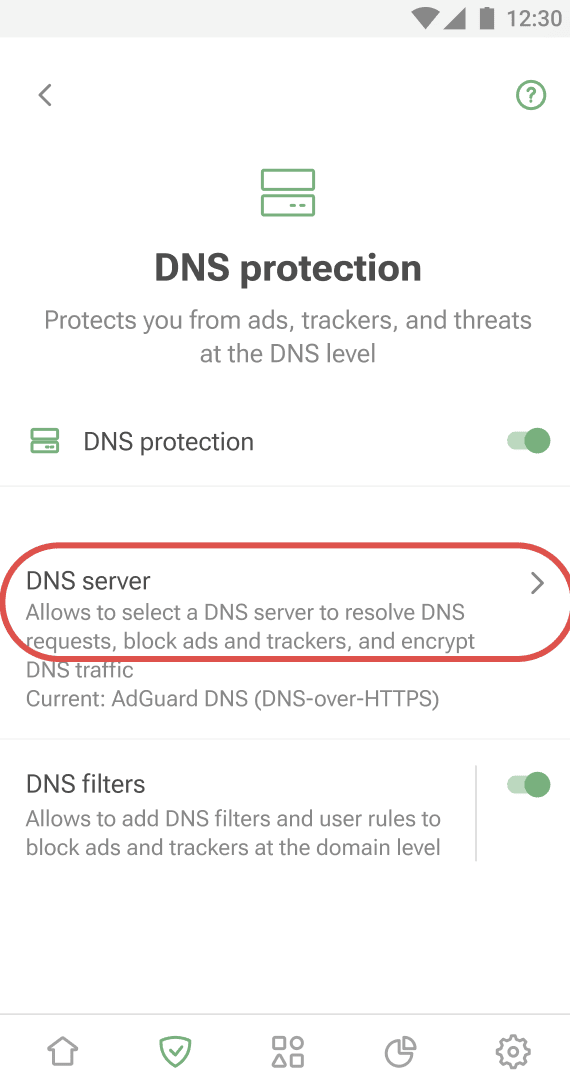
- 「DNSサーバー」を選択します。
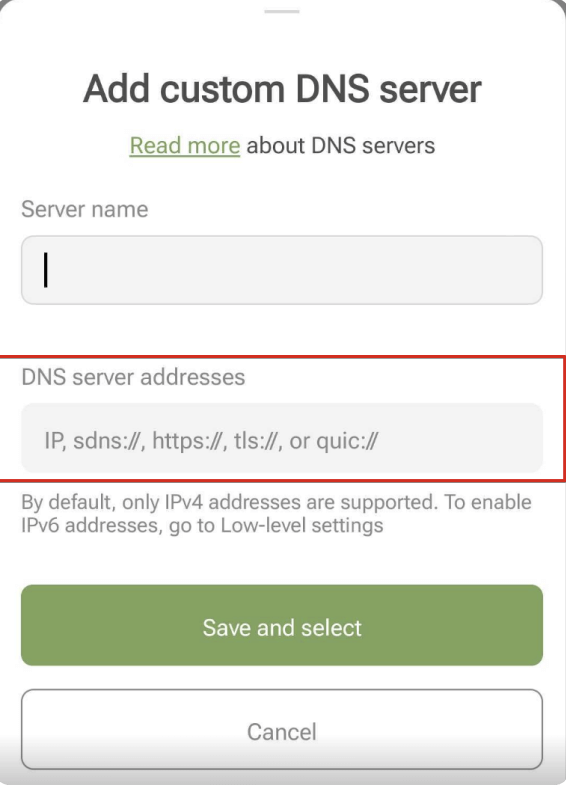
- 「カスタムサーバー」までスクロールダウンし、「+ DNSサーバーを追加する」をタップします。
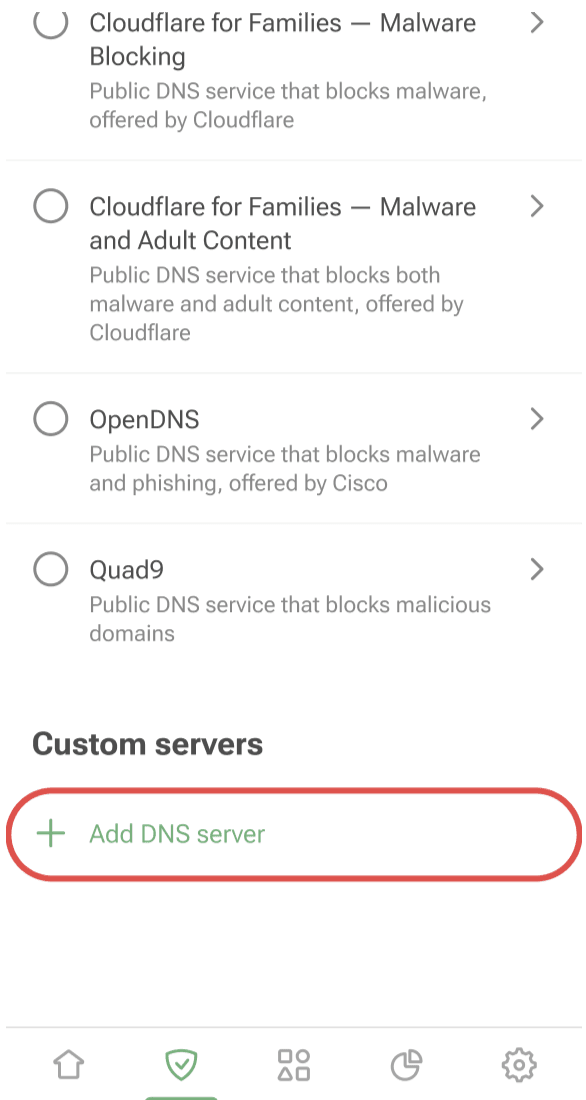
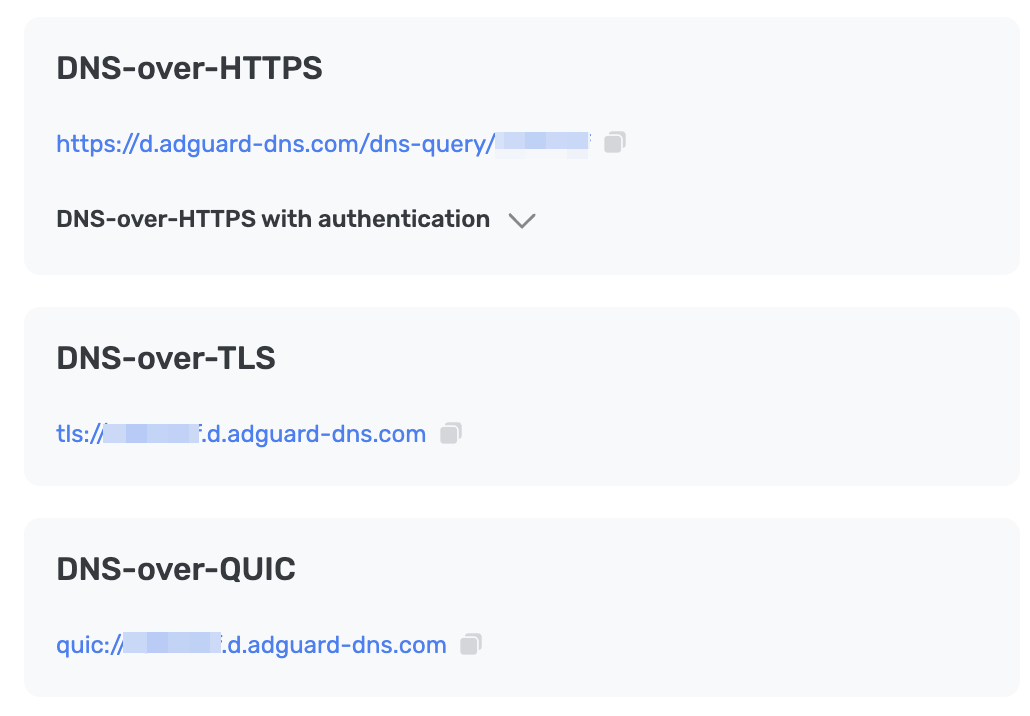
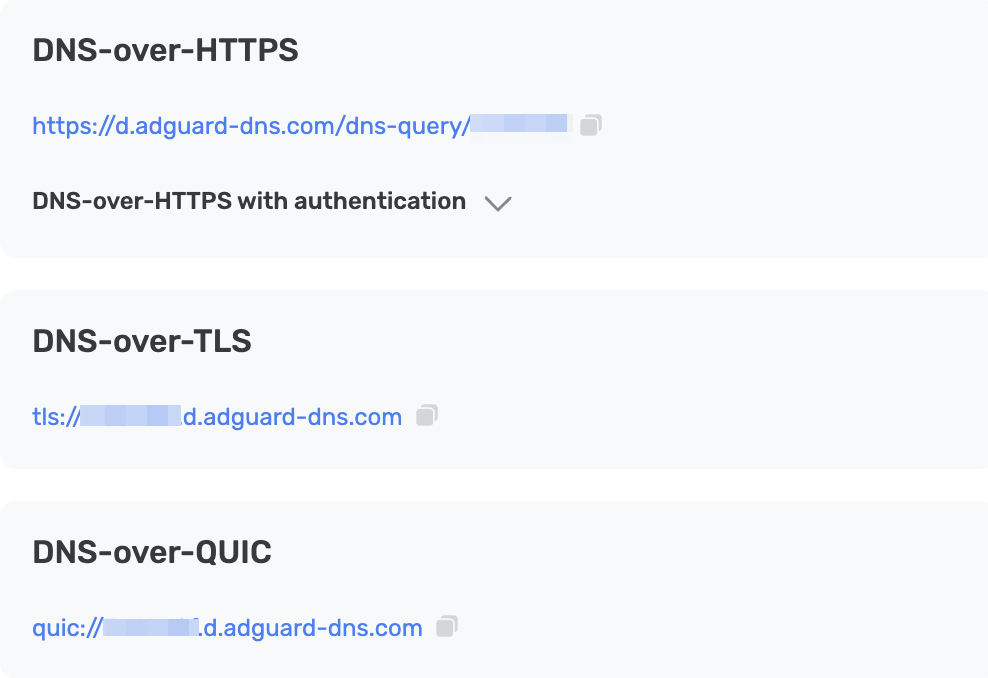
- 以下からDNSアドレスを一つ選んでコピーして、アプリ内の「サーバーアドレス」欄に貼り付けます。 どれを使用すべきかわからない場合は、「DNS-over-HTTPS」アドレスを選択してください。
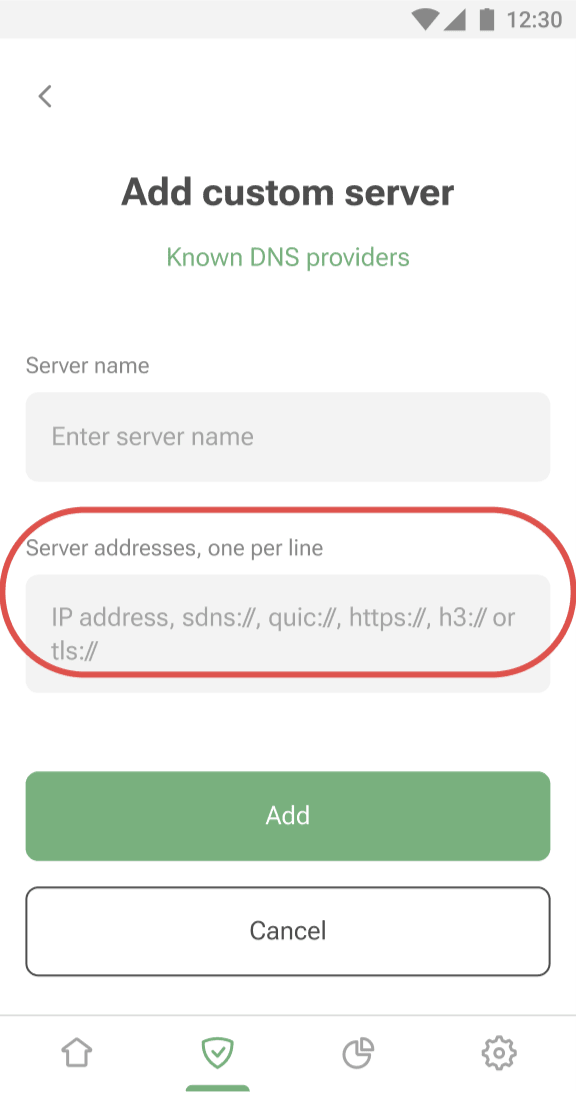
- 「追加」をタップします。
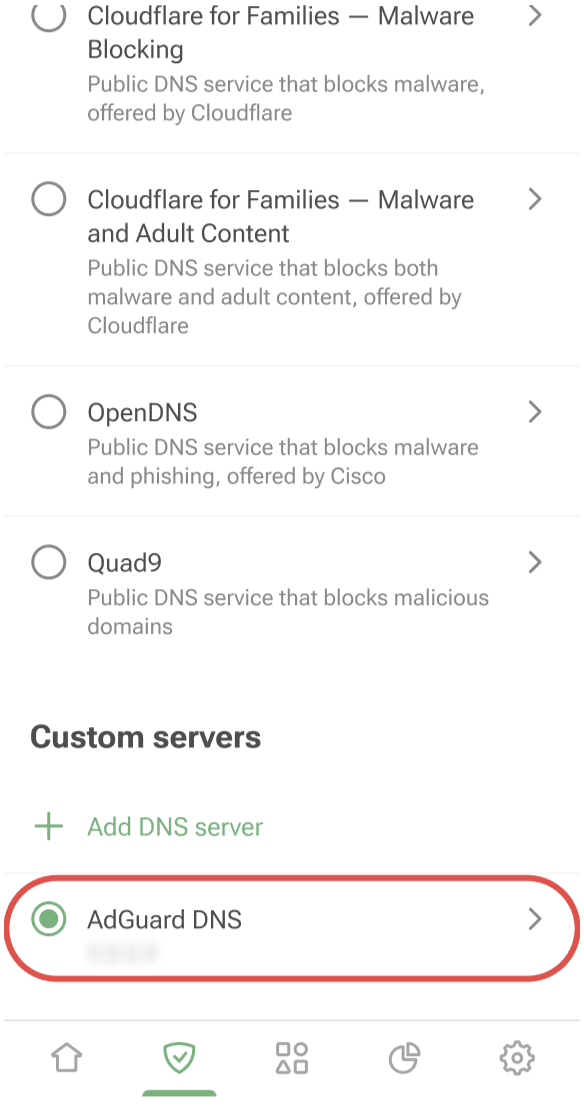
- 追加したDNSサーバーは、「カスタムサーバー」リストの一番下に現れます。 サーバーを選択するには、その名前やその隣にあるラジオボタンをタップします。
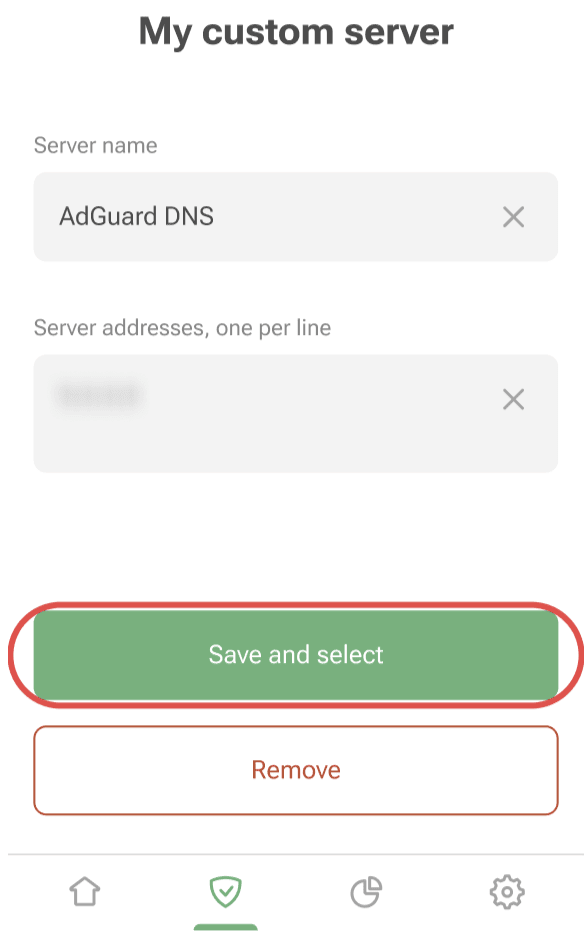
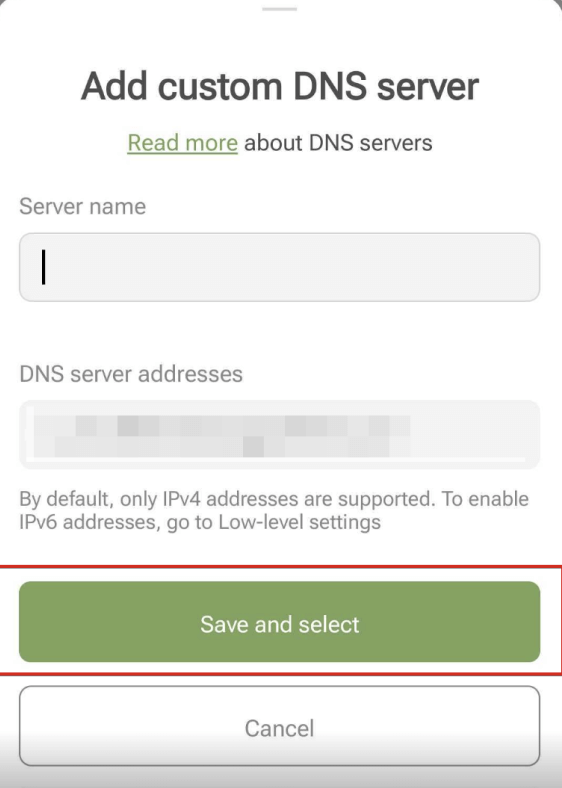
- 「保存して選択する」をタップします。
完了です! これで、お使いのデバイスは正常に AdGuard DNS に接続されました。
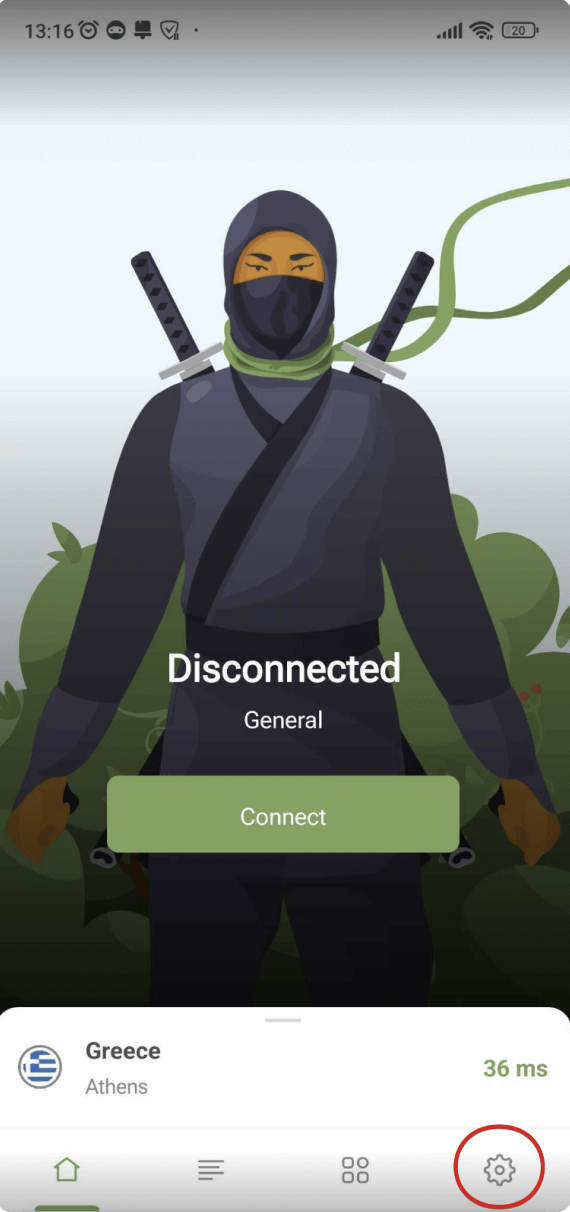
AdGuard VPN を使用する
VPNサービスの中には、暗号化DNSをサポートしていないものもあります。 しかし、AdGuard VPN は対応しているので、VPNとプライベートDNSの両方が必要な場合、AdGuard VPN がベストチョイスになります。
- AdGuard DNS に接続したいデバイスに AdGuard VPN アプリをインストールします。
- アプリを開きます。
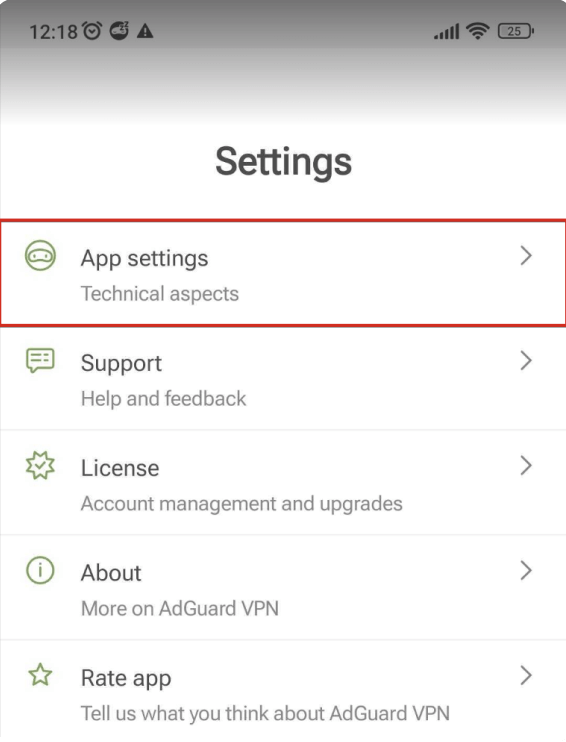
- 画面下部のメニューバーで、設定⚙アイコンをタップします。
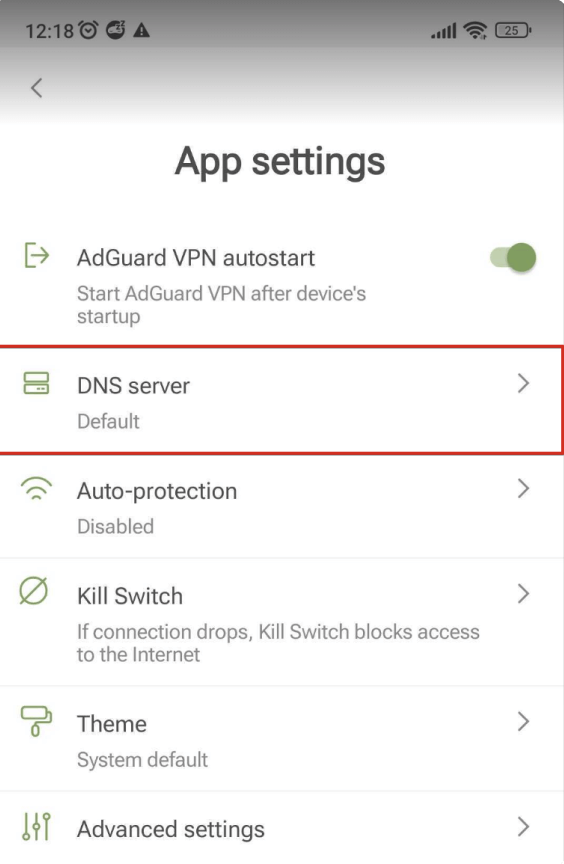
- 「一般設定」を開きます。
- 「DNSサーバー」を選択します。
- 下にスクロールダウンして、「+ カスタムDNSサーバーを追加する」をクリックします。
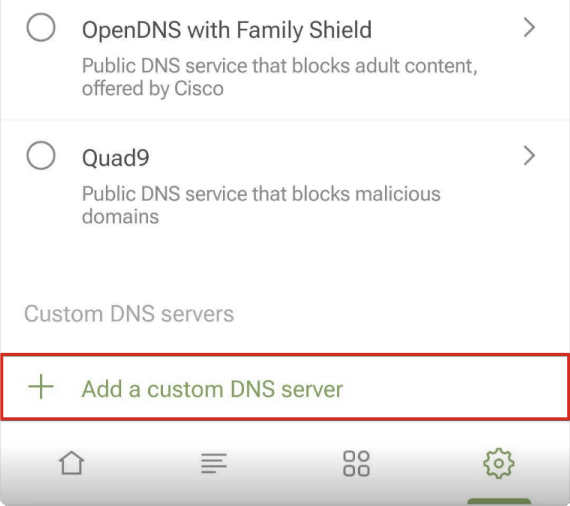
- 以下からDNSアドレスを一つ選んでコピーして、アプリ内の「サーバーアドレス」欄に貼り付けます。 どれを使用すべきかわからない場合は、「DNS-over-HTTPS」アドレスを選択してください。
- 「保存して選択する」をタップします。
- 追加したDNSサーバーは、「カスタムDNSサーバー」リストの一番下に現れます。
完了です! これで、お使いのデバイスは正常に AdGuard DNS に接続されました。
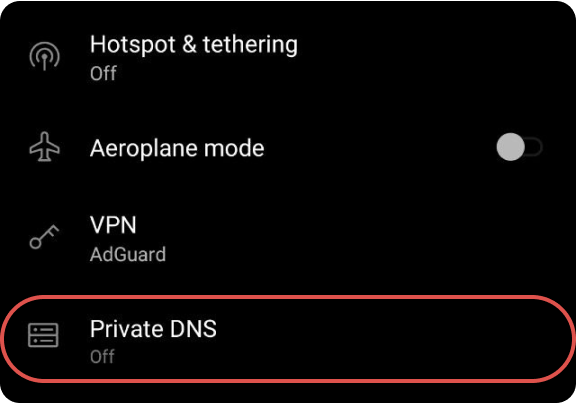
プライベート DNS を手動で設定する
デバイスの設定でDNSサーバーを手動で設定することもできます。 ※Android デバイスは DNS-over-TLS プロトコルのみをサポートしていることに注意してください。
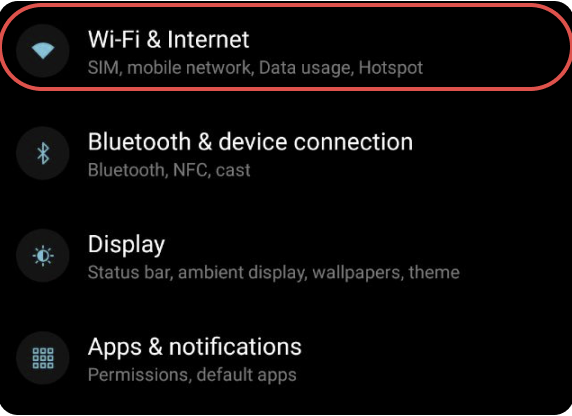
- 端末の「設定」→「ネットワークとインターネット」(OSバージョン・端末によっては、「Wi-Fiとインターネット」や「接続」など)を開きます。
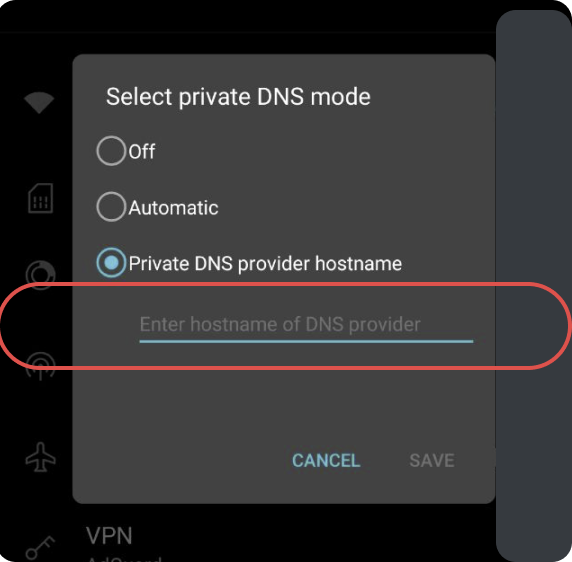
- (環境によっては「詳細設定」を押してから)「プライベート DNS」をタップします。
- 「プライベート DNS プロバイダのホスト名」というオプションを選択し、あなたのパーソナルDNSサーバーのアドレスを入力します:
{Your_Device_ID}.d.adguard-dns.com - 「保存」をタップします。
 完了です! これで、お使いのデバイスは正常に AdGuard DNS に接続されました。
プレーンDNSを構成する
DNS設定に余分なソフトウェアを使いたくない場合は、暗号化されていないDNSを設定することができます。 リンクされた IP または 専用 IP を使用するという次の2つの選択肢があります: